
OnlyTG Echo provides the function to Publish Group Post via your bot. You can configure text/media/button for your post. Additional, you can set Loop Posts in your group.
Video Tutorial
New Post
step 1
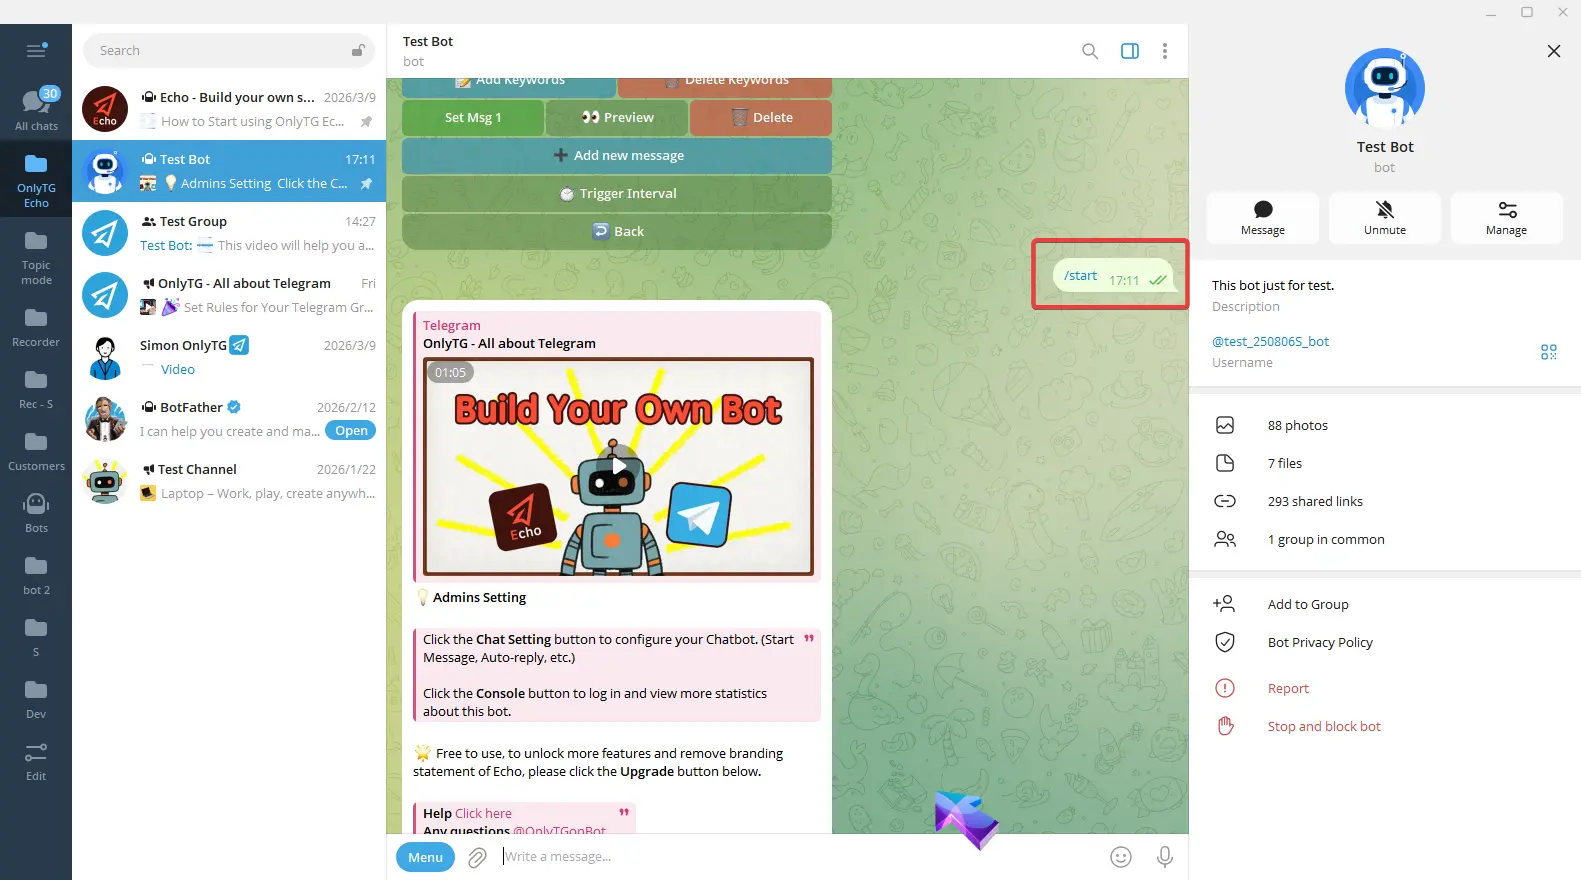
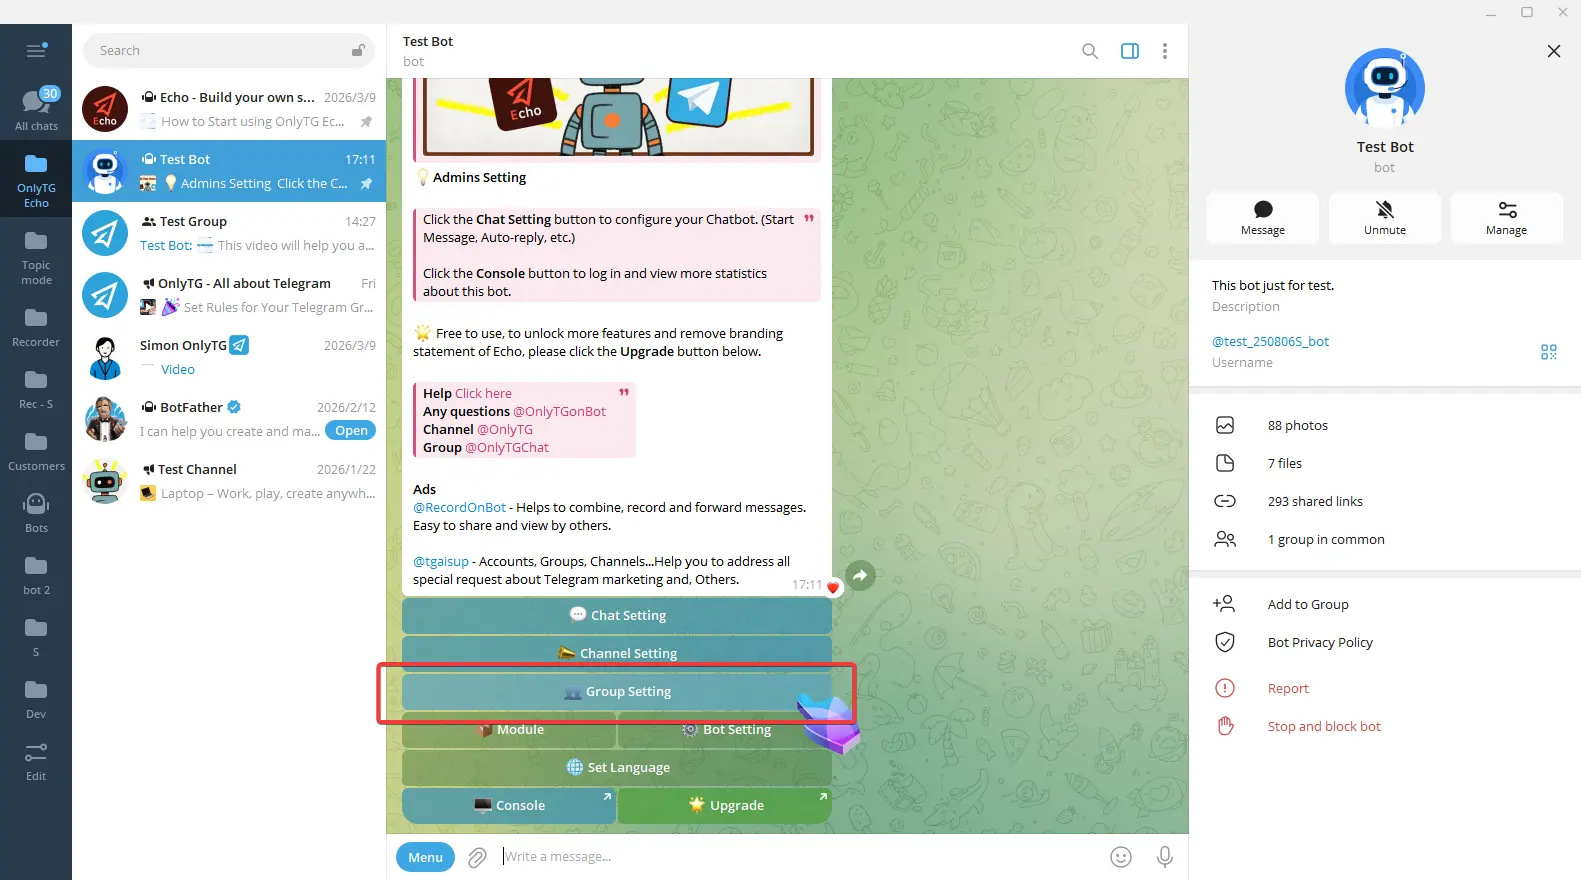
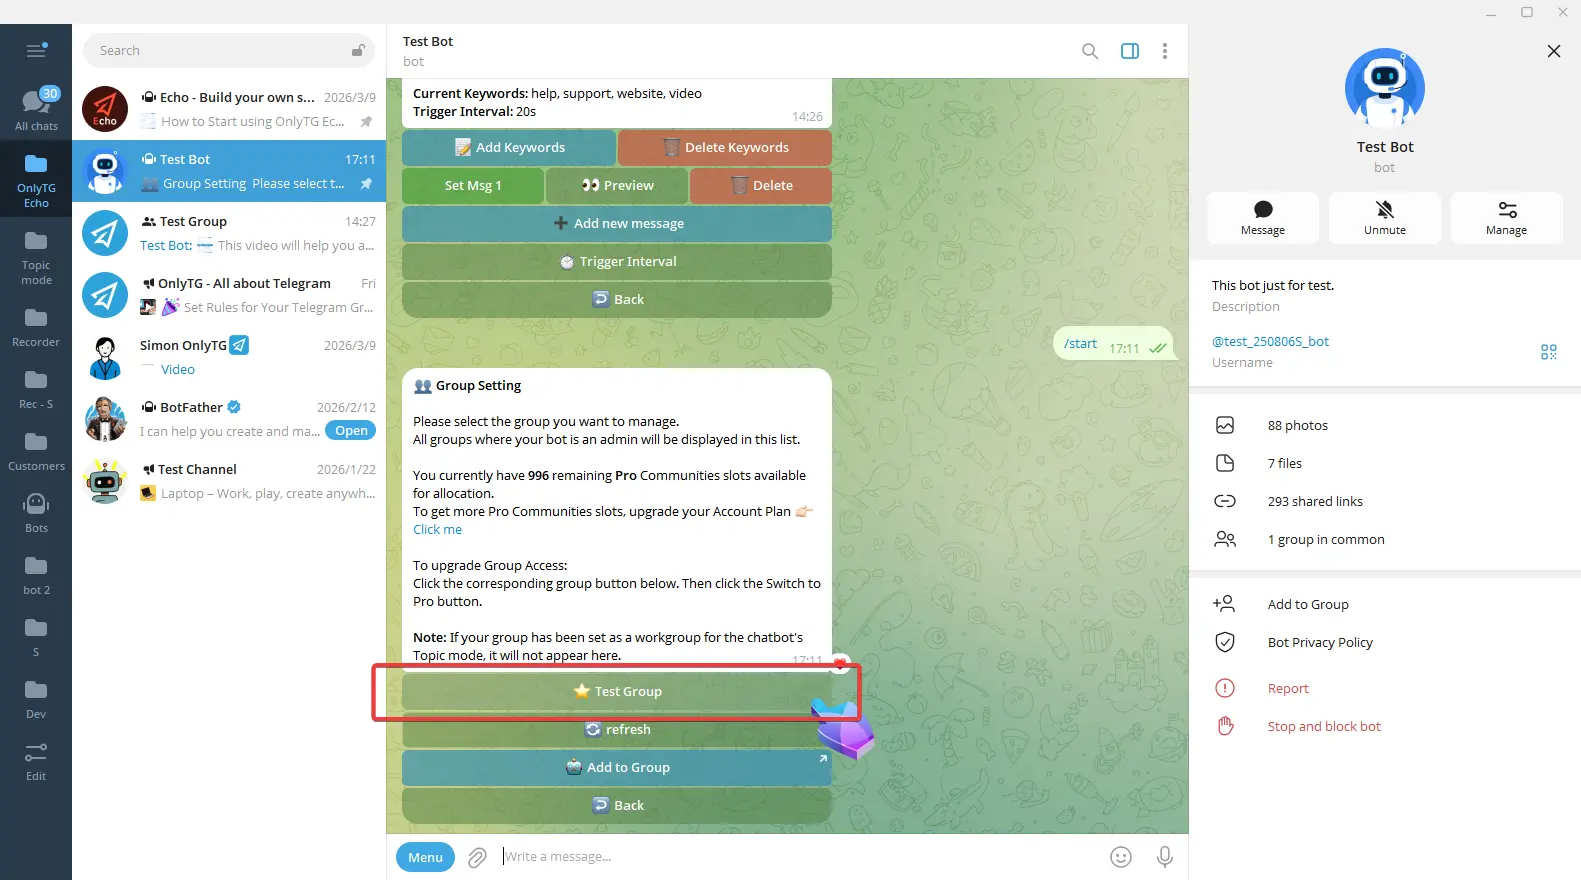
Send /start to your Bot, select Group Setting, then choose your Group. (See previous tutorials for how to add a Group)
step 2
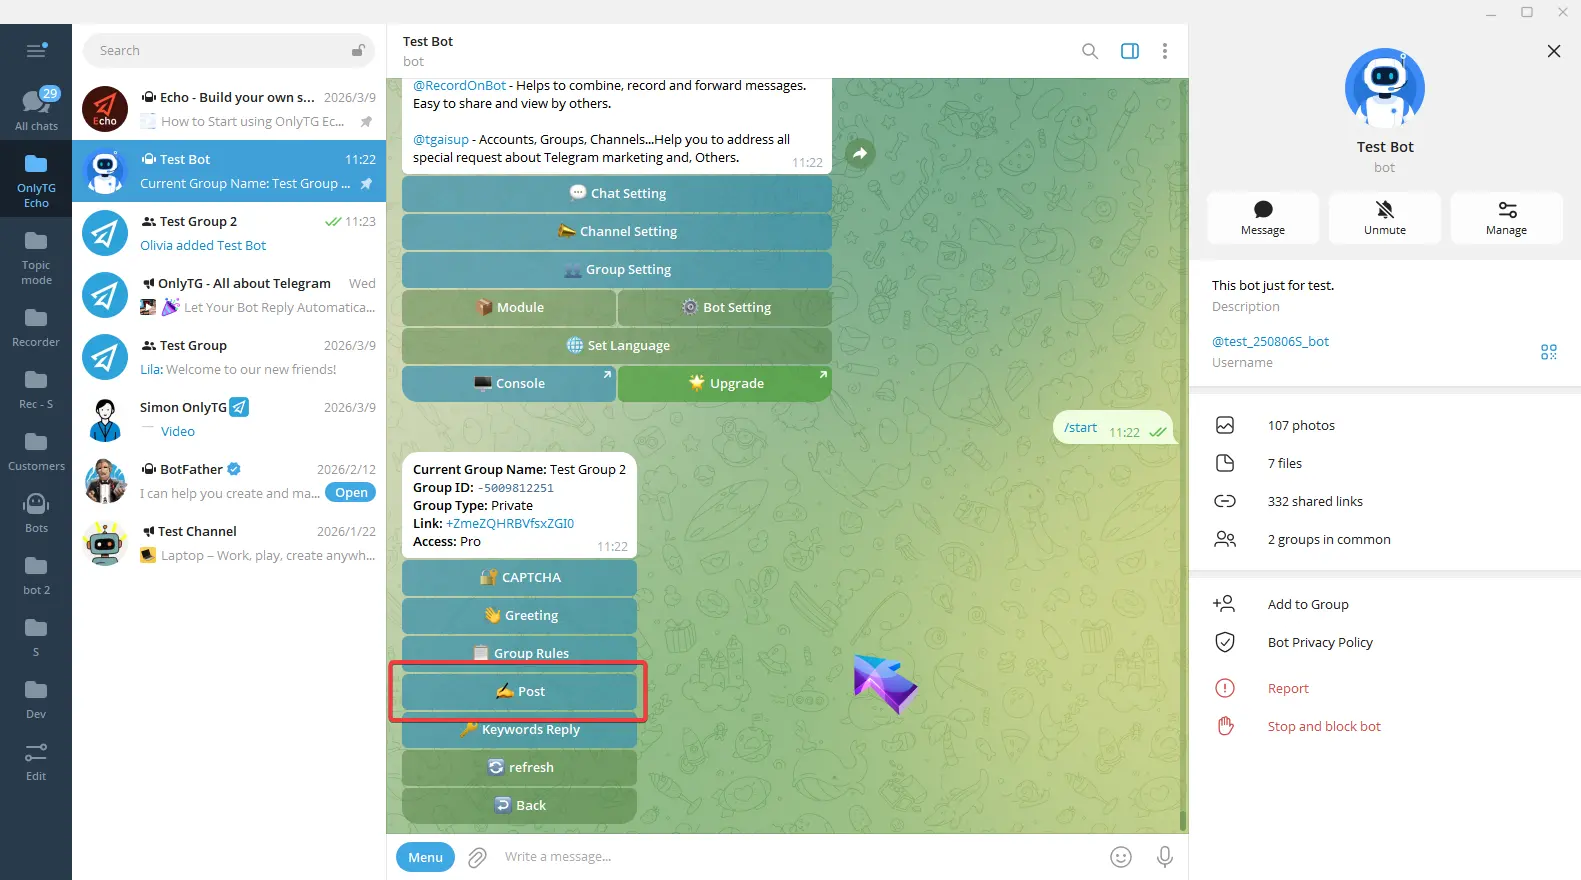
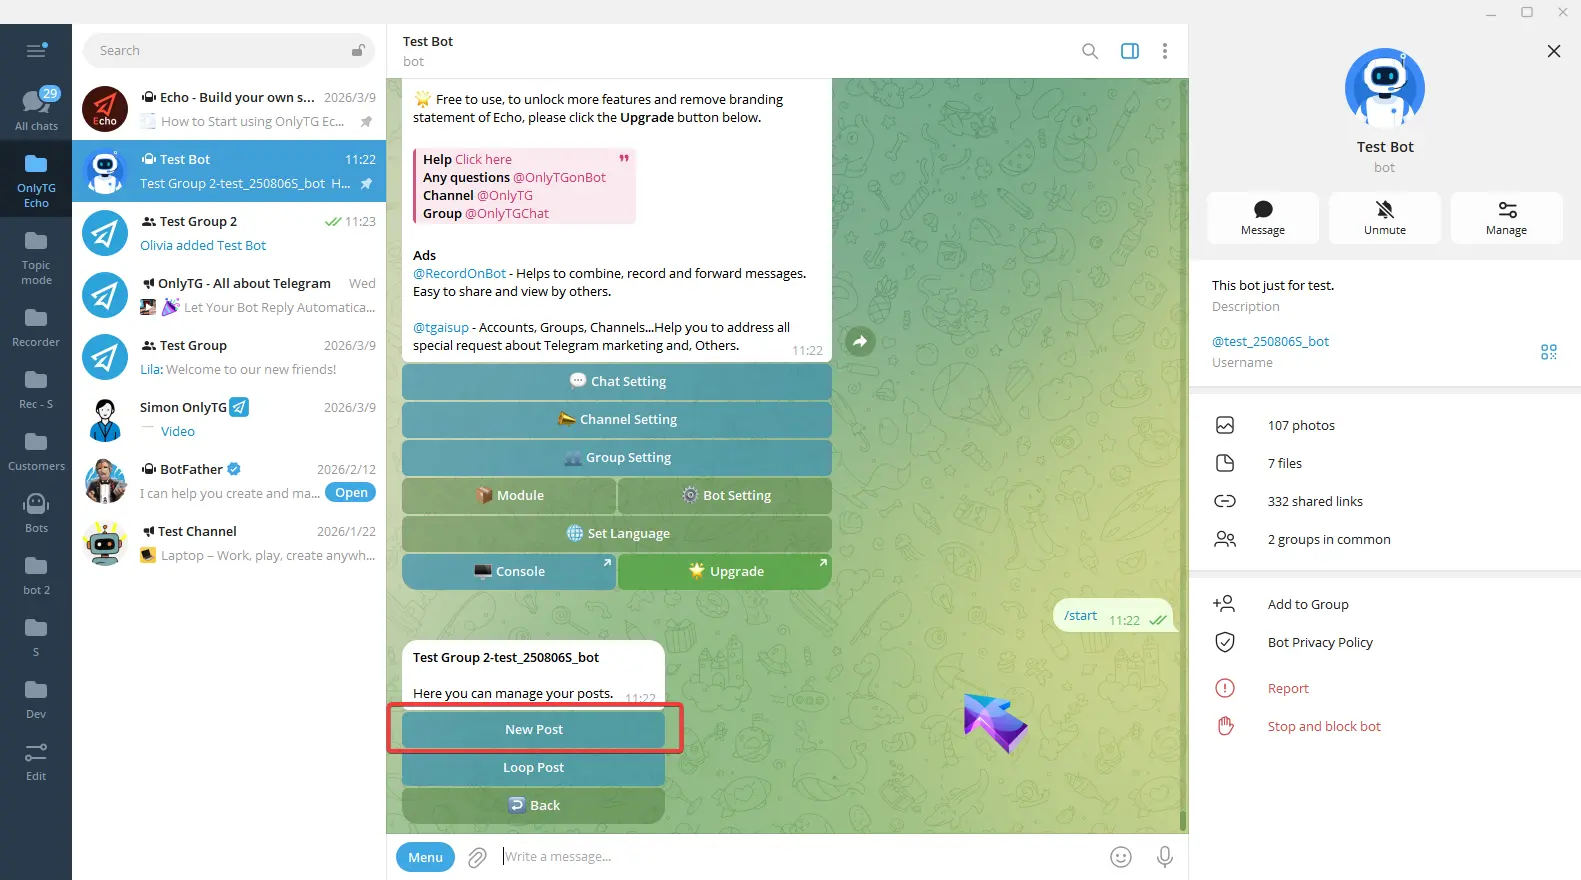
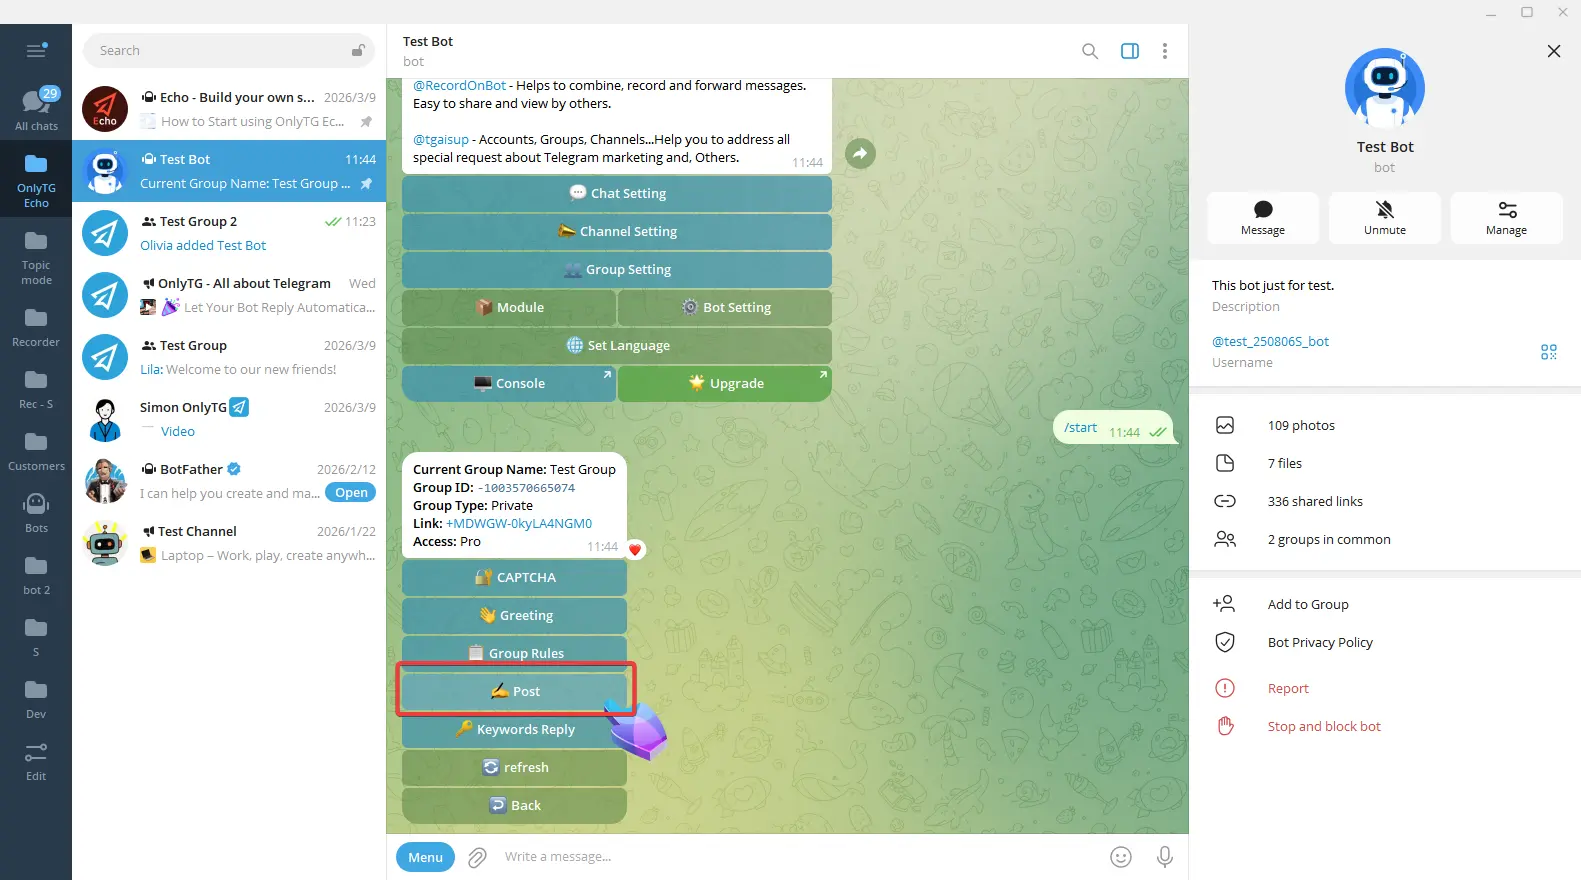
Click Post.
Click New post.
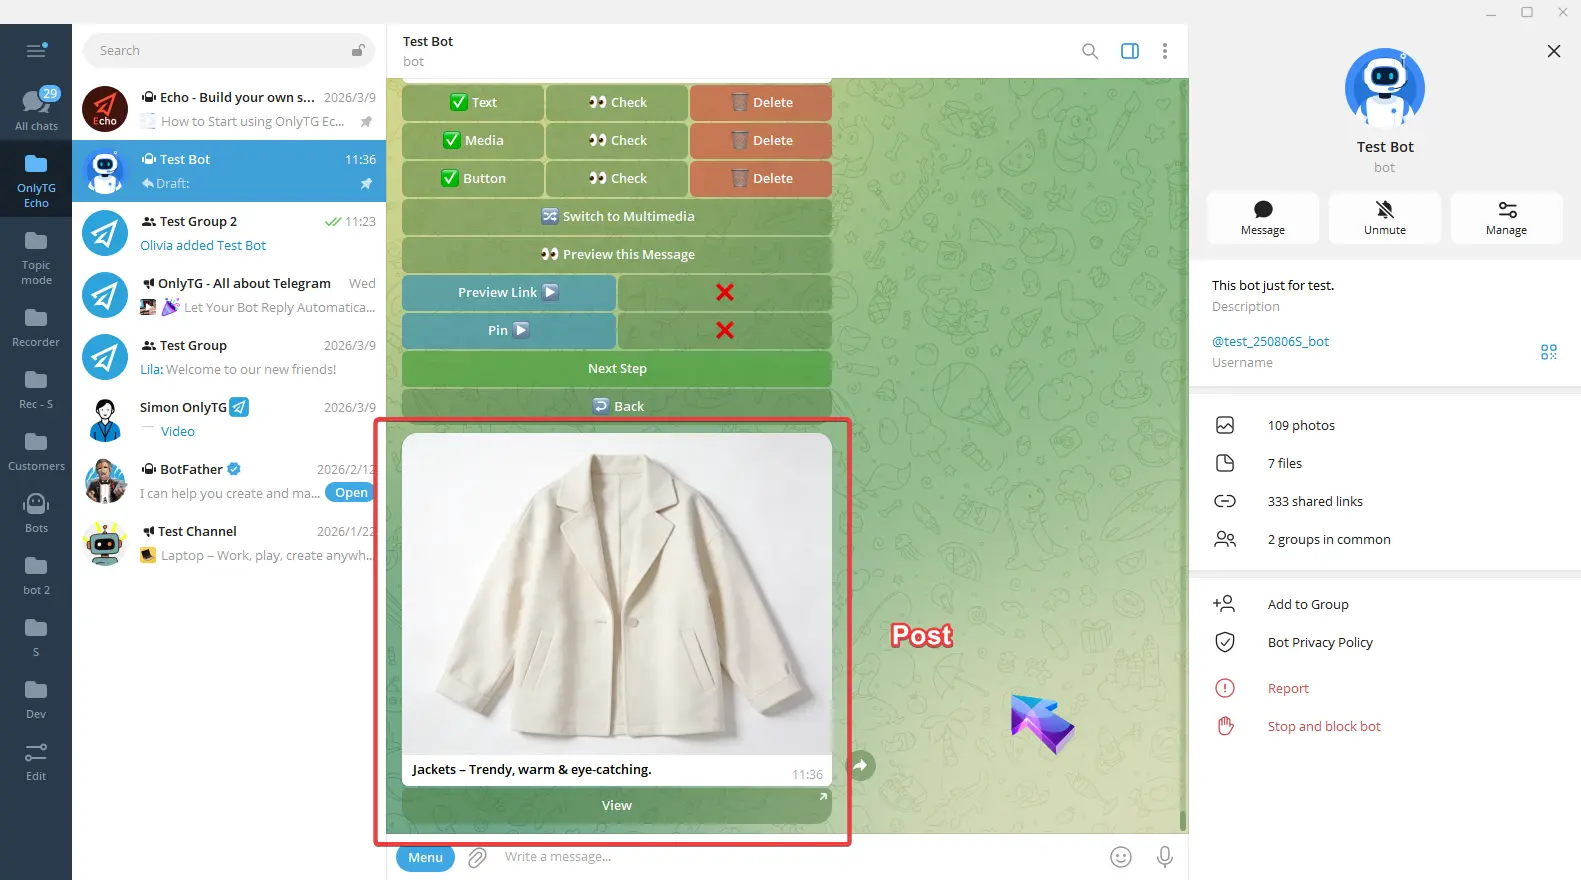
Configure the post content.
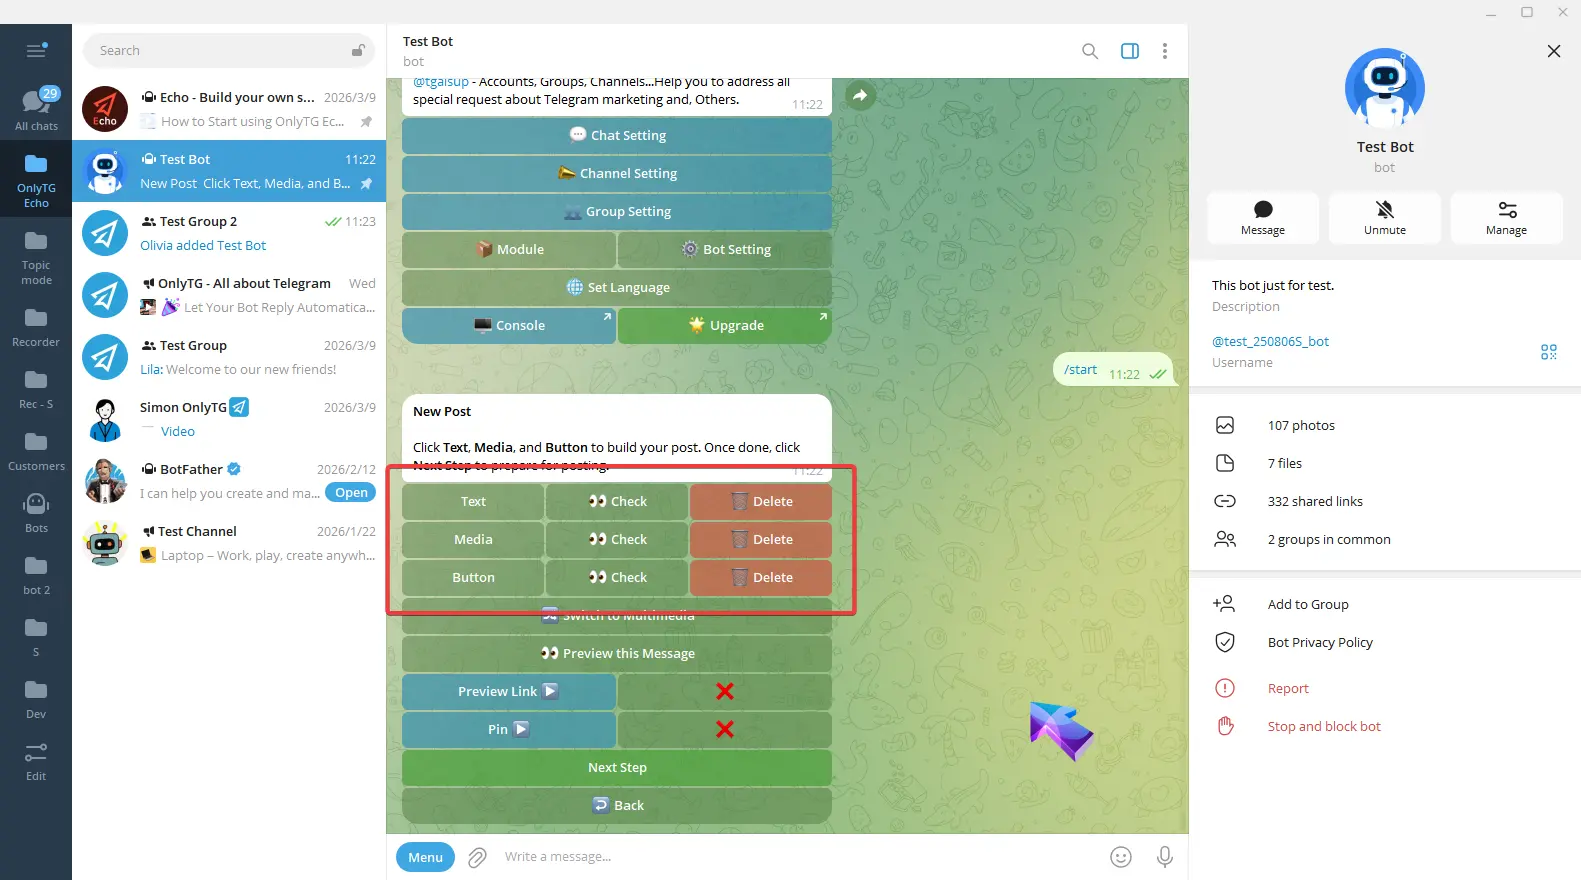
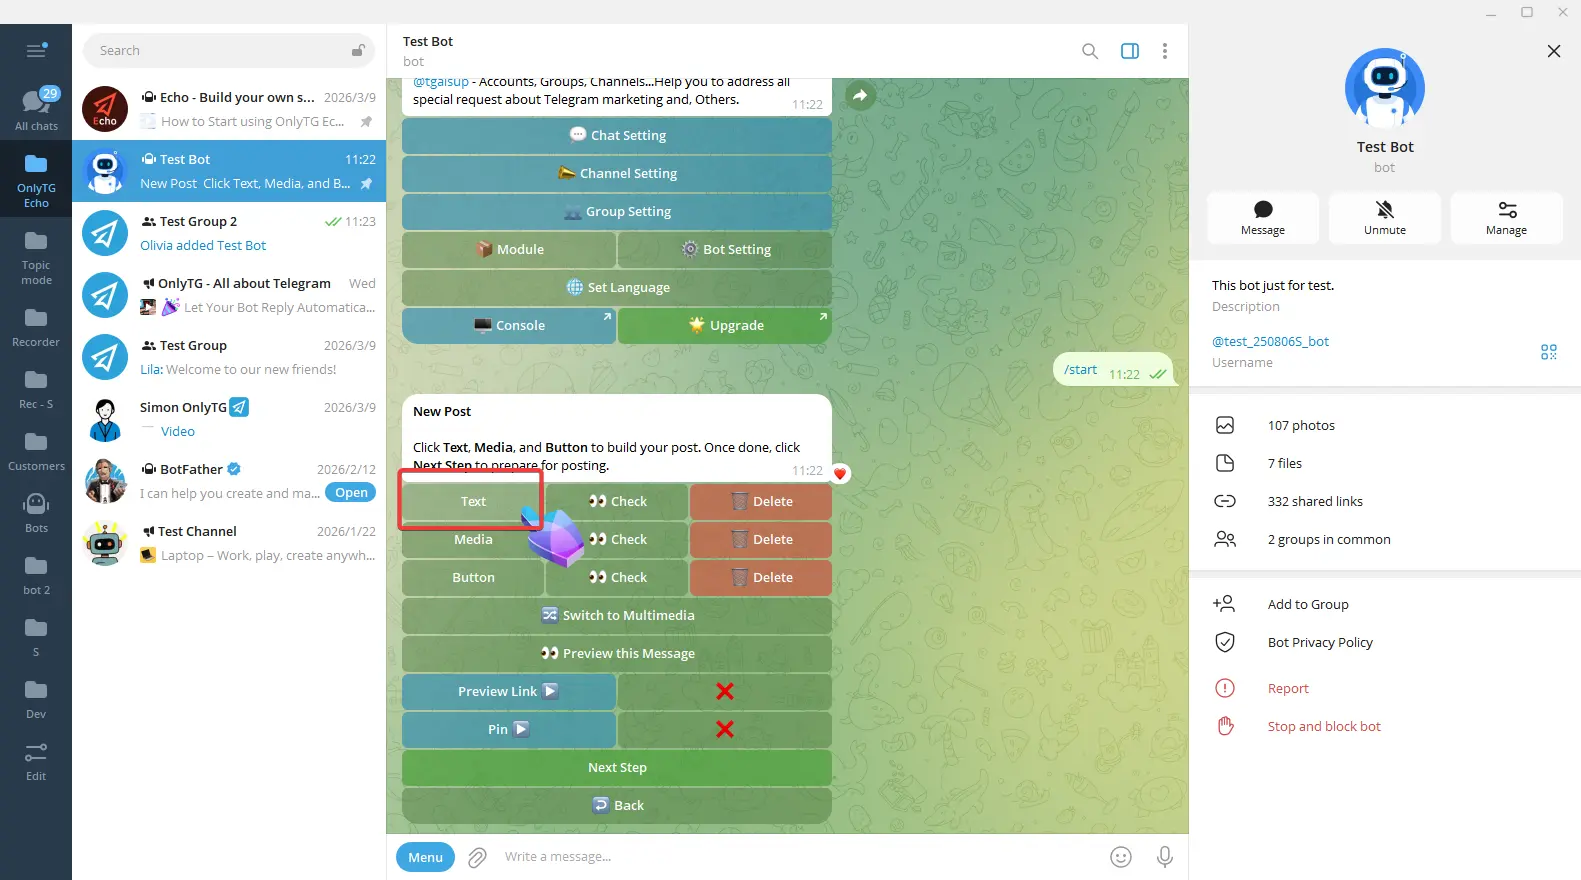
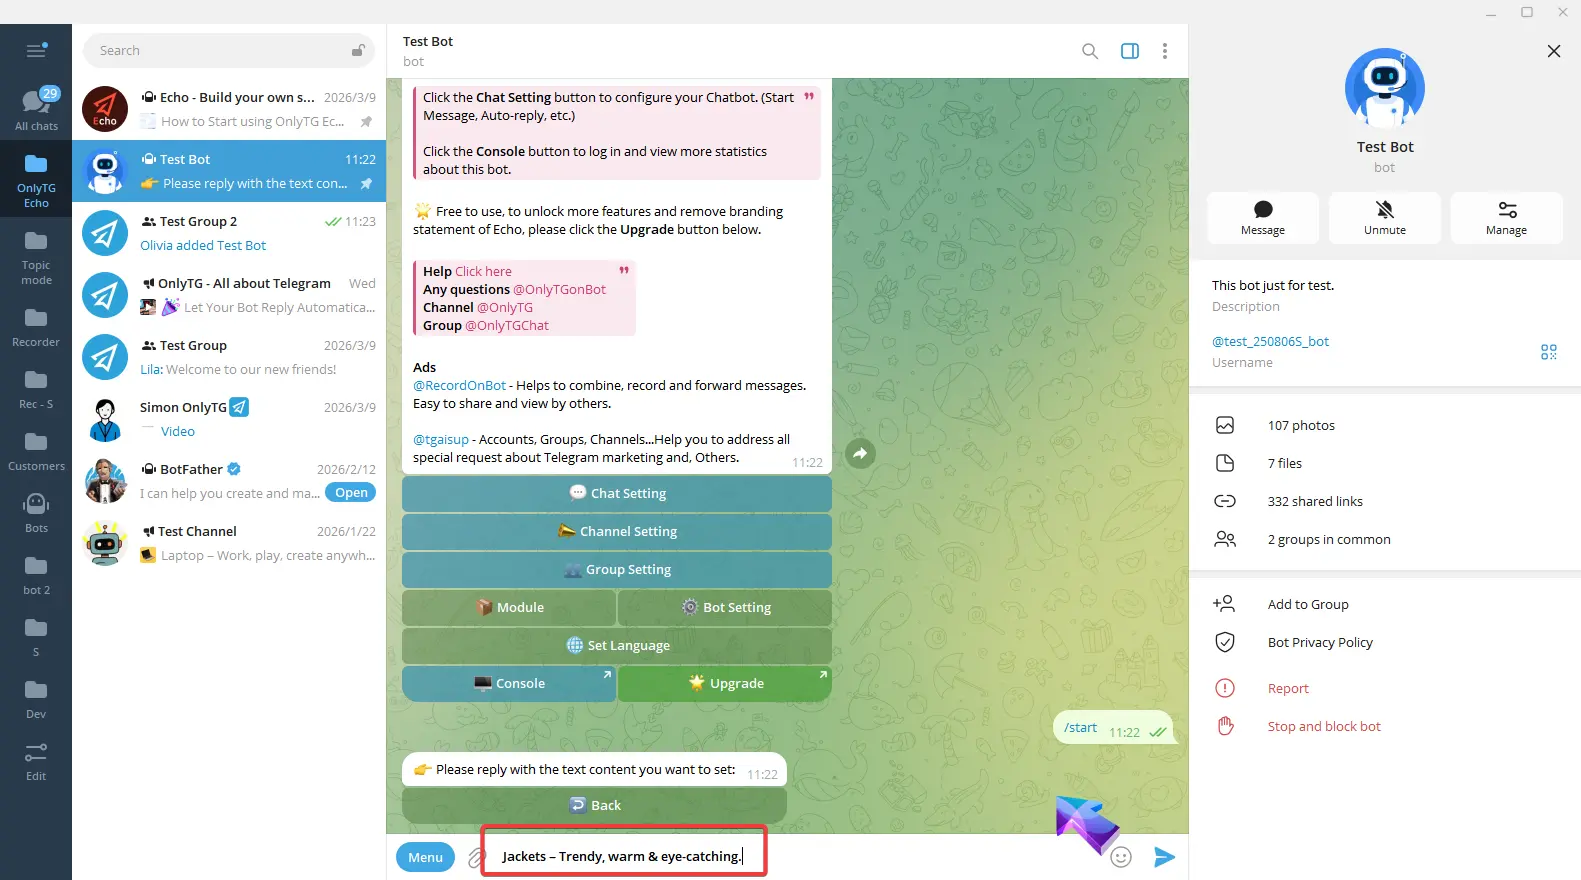
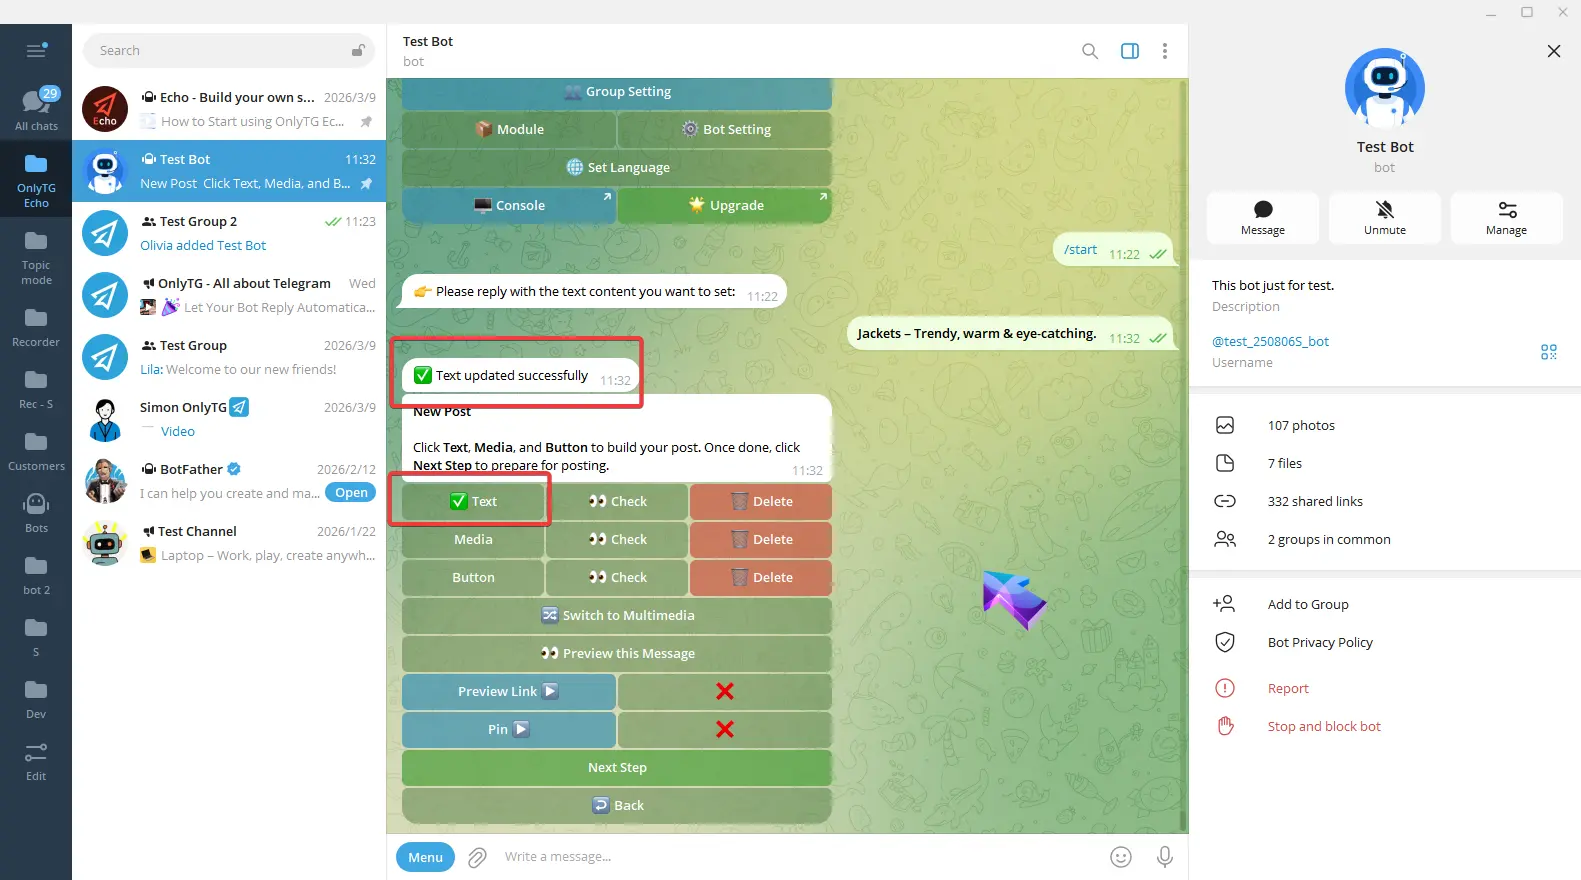
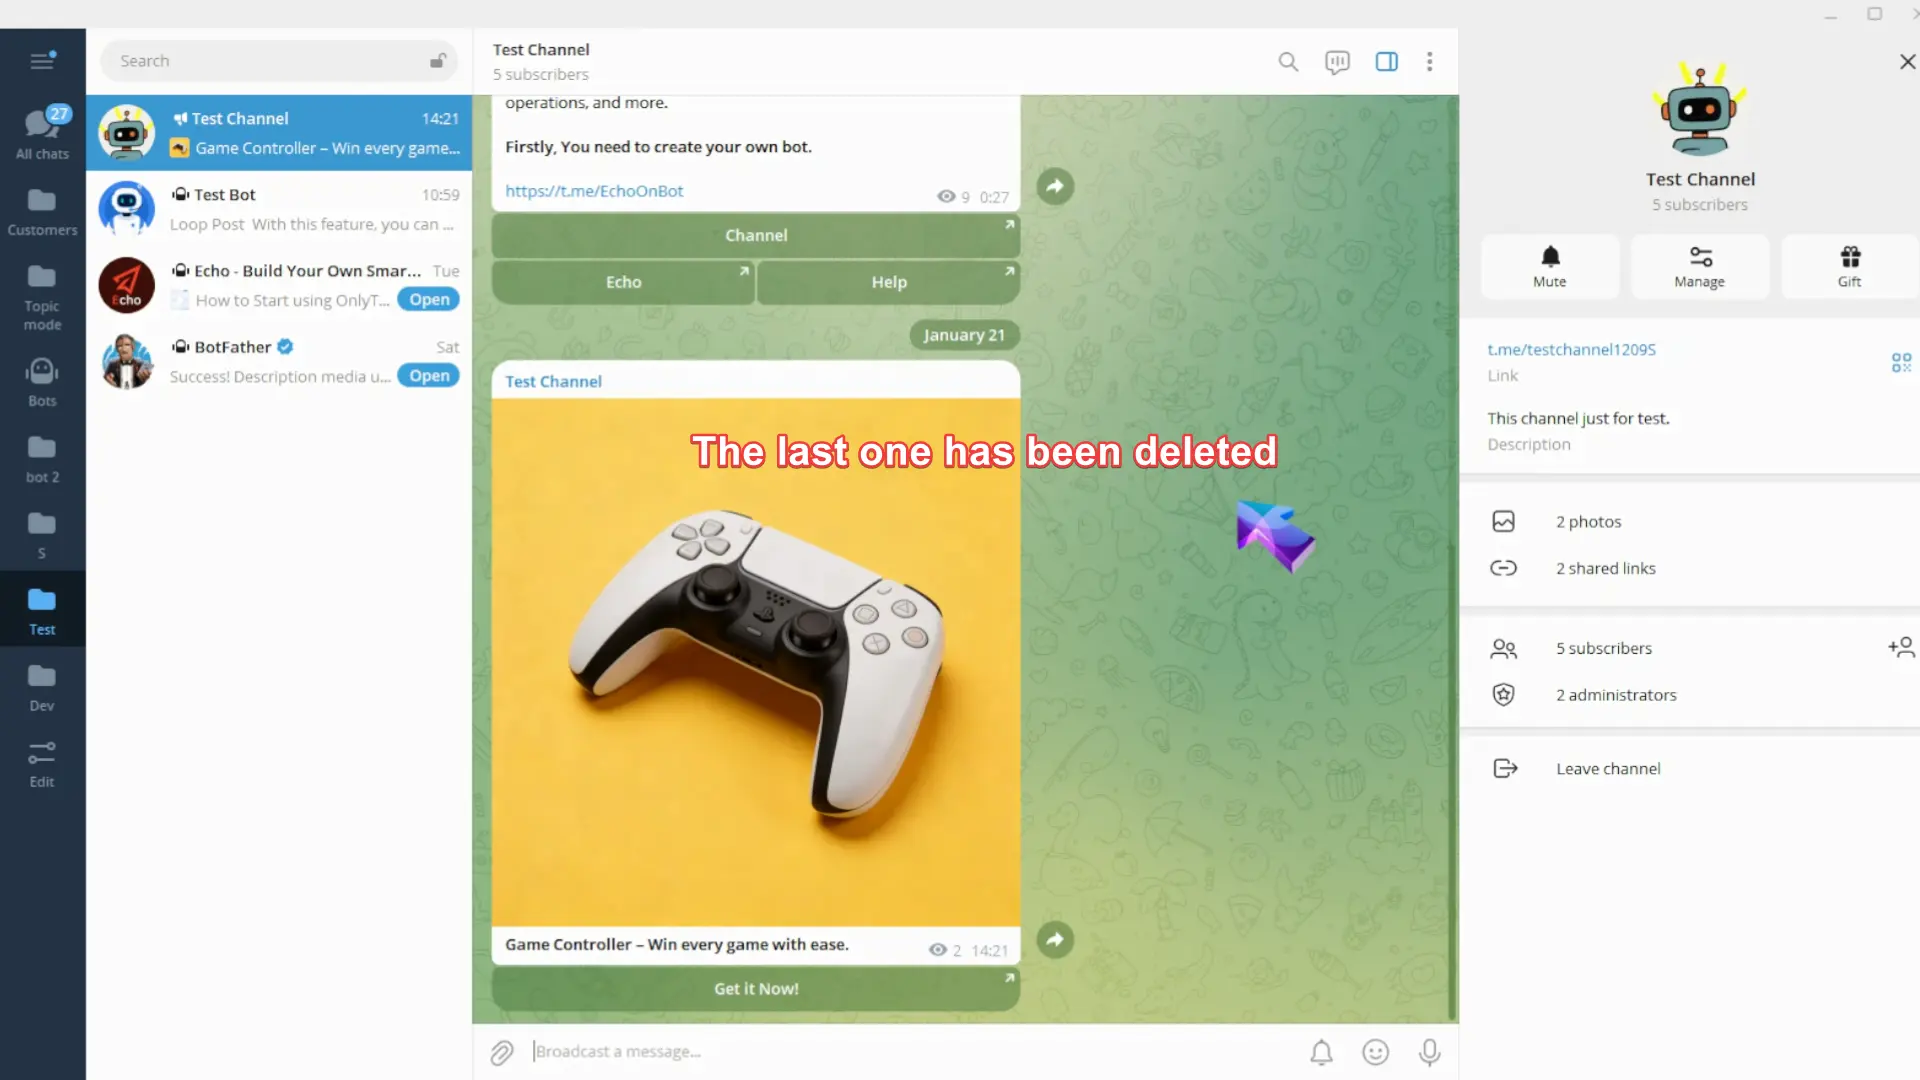
Click Text, and directly enter and send the text content. Once sent, a confirmation message will appear, and a checkmark next to the Text button means the setup is complete.
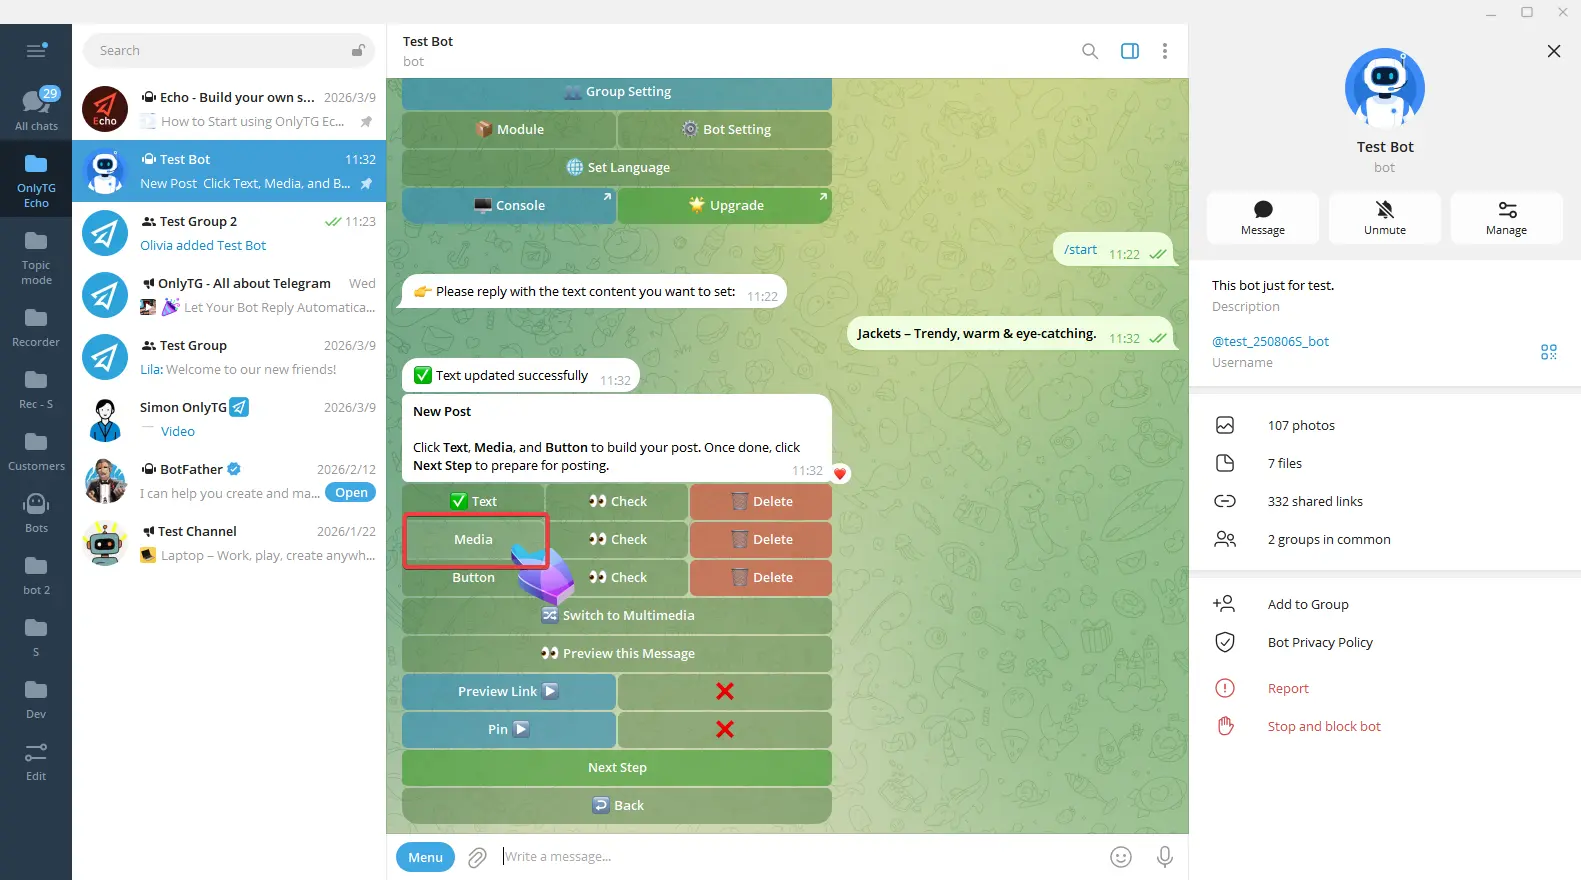
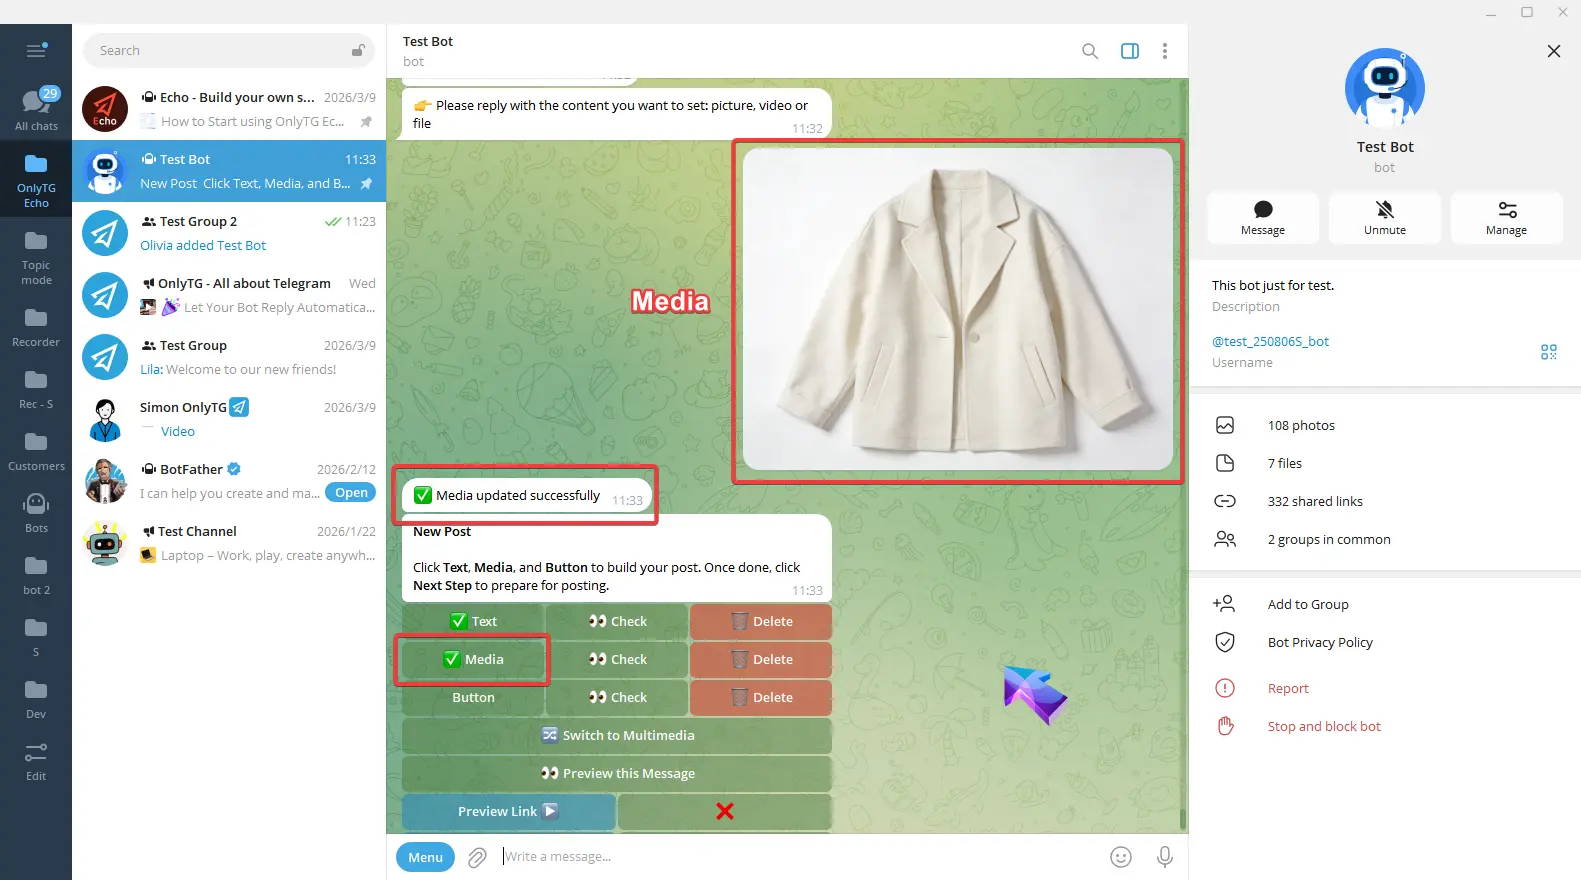
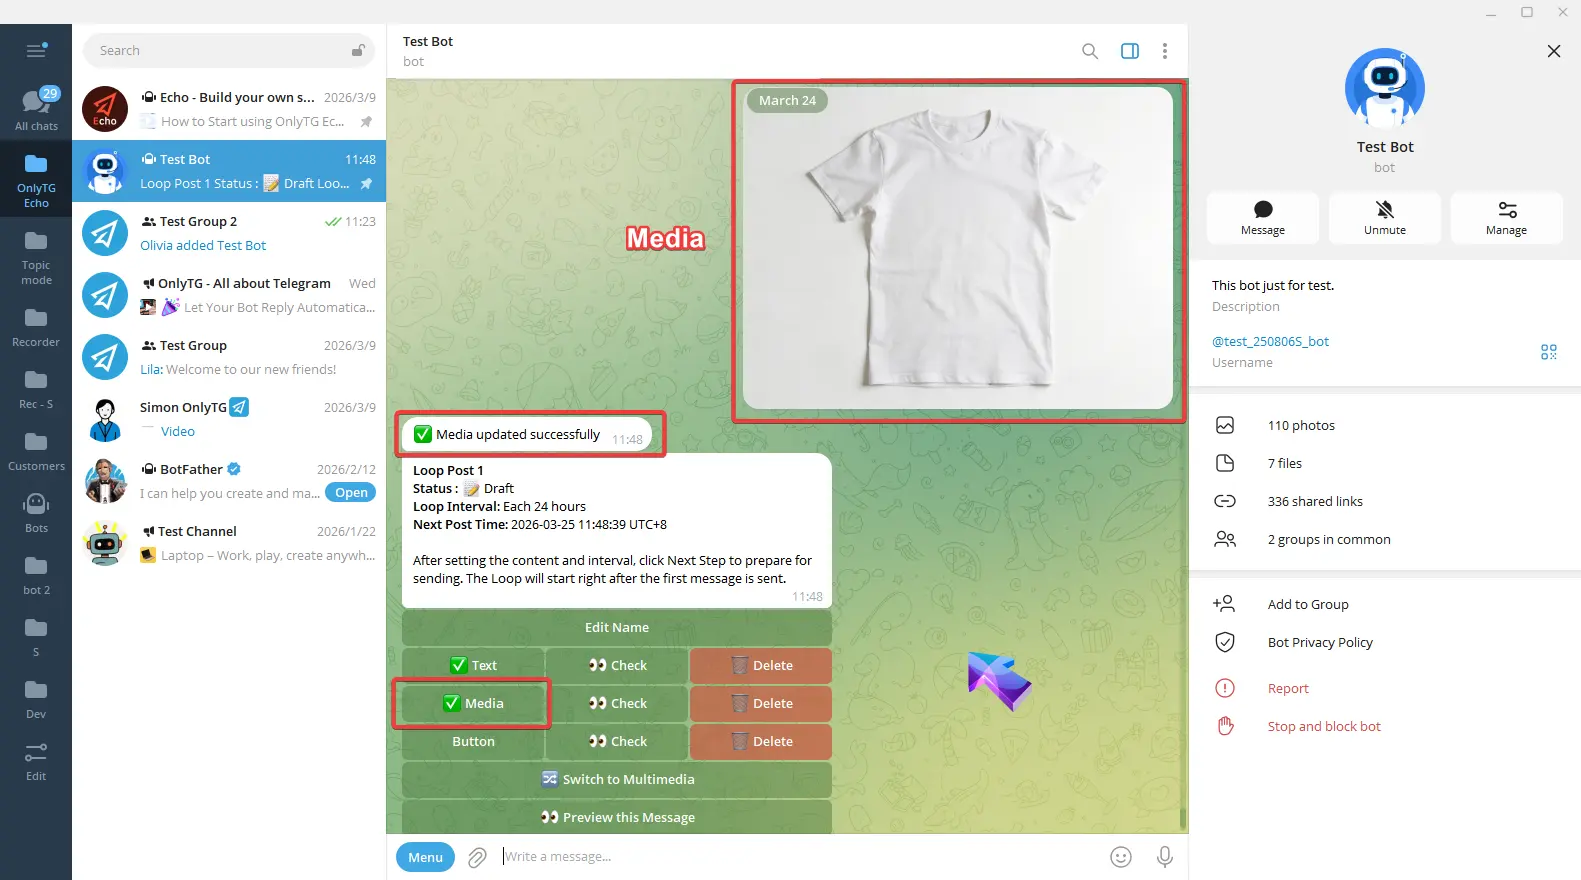
Click Media, select an image, video or file. Once the update success message pops up, and a checkmark next to the Media button means the setup is complete.
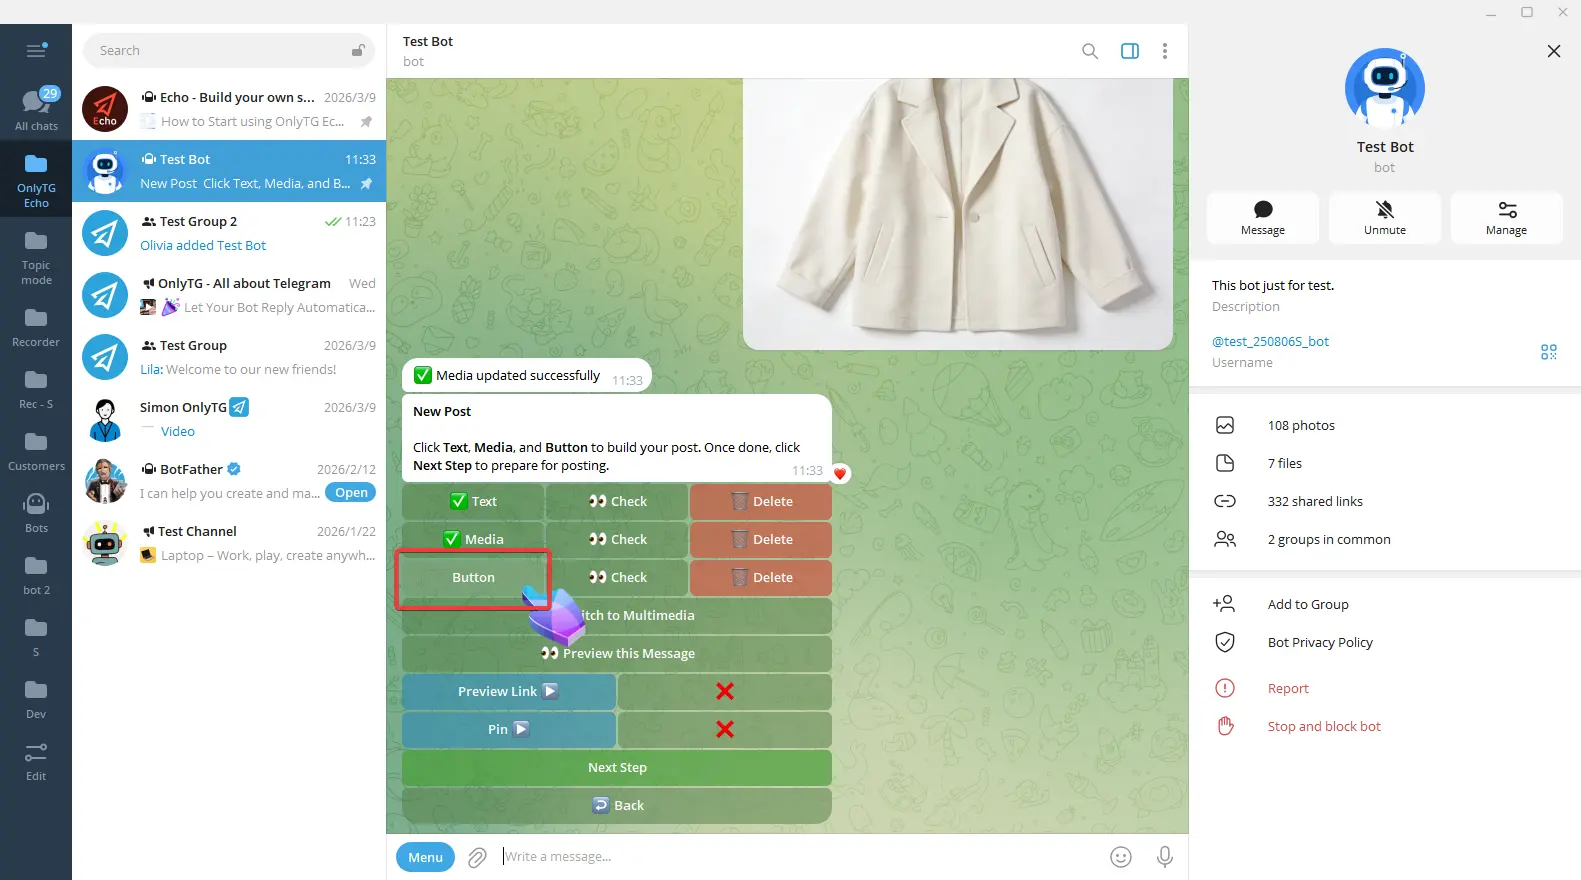
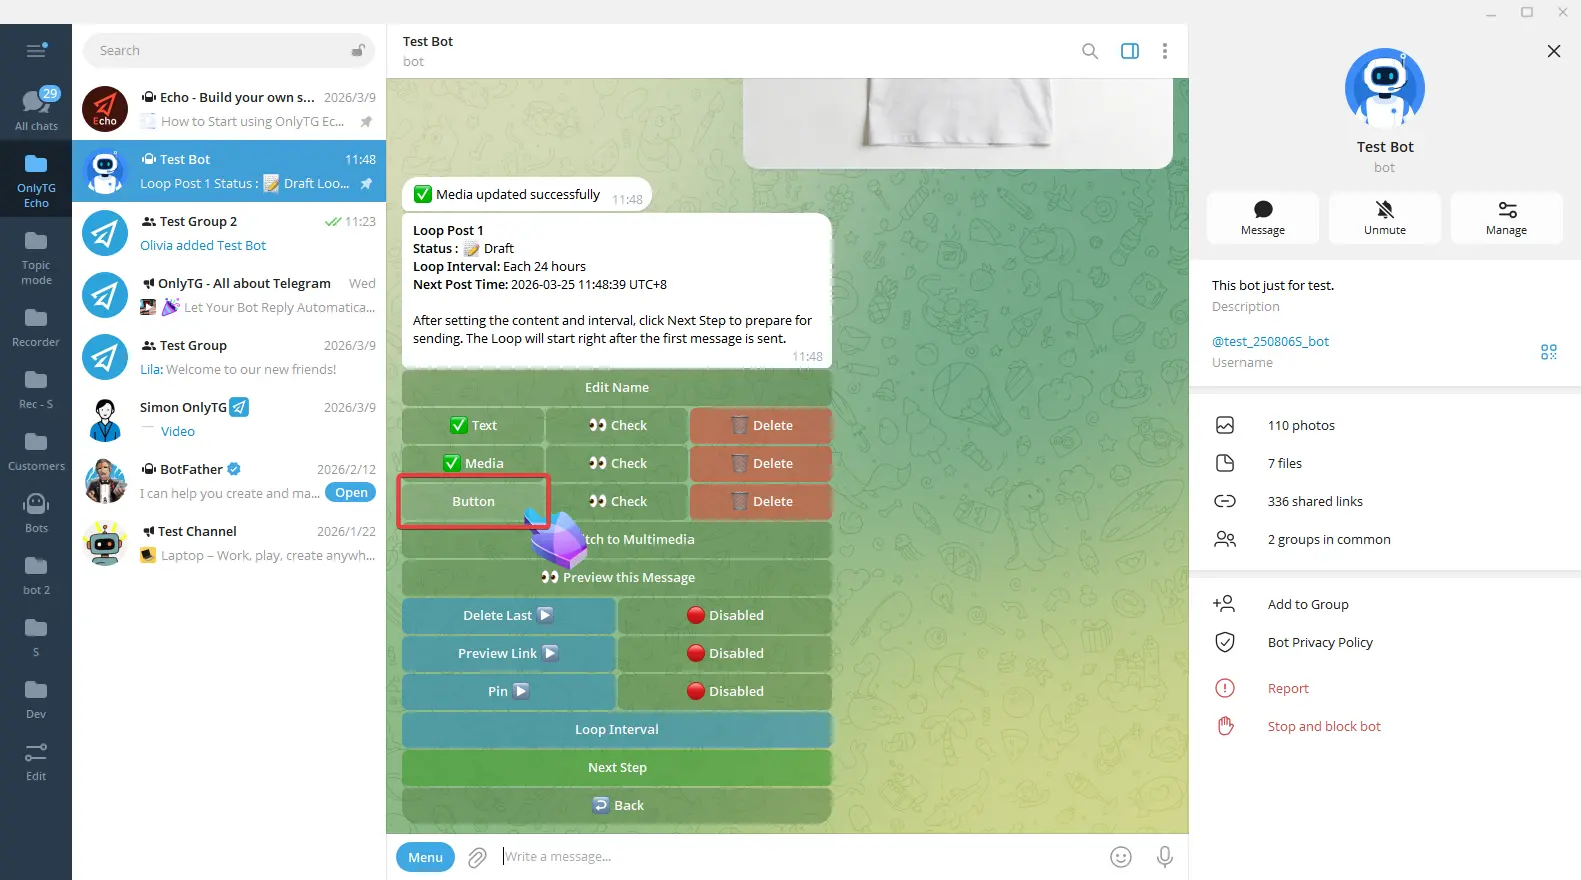
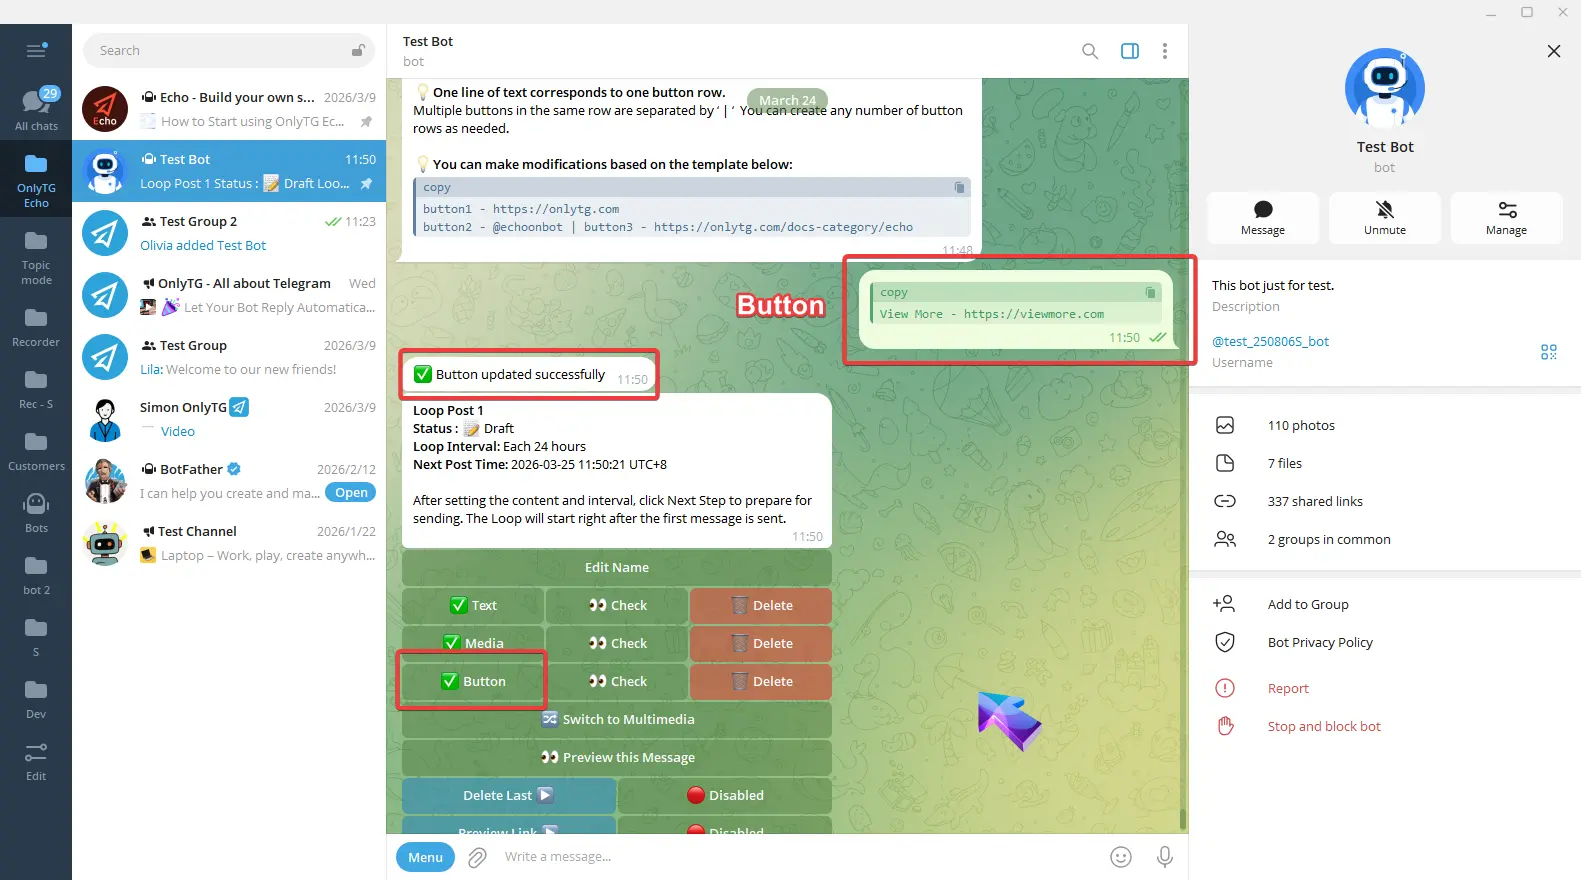
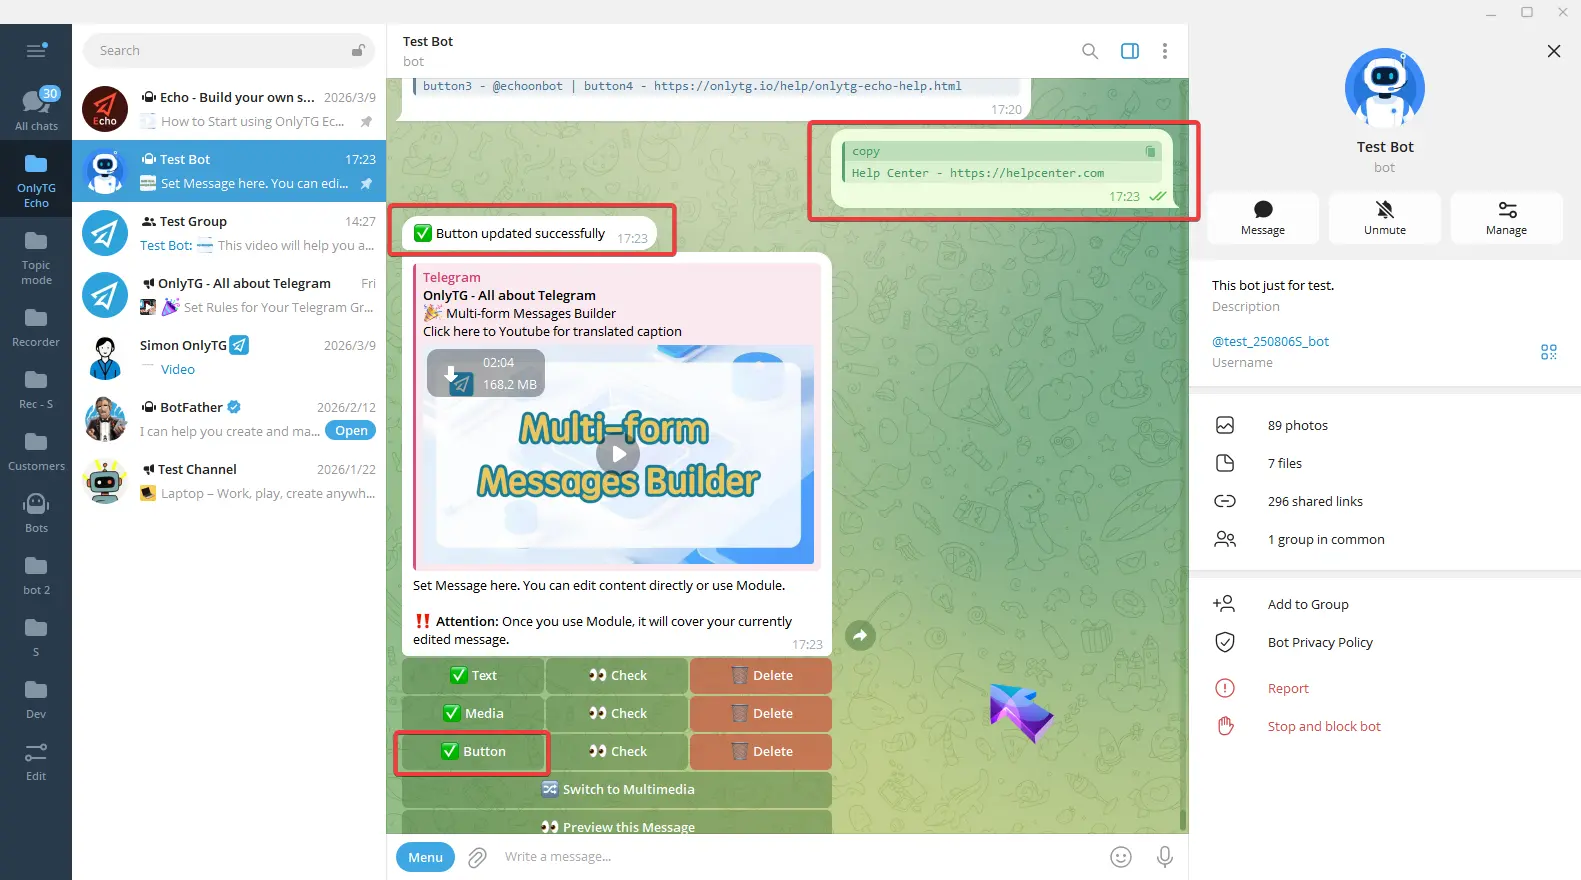
Click Button, Enter the content according to the format in the prompt.
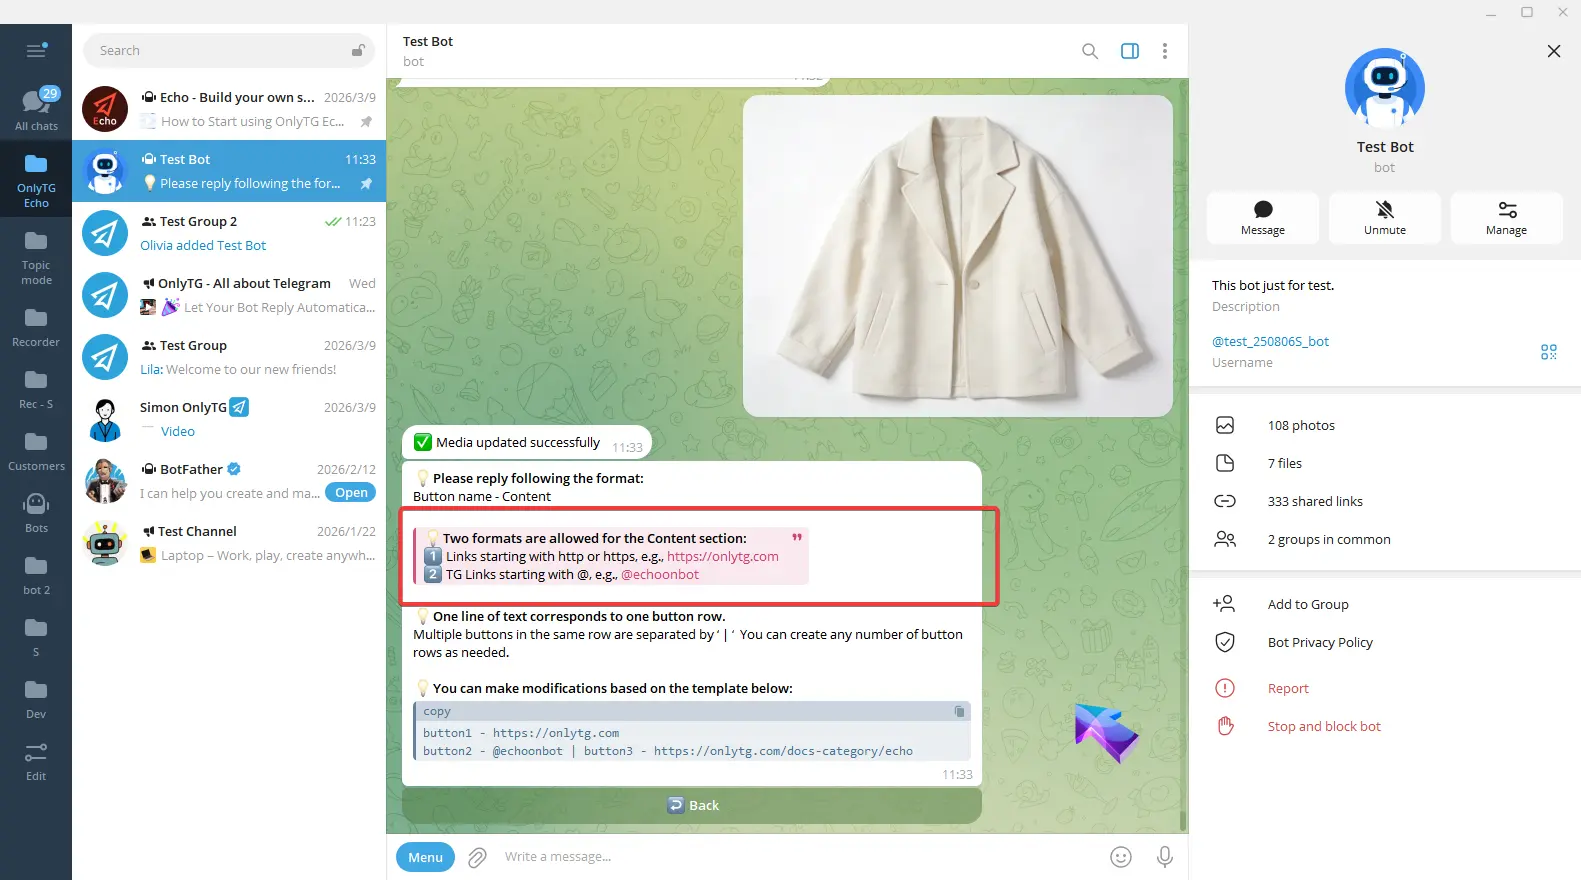
You can also copy the example into the input box and edit it.
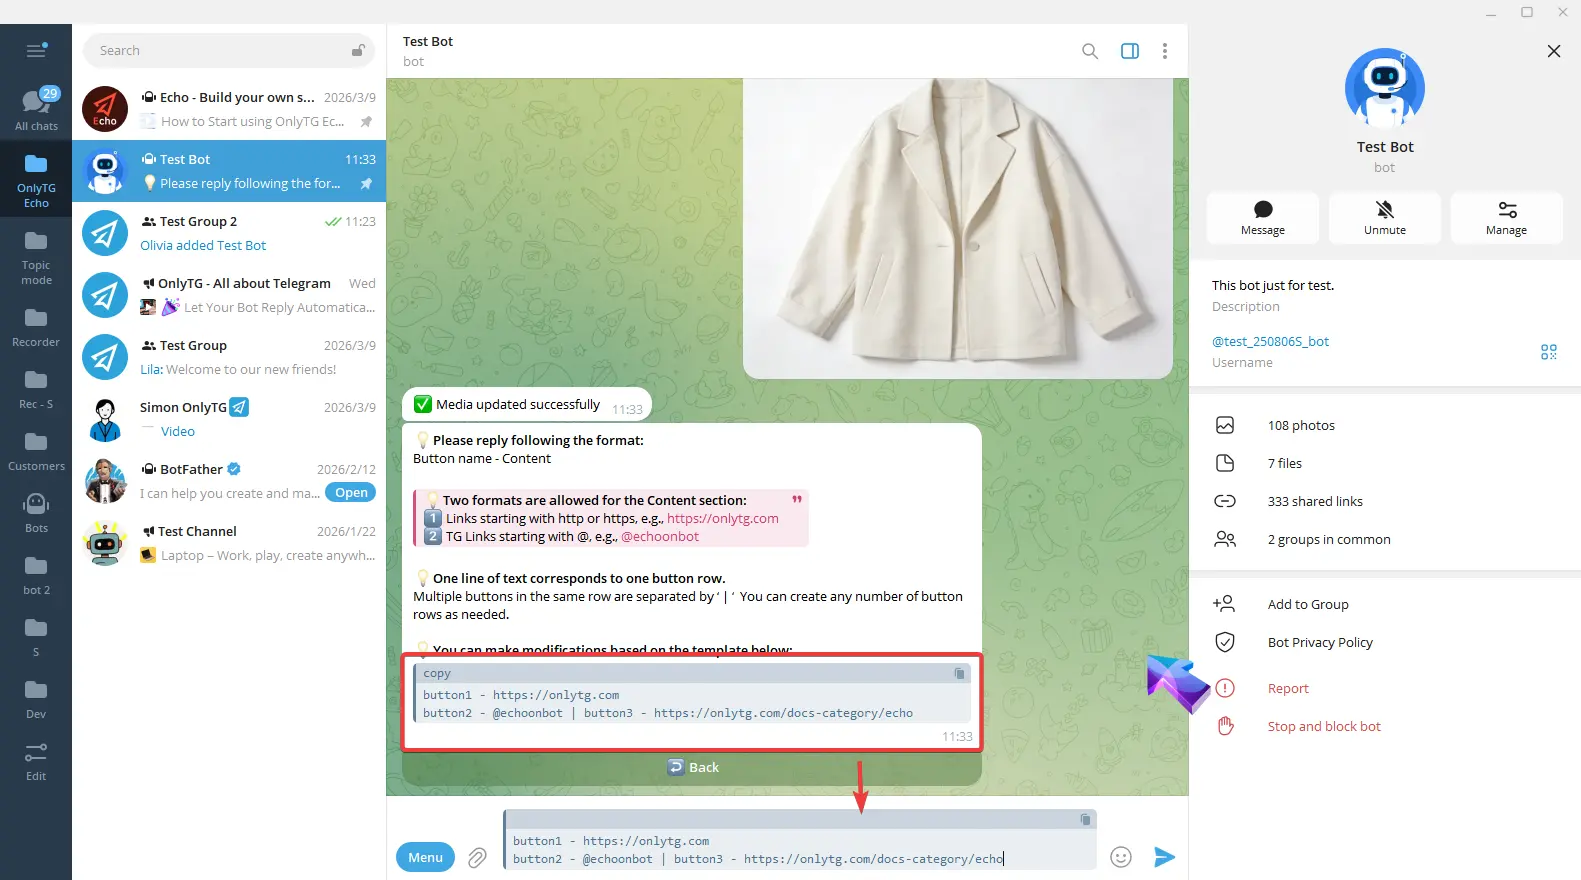
For example: I want only one button now, so I will delete the following line. Then I change button1 to my desired button name, and replace the link with my own.

Finish editing and send. Once the update success message pops up, and a checkmark next to the Button means the setup is complete.

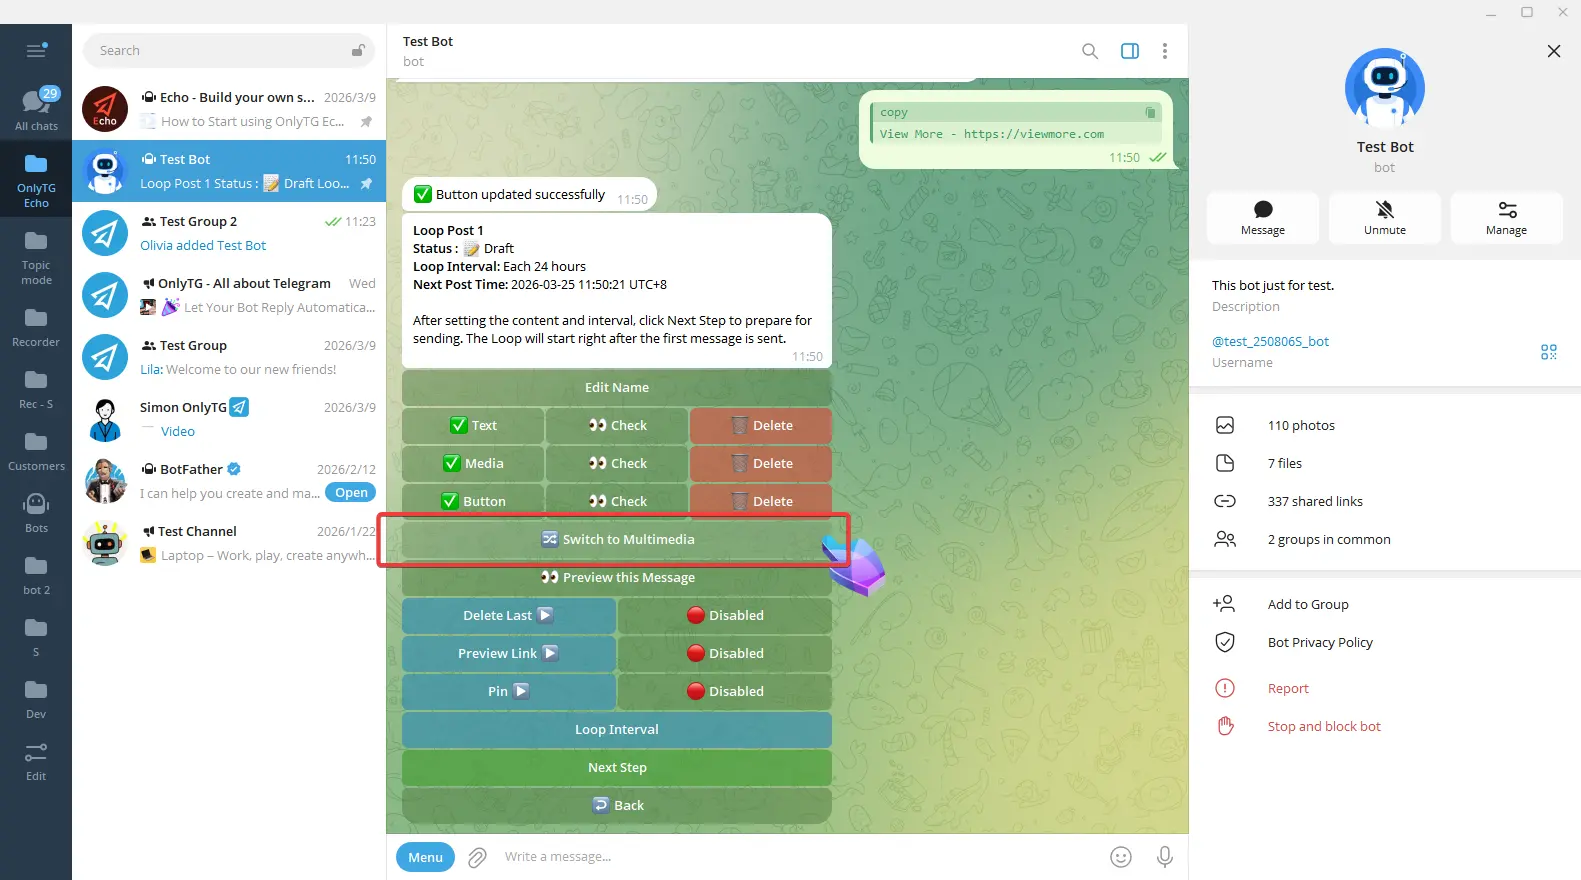
Switch to Multimedia: Convert the post to a mode which you can configure text and multiple images/videos, but files and buttons are not supported. We won’t use this mode for now. (Click here to learn how to set multimedia messages)
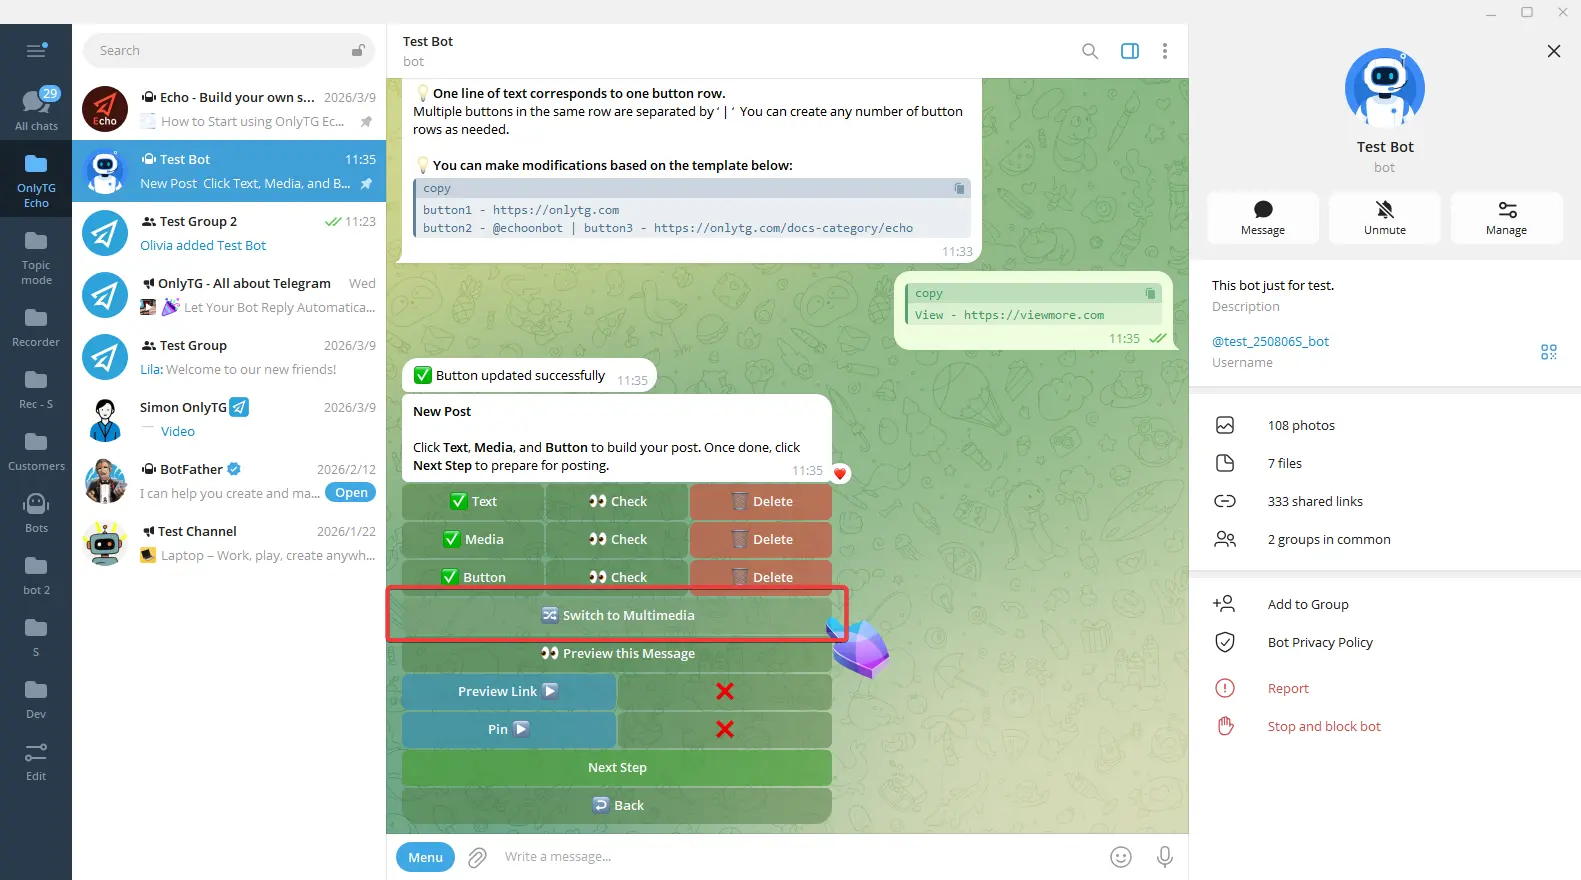
After completing the above configurations, click here to preview the post.

step 2
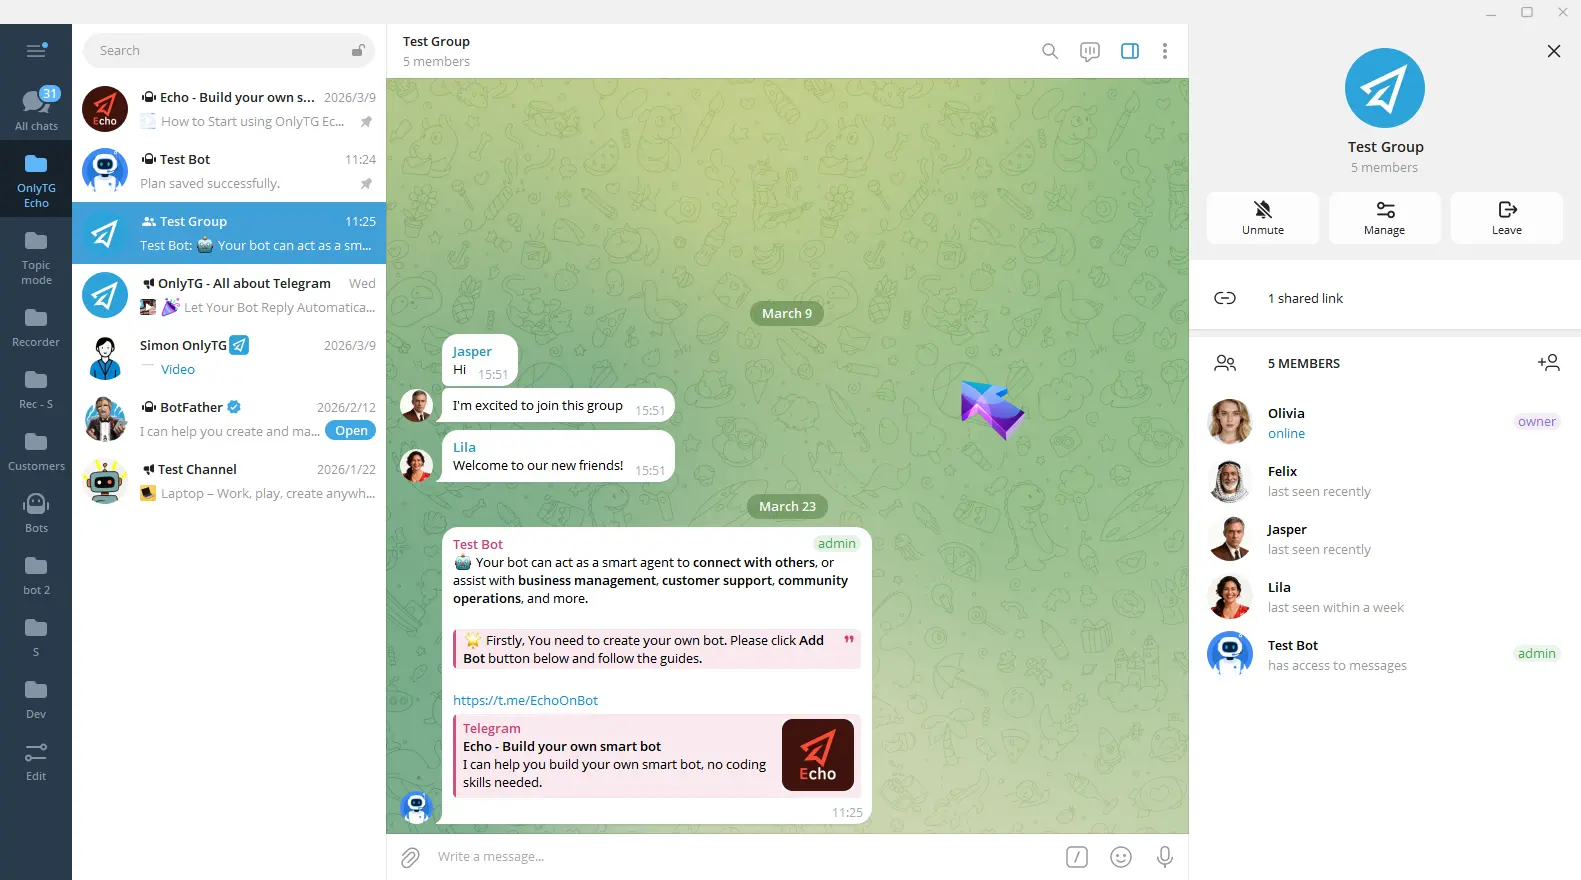
You’ll see two features here and you can choose to enable them based on your needs:

Preview Link: When enabled, it will show a preview of the link in your post.

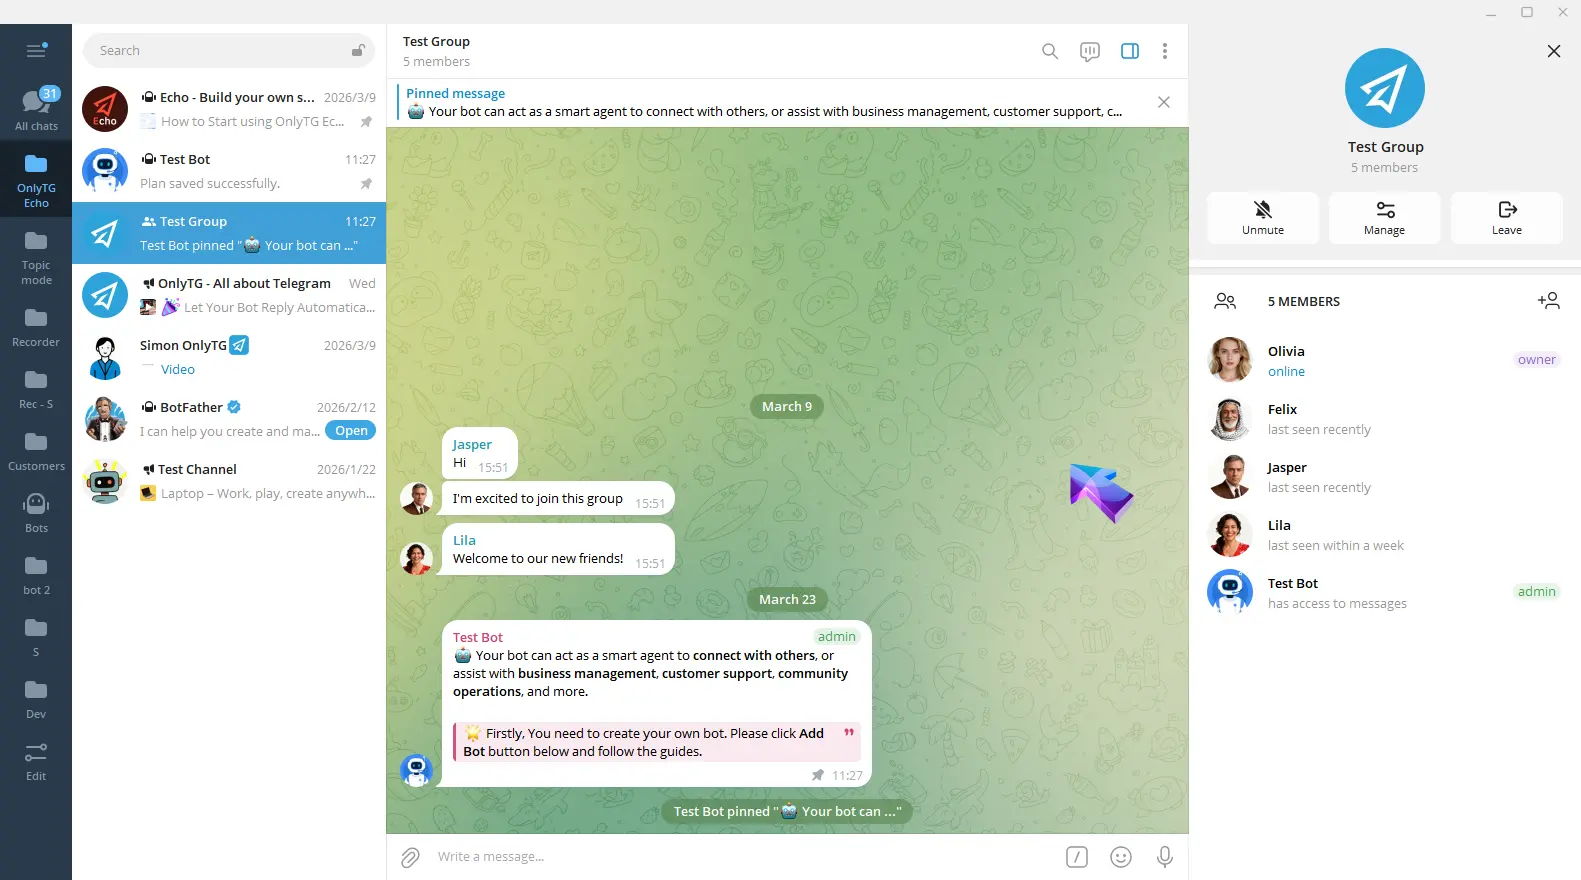
Pin: When enabled, this post will be pinned in the group.

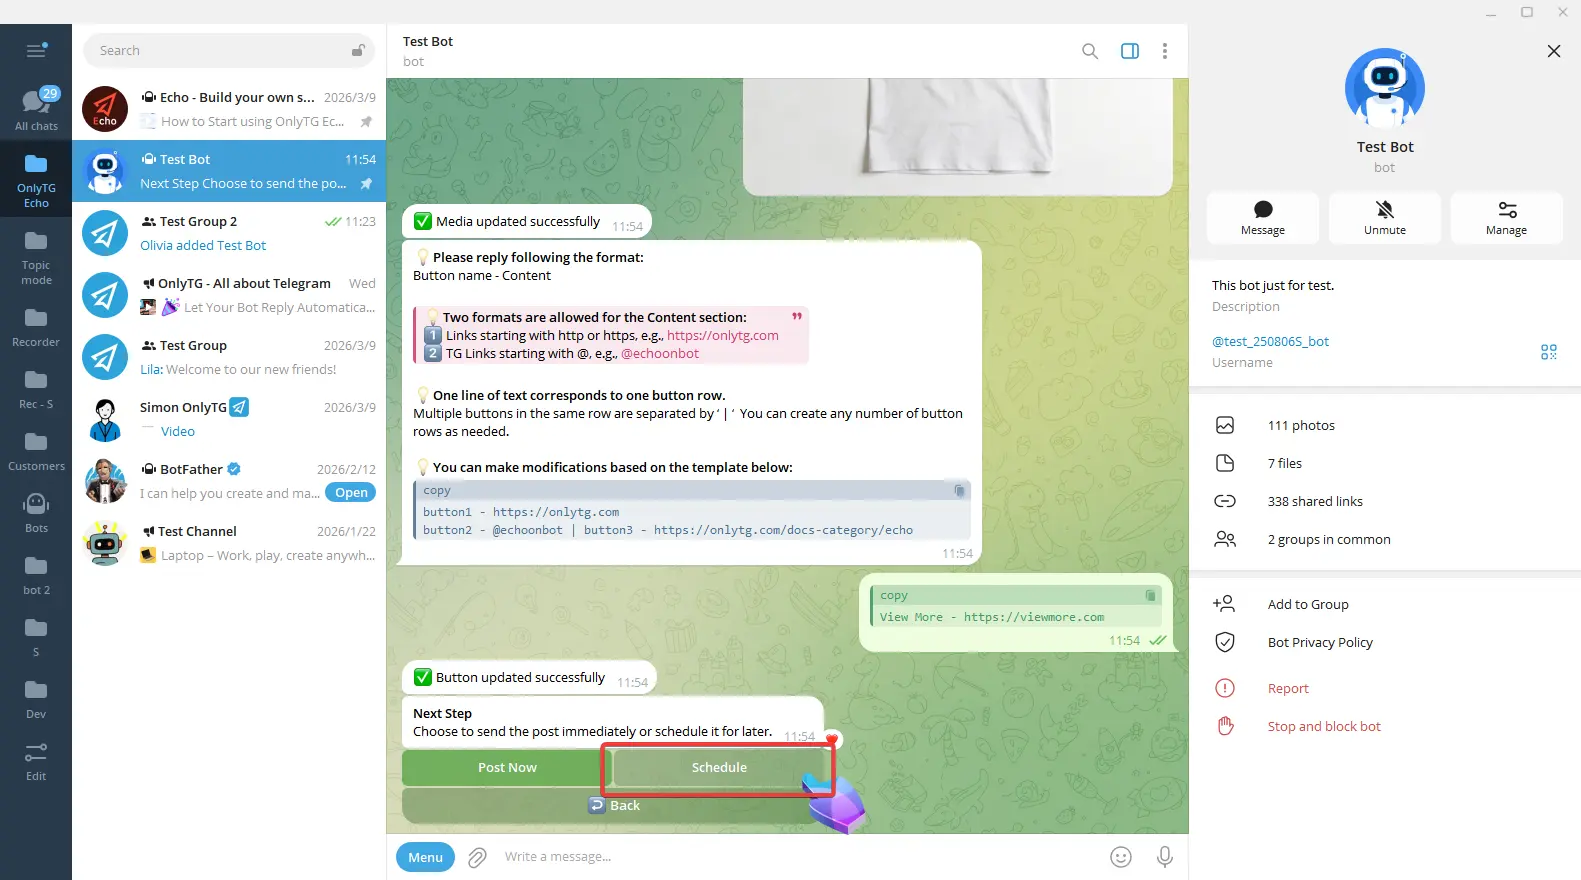
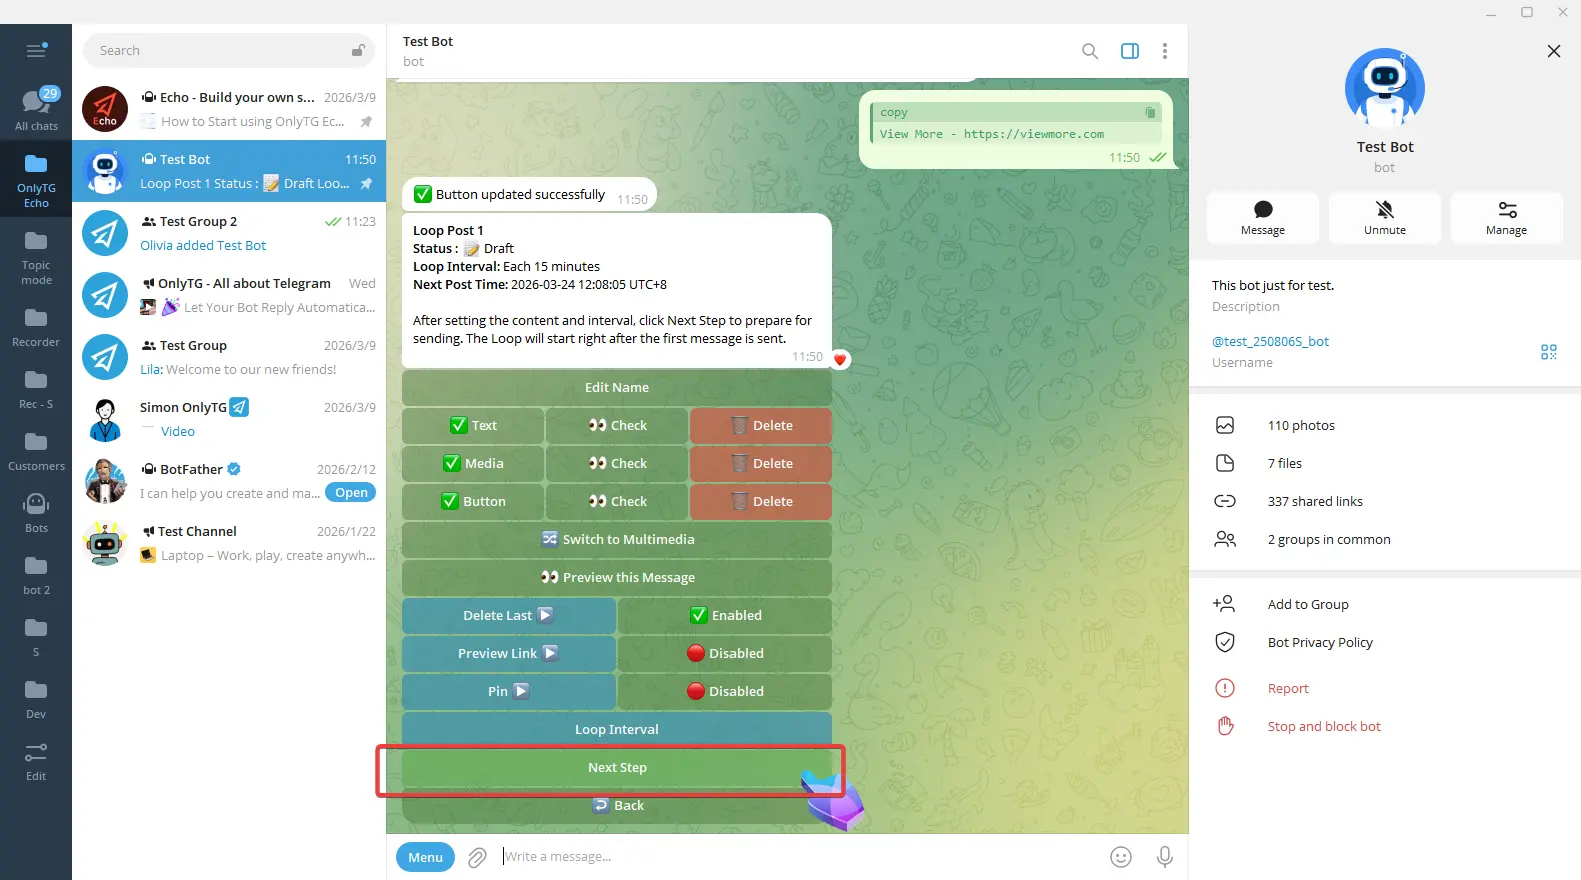
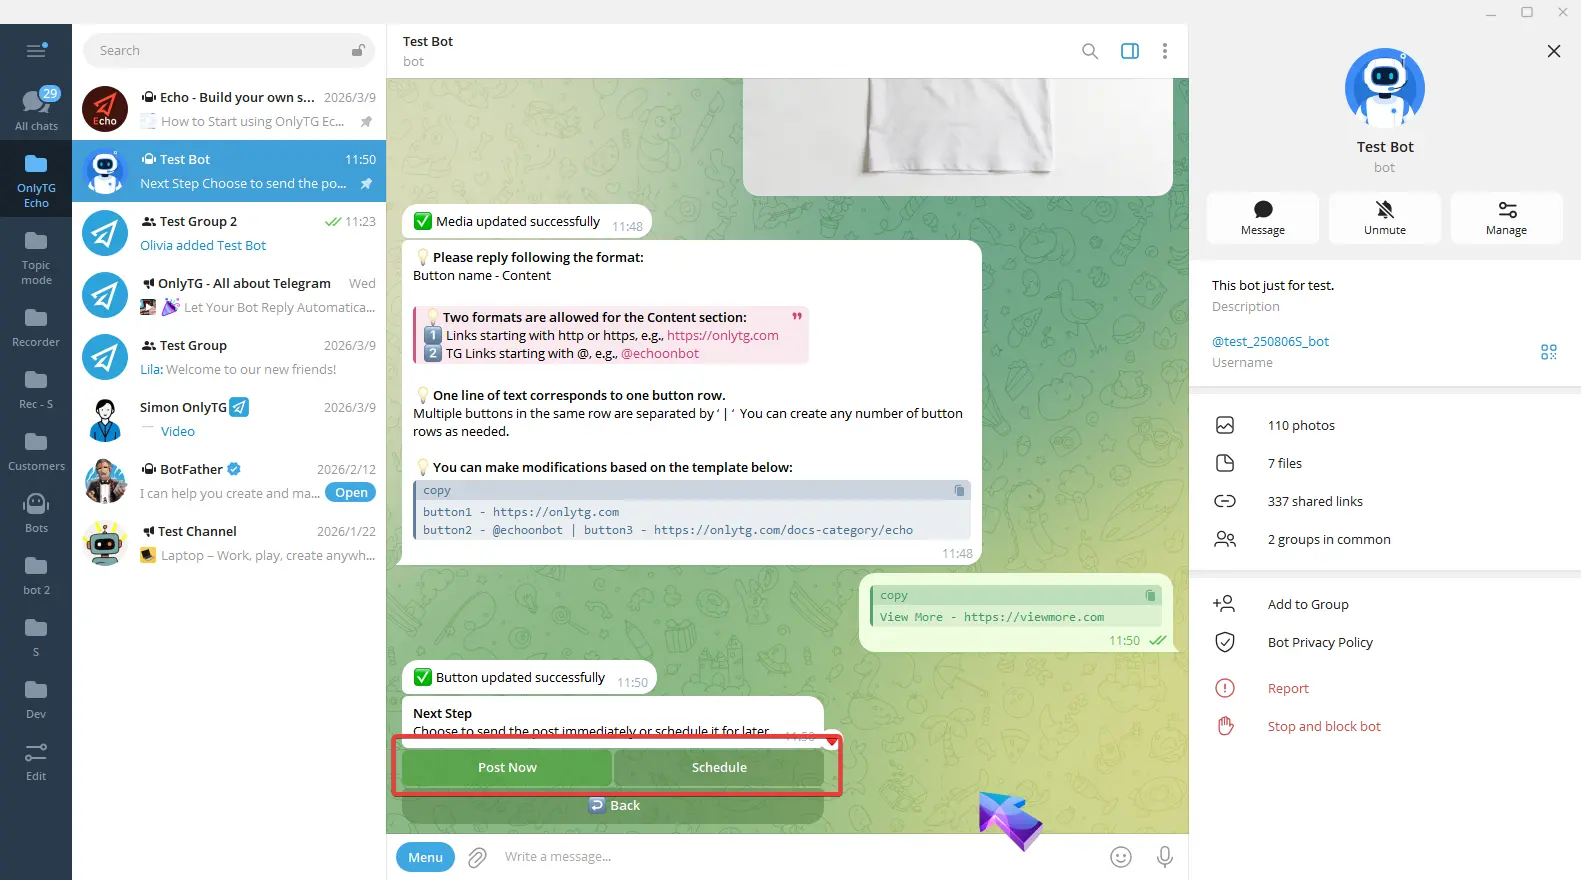
After completing the above steps, Click Next Step.

step 3
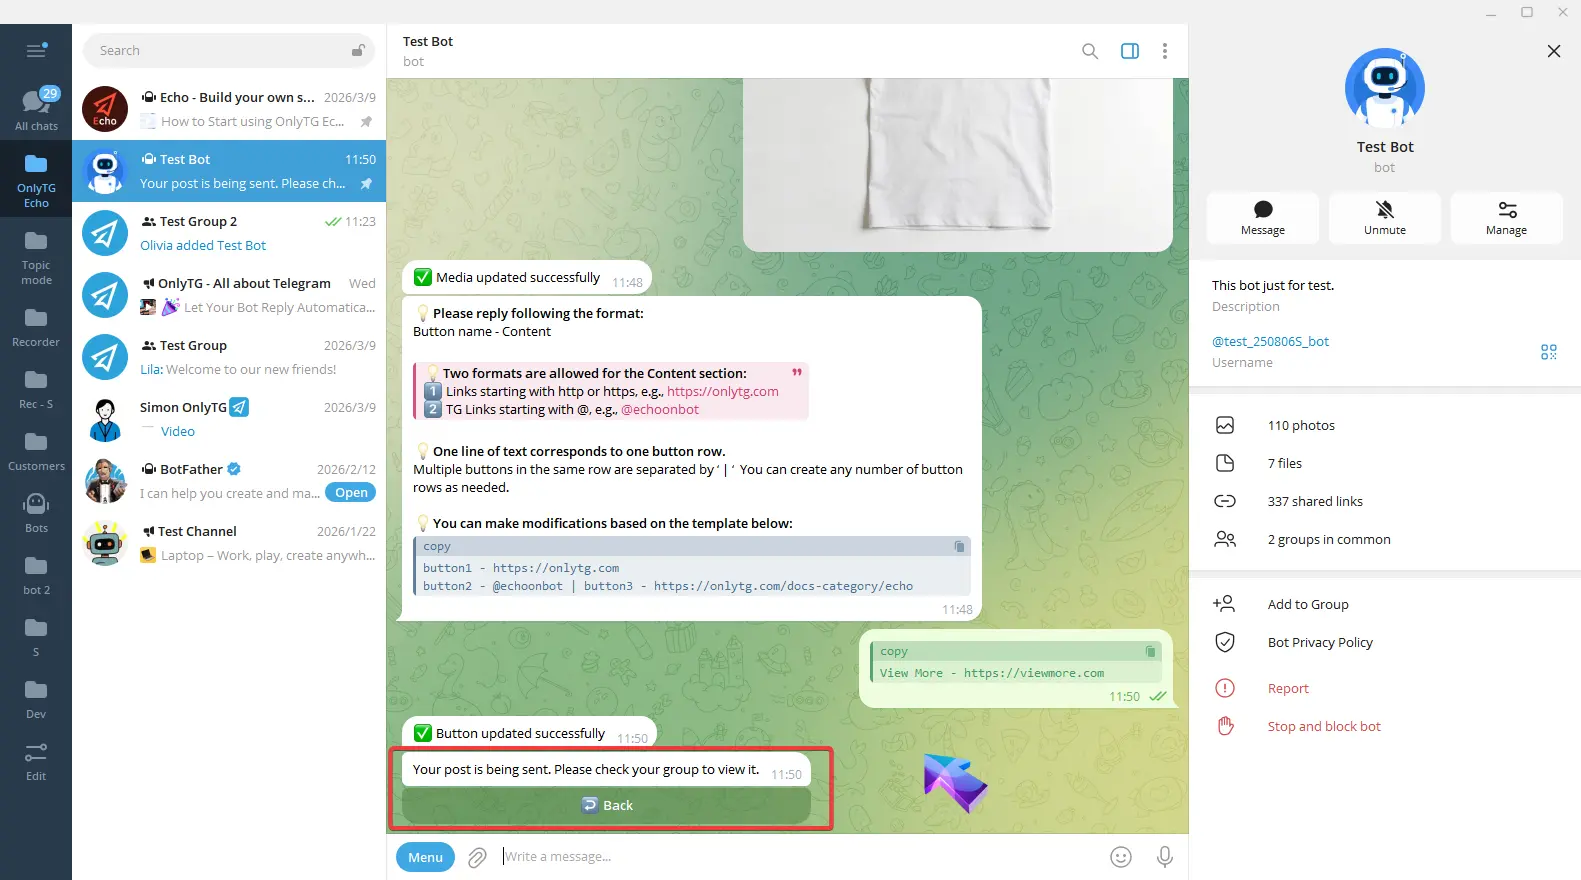
You can click Post Now to publish immediately. Or you can click Schedule to set a future publishing time.
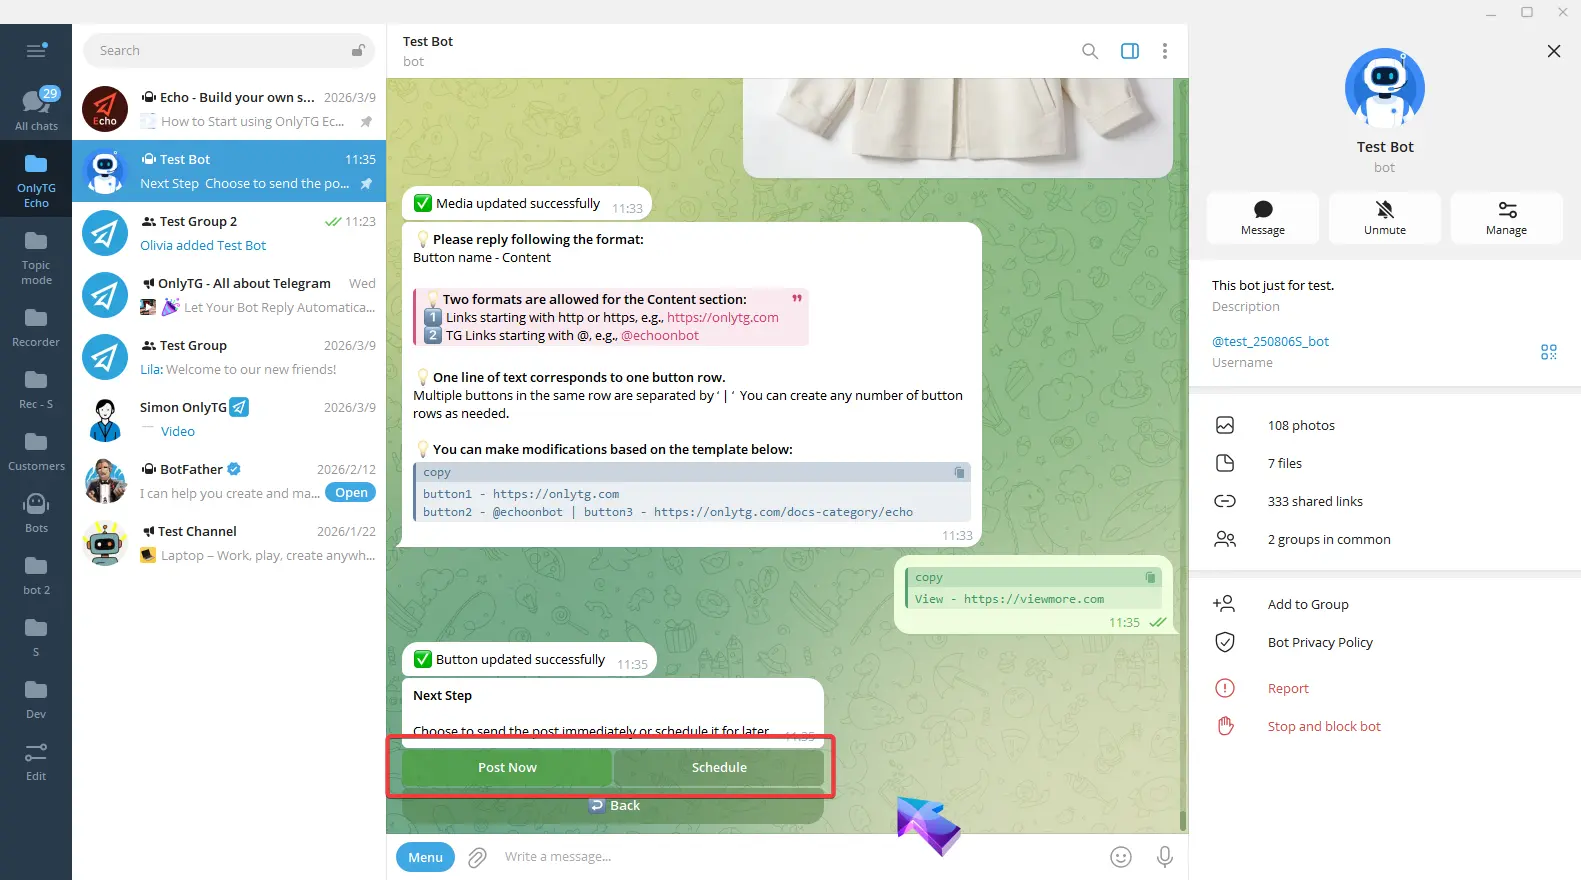
Post Now
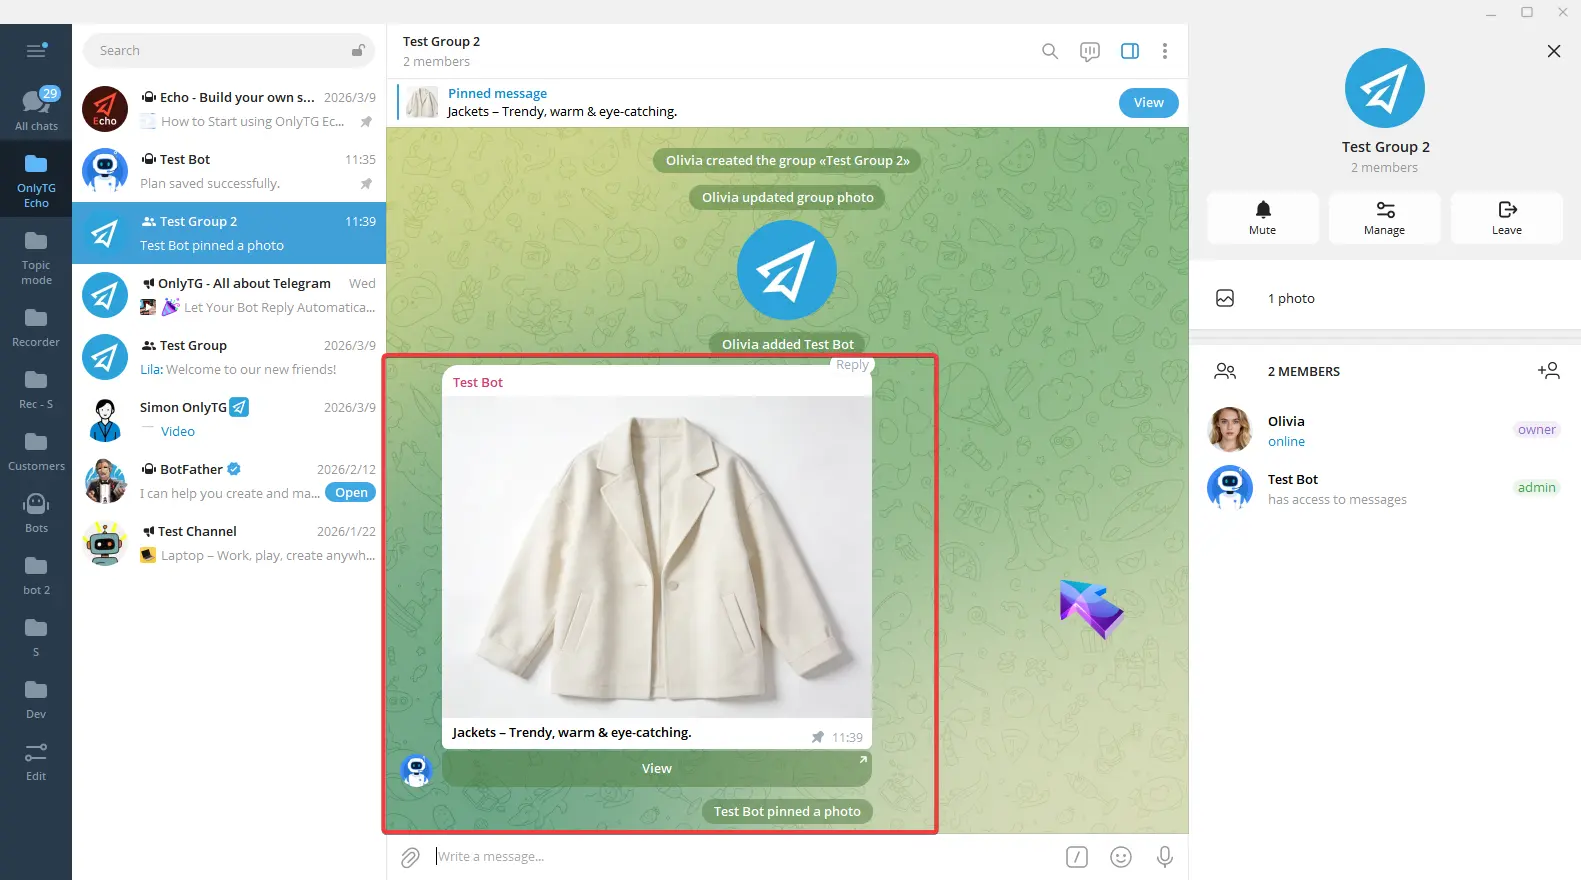
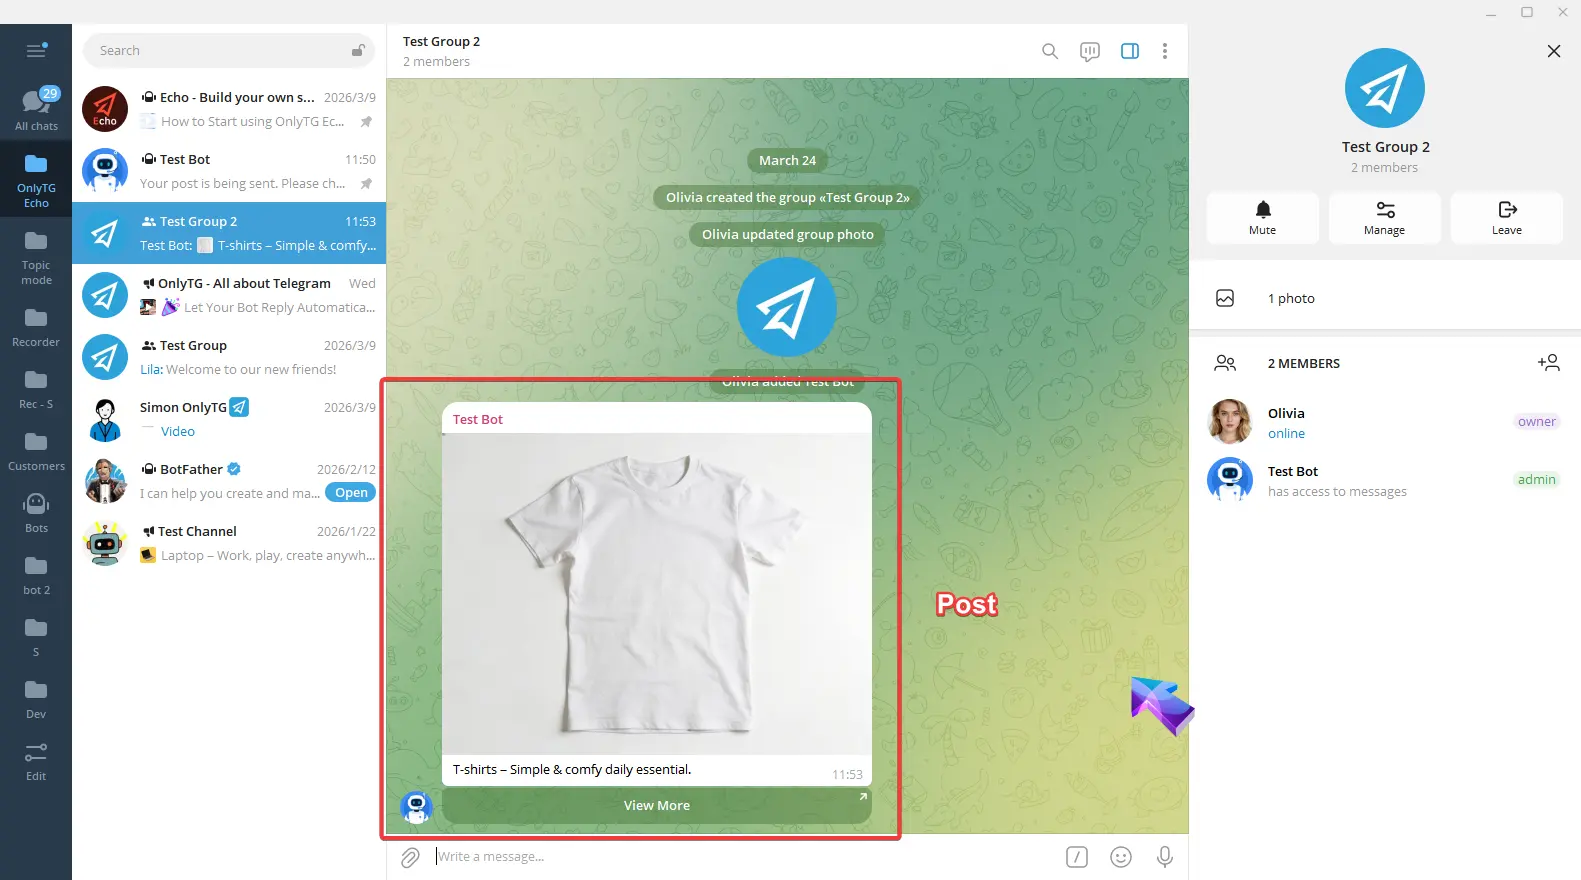
After clicking Post Now, a confirmation message will appear.

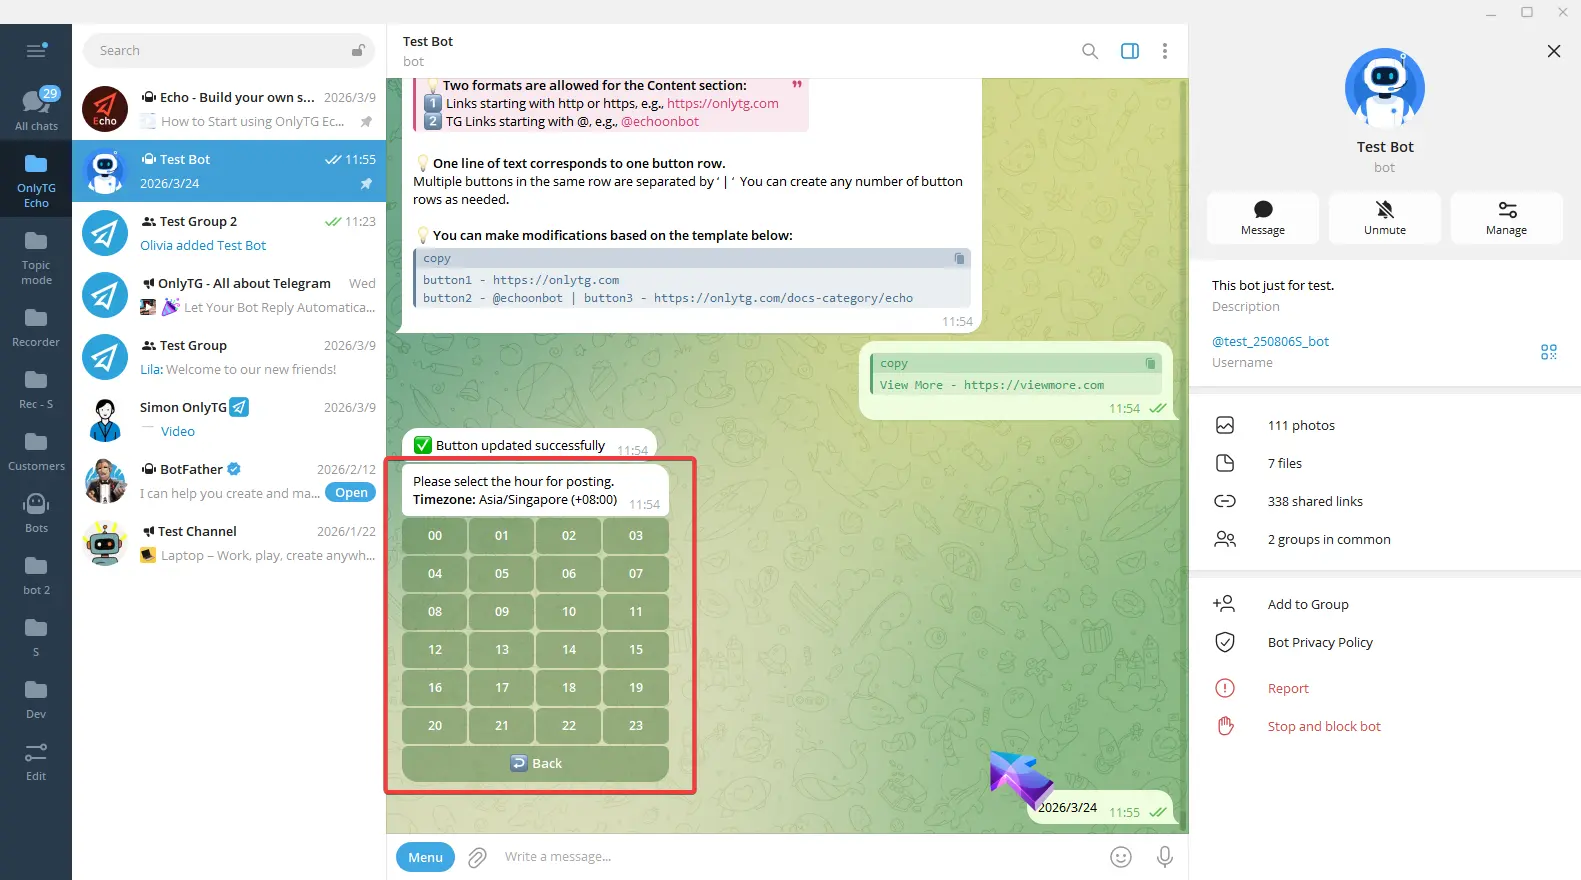
Schedule
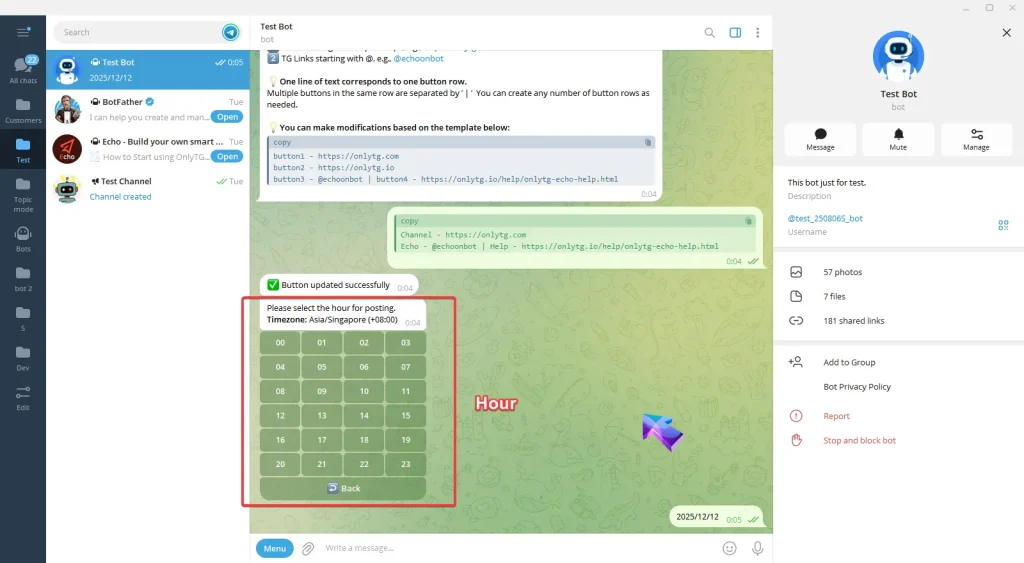
Click Schedule.
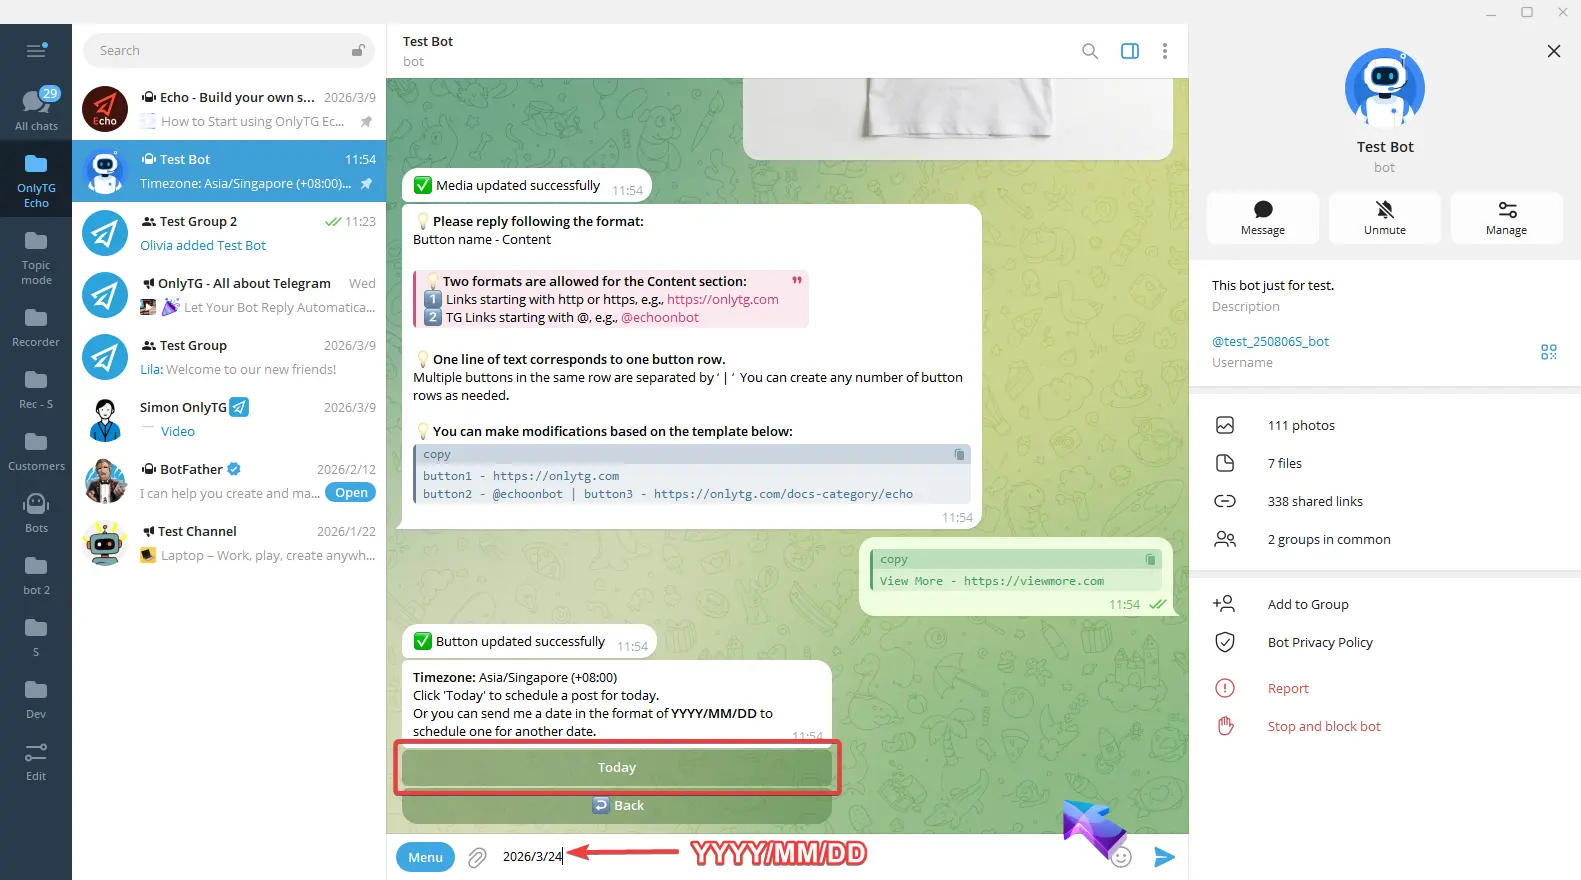
You can either click Today directly or reply the date according to the format of YYYY/MM/DD.
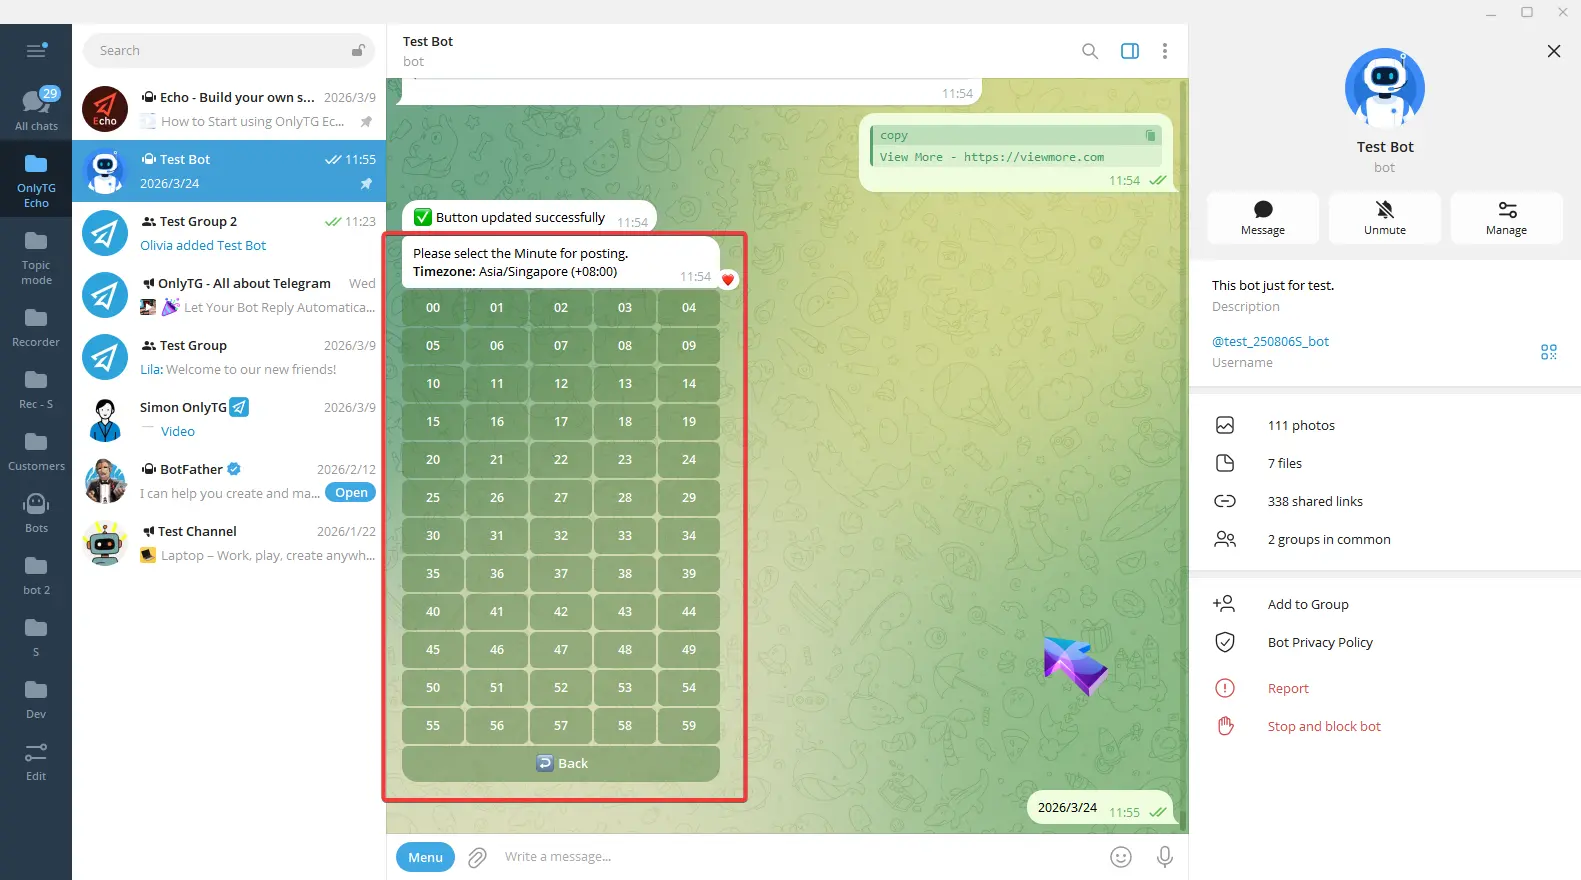
After setting the date, select the specific Hour and Minute (the time follows your configured time zone).

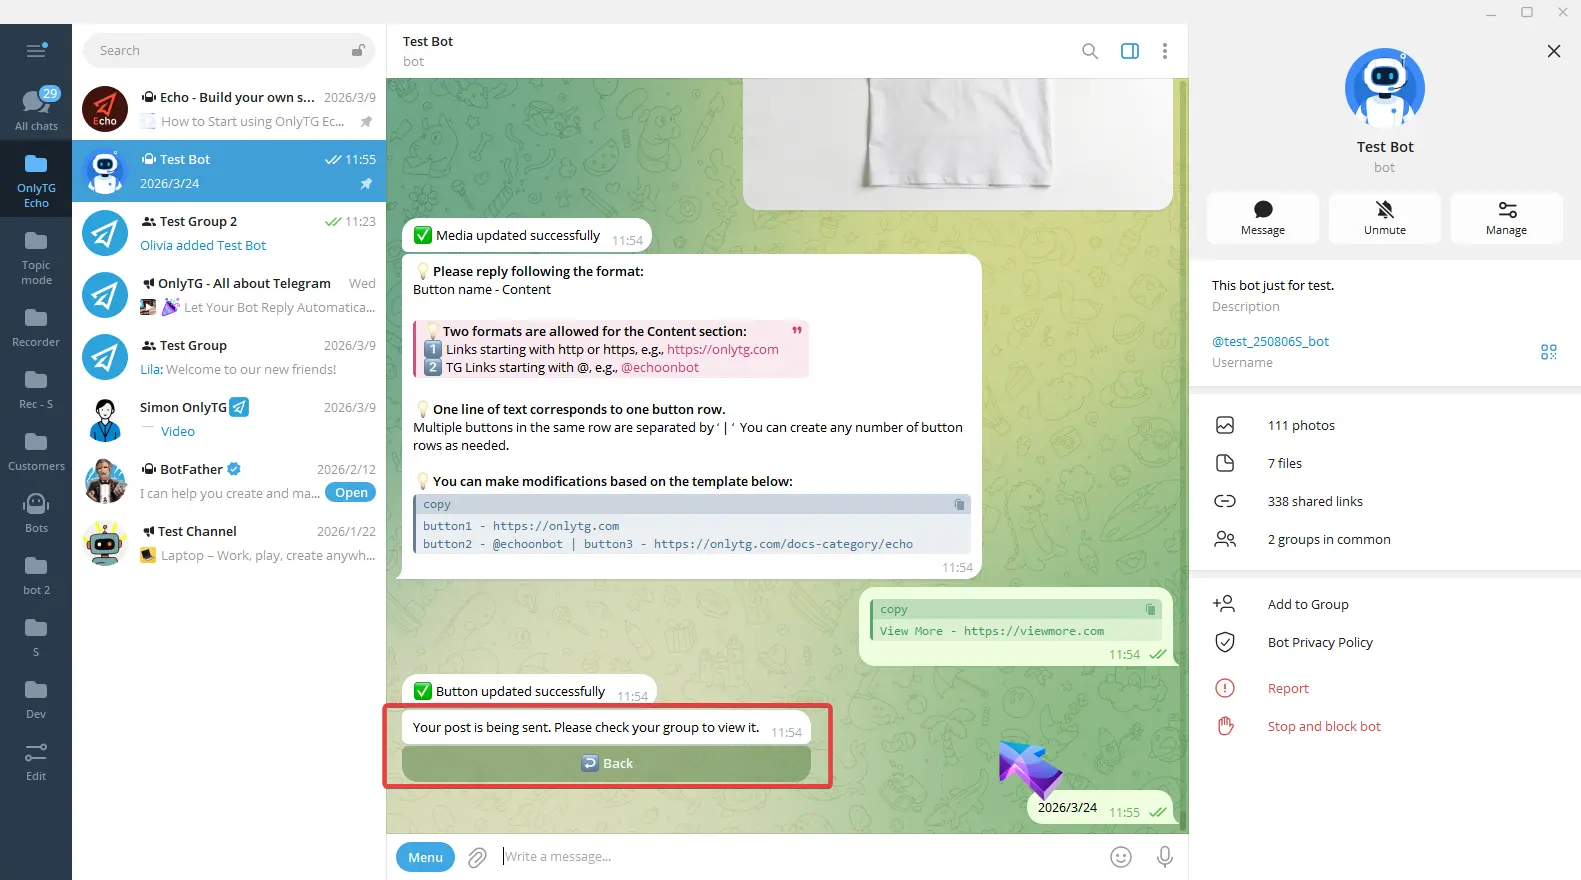
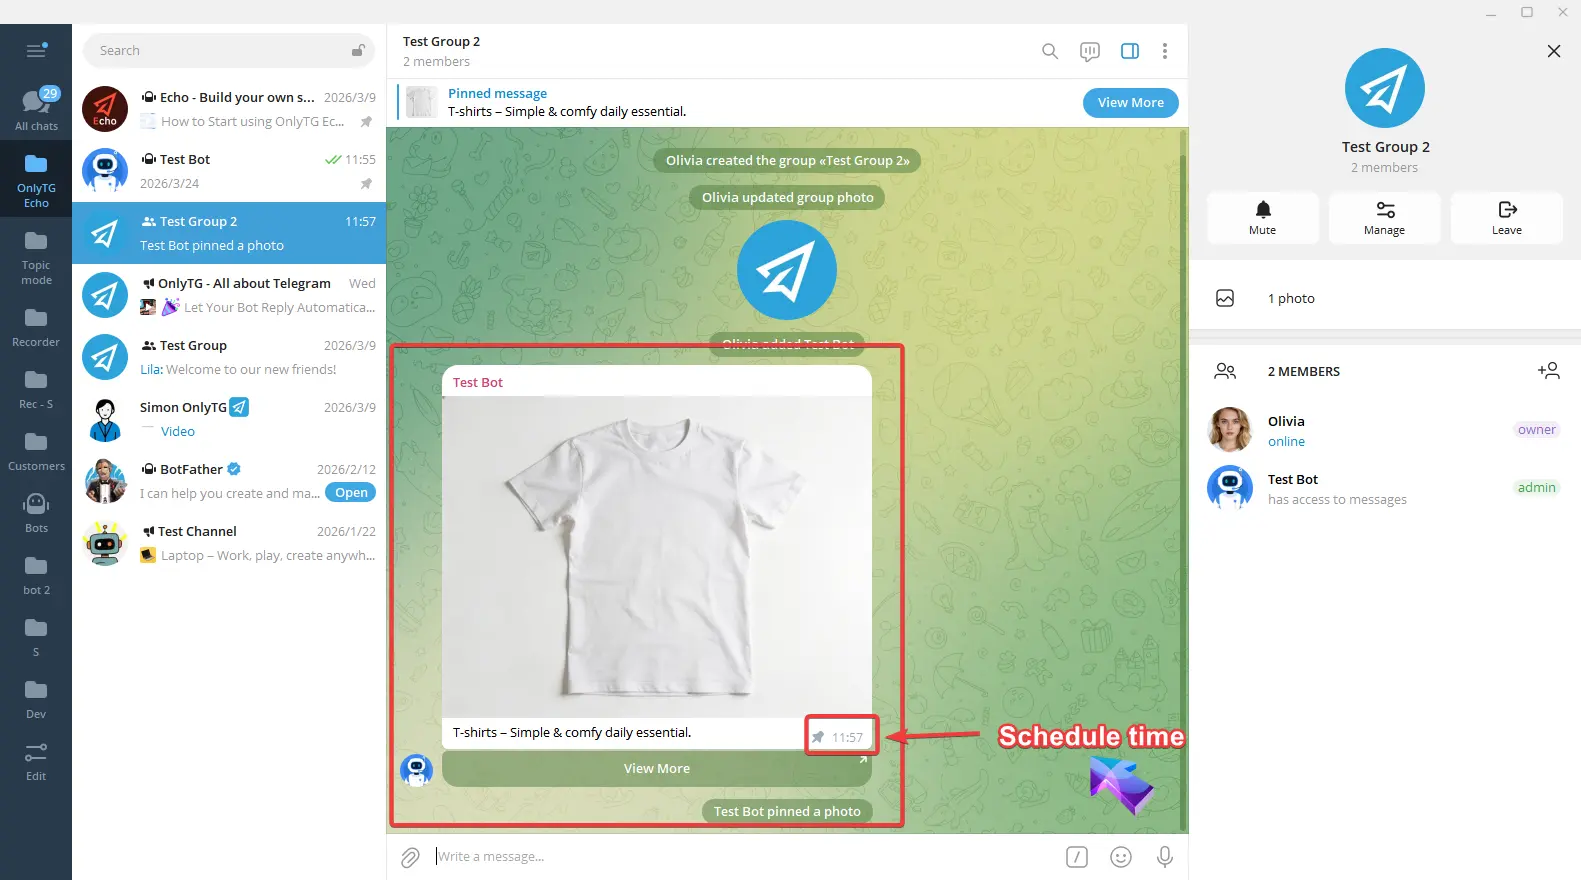
Finally, click Confirm and Post. The post will be published in the channel at the scheduled time.

Loop Post
step 1
Send /start to your Bot, select Group Setting. (See previous tutorials for how to add a Group)
Choose the Group that has been upgraded to Pro access. Loop Post feature is currently exclusive to Pro Groups. (Click here to learn how to upgrade your group’s access)
step 2
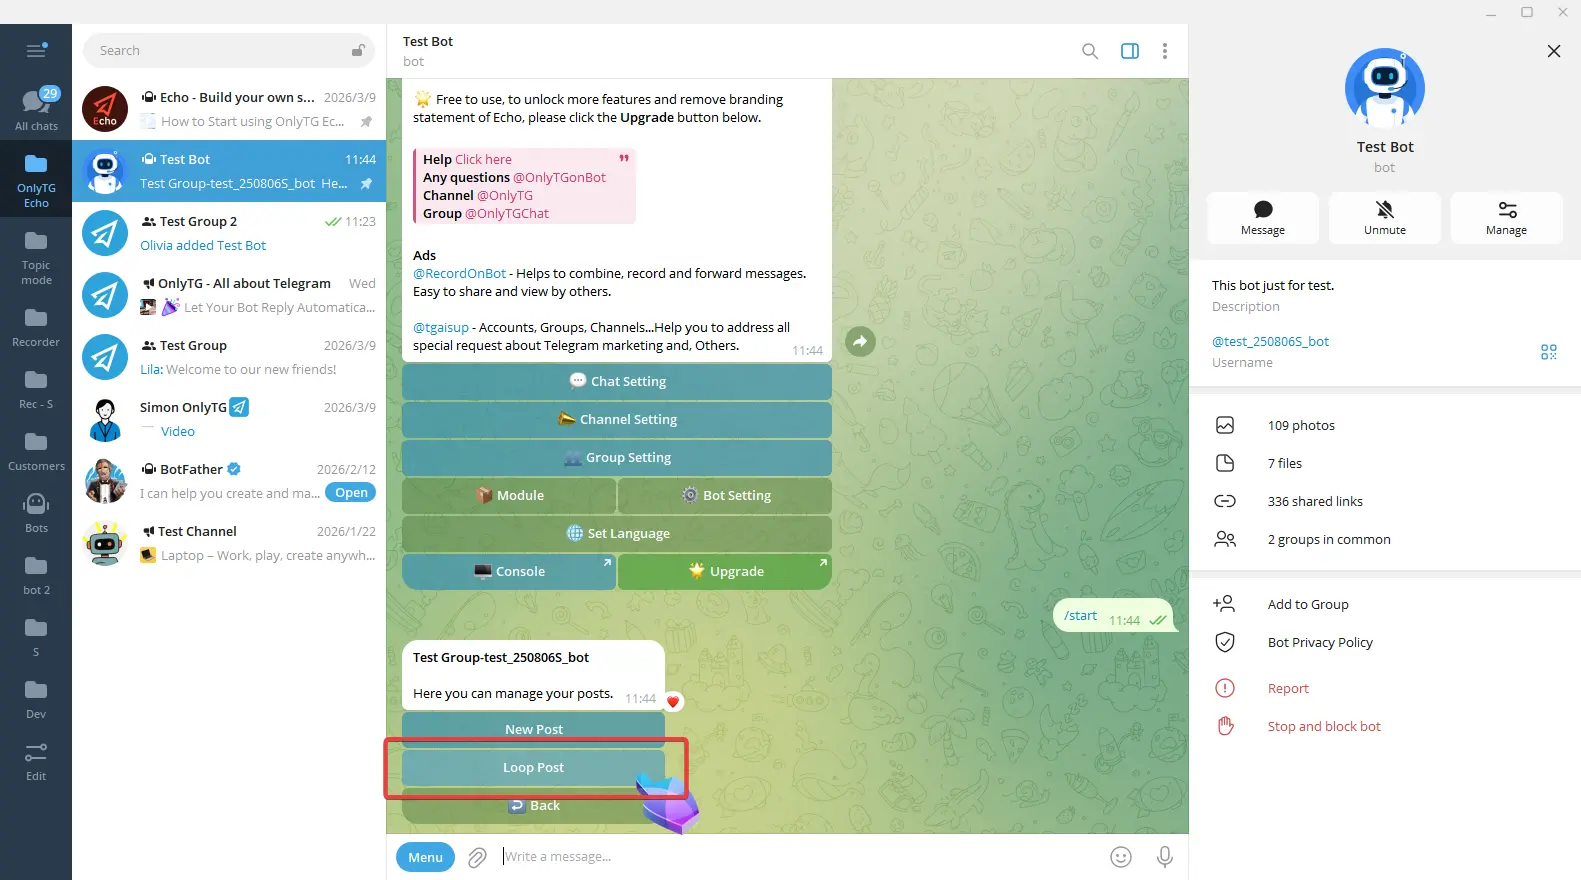
Click Post.
Click Loop Post.
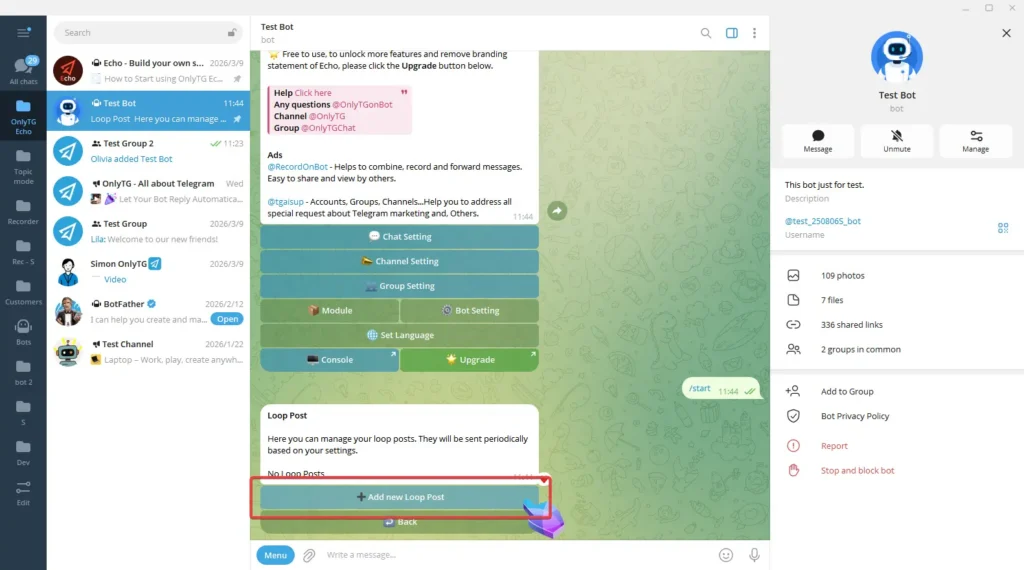
Click Add new Loop Post.
Configure the post content.
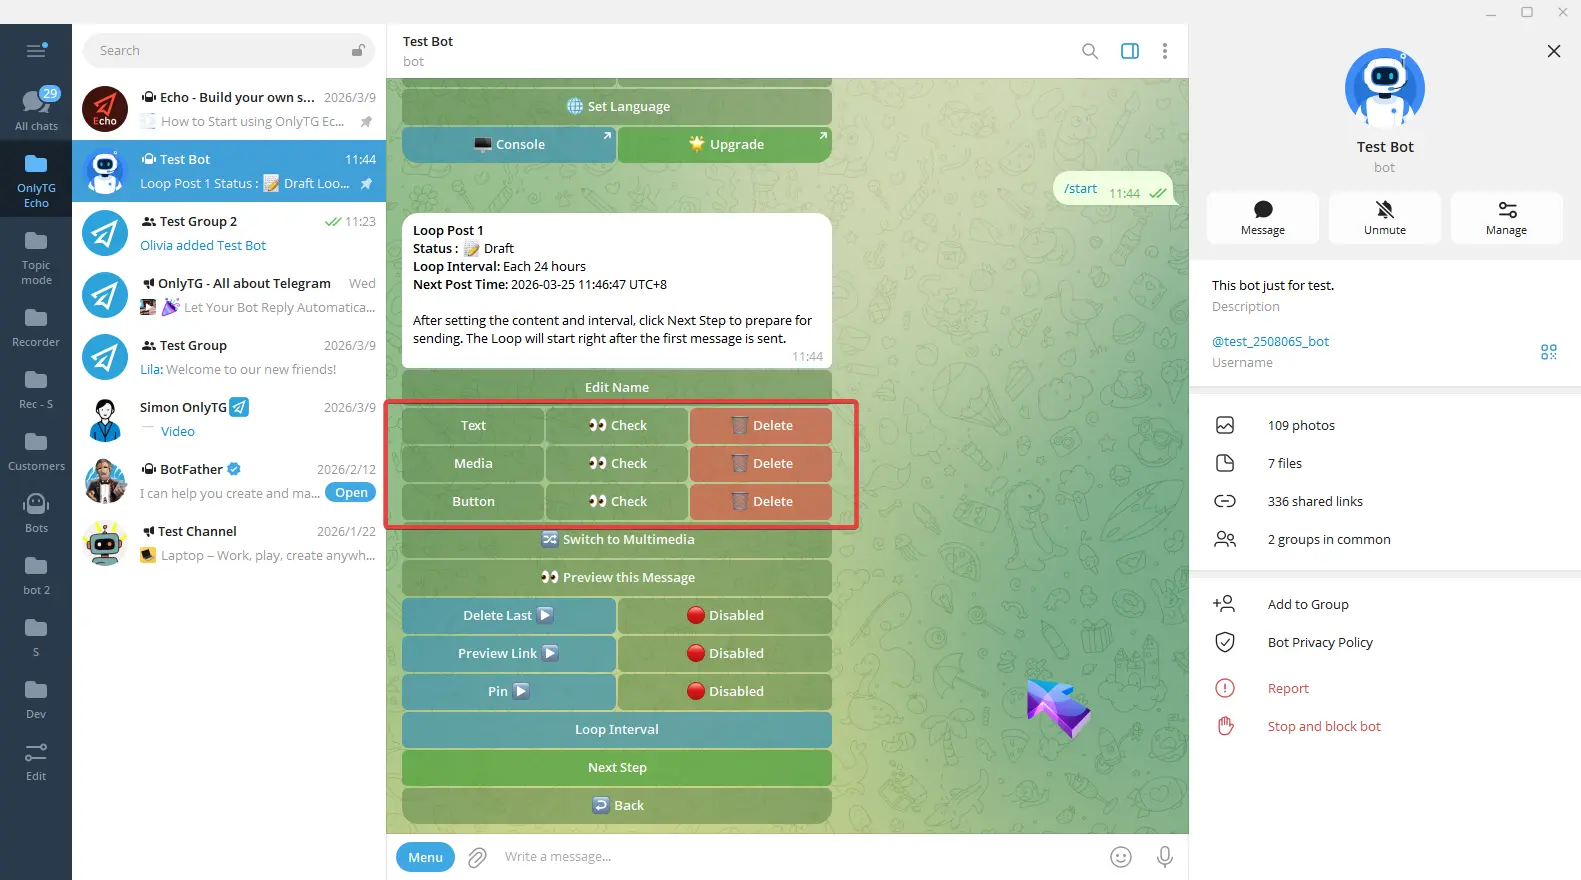
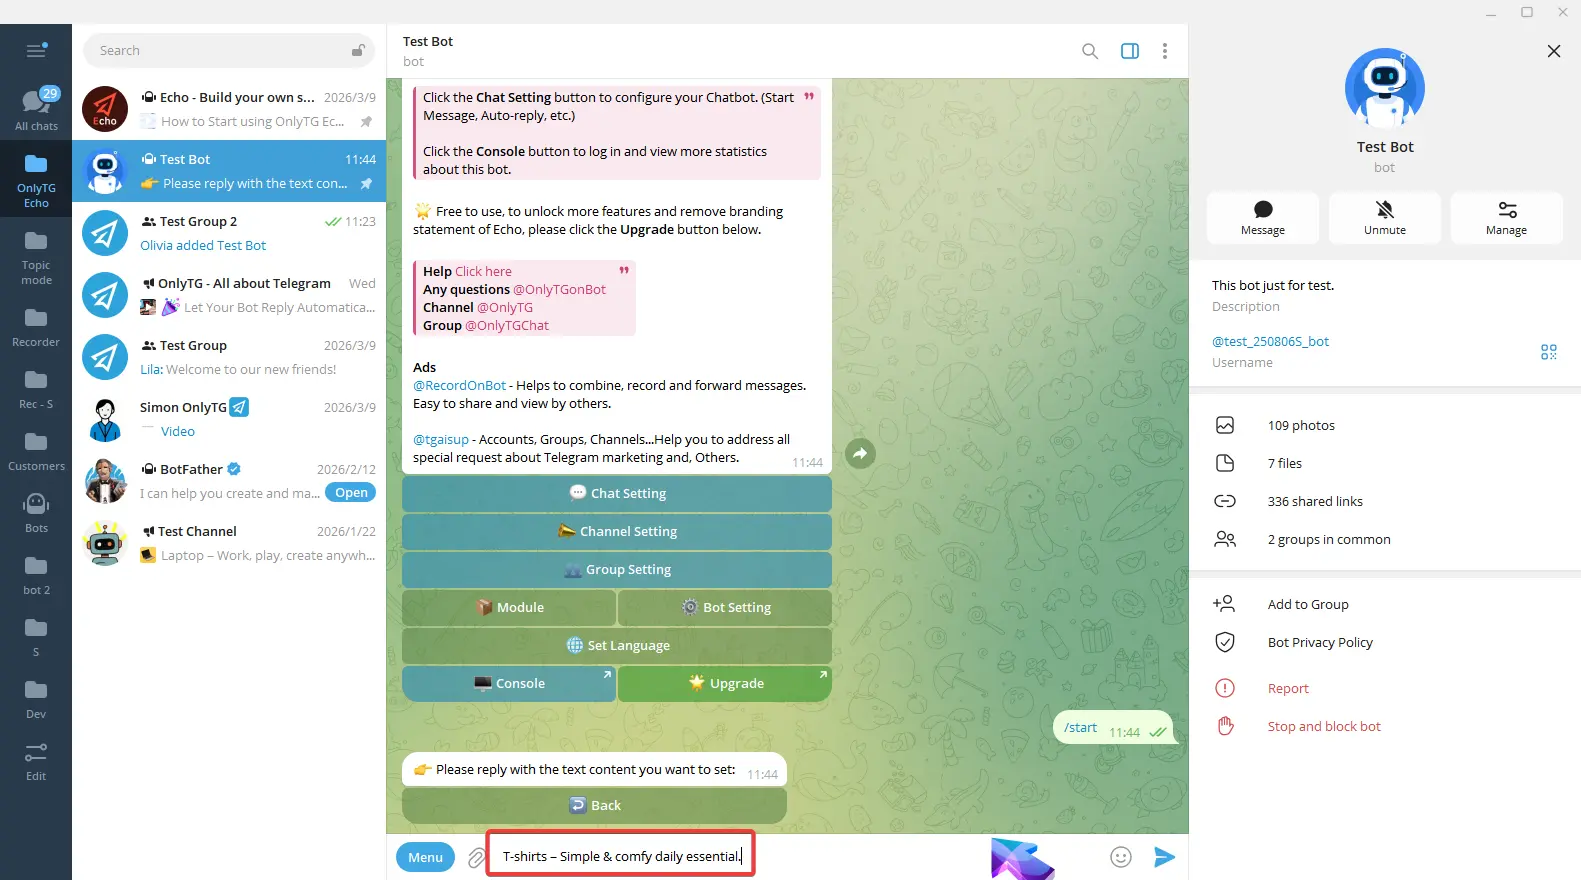
Click Text, and directly enter and send the text content. Once sent, a confirmation message will appear, and a checkmark next to the Text button means the setup is complete.
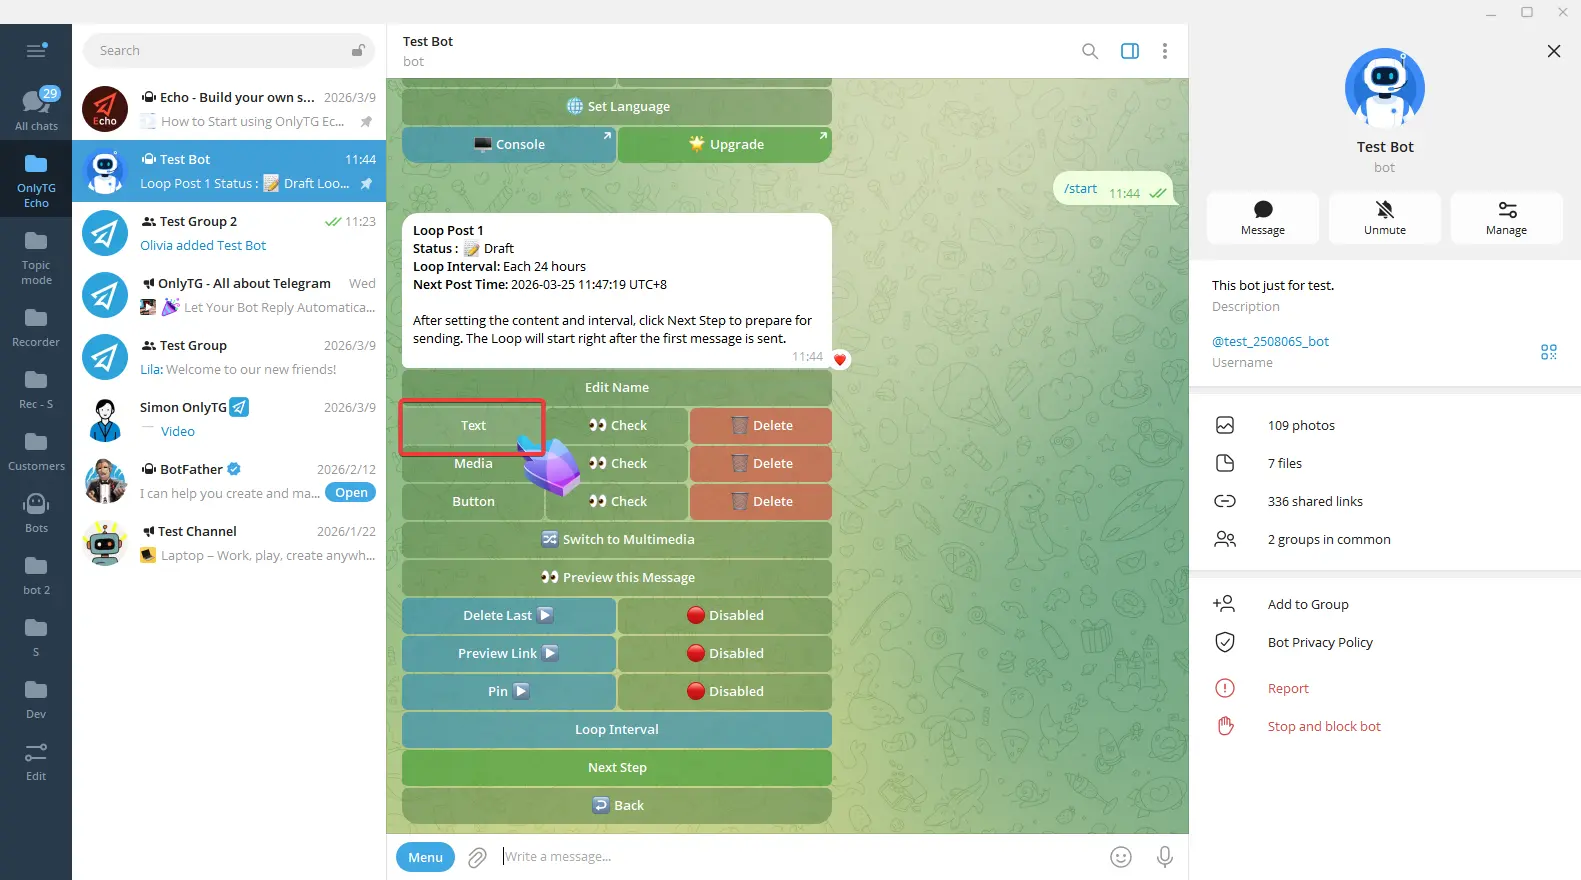
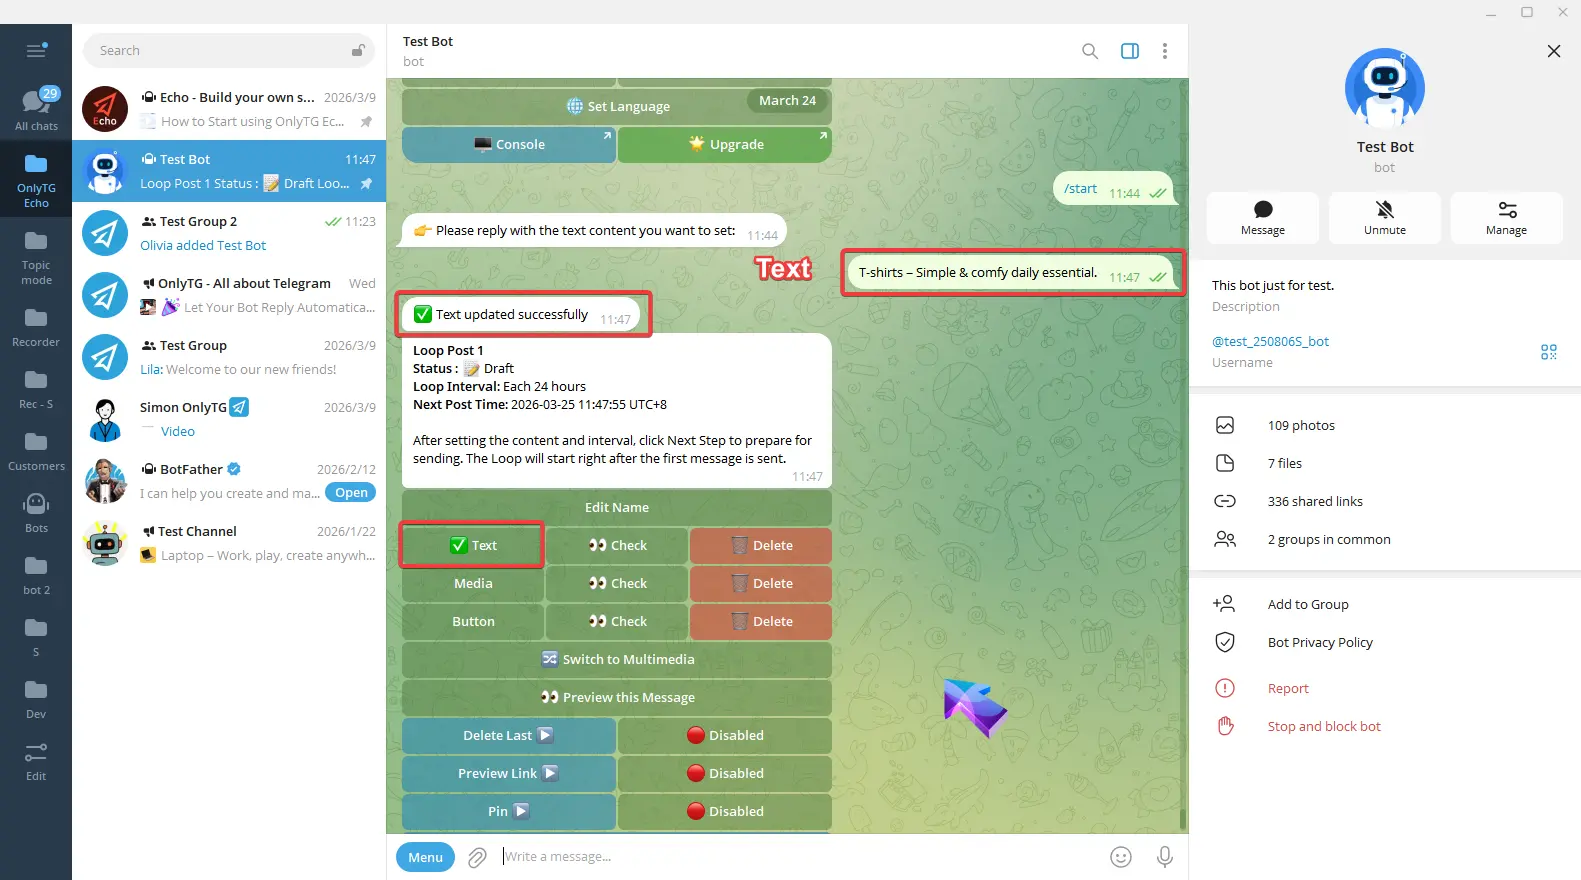
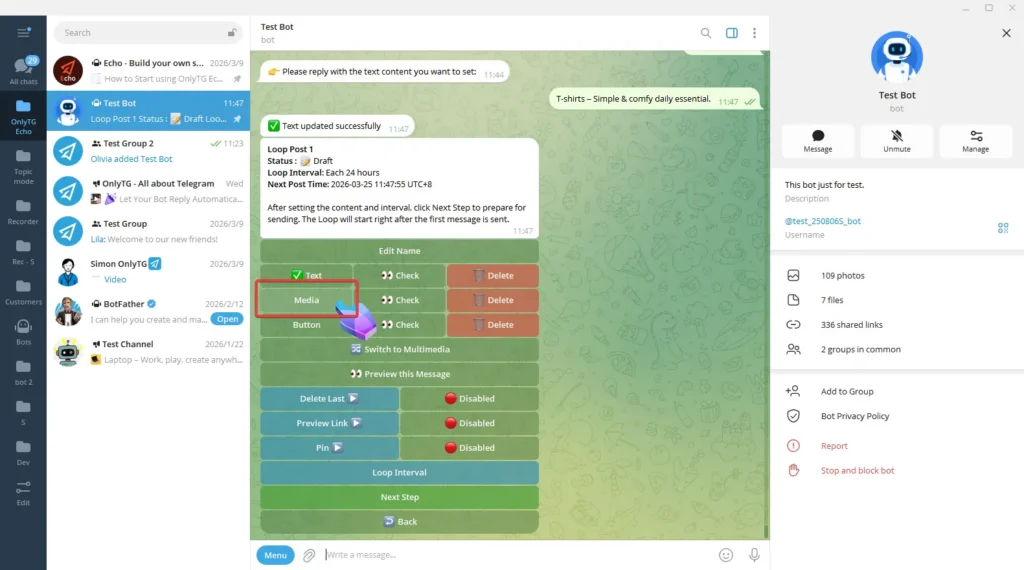
Click Media, select an image, video or file. Once the update success message pops up, and a checkmark next to the Media button means the setup is complete.
Click Button, Enter the content according to the format in the prompt.

You can also copy the example into the input box and edit it.
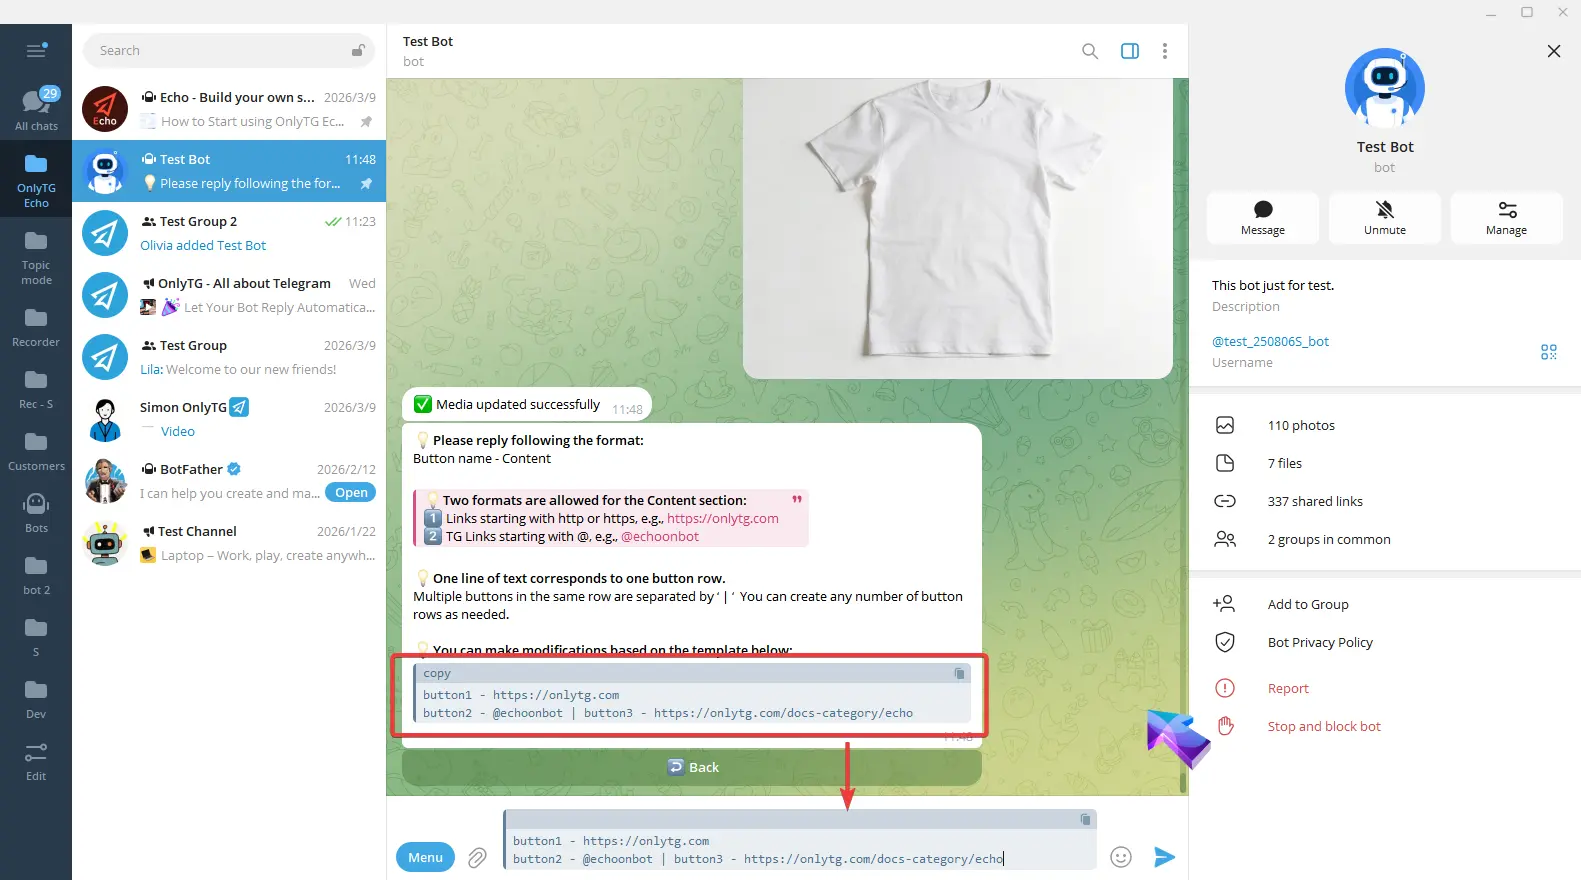
For example: I want only one button now, so I will delete the following line. Then I change button1 to my desired button name, and replace the link with my own.
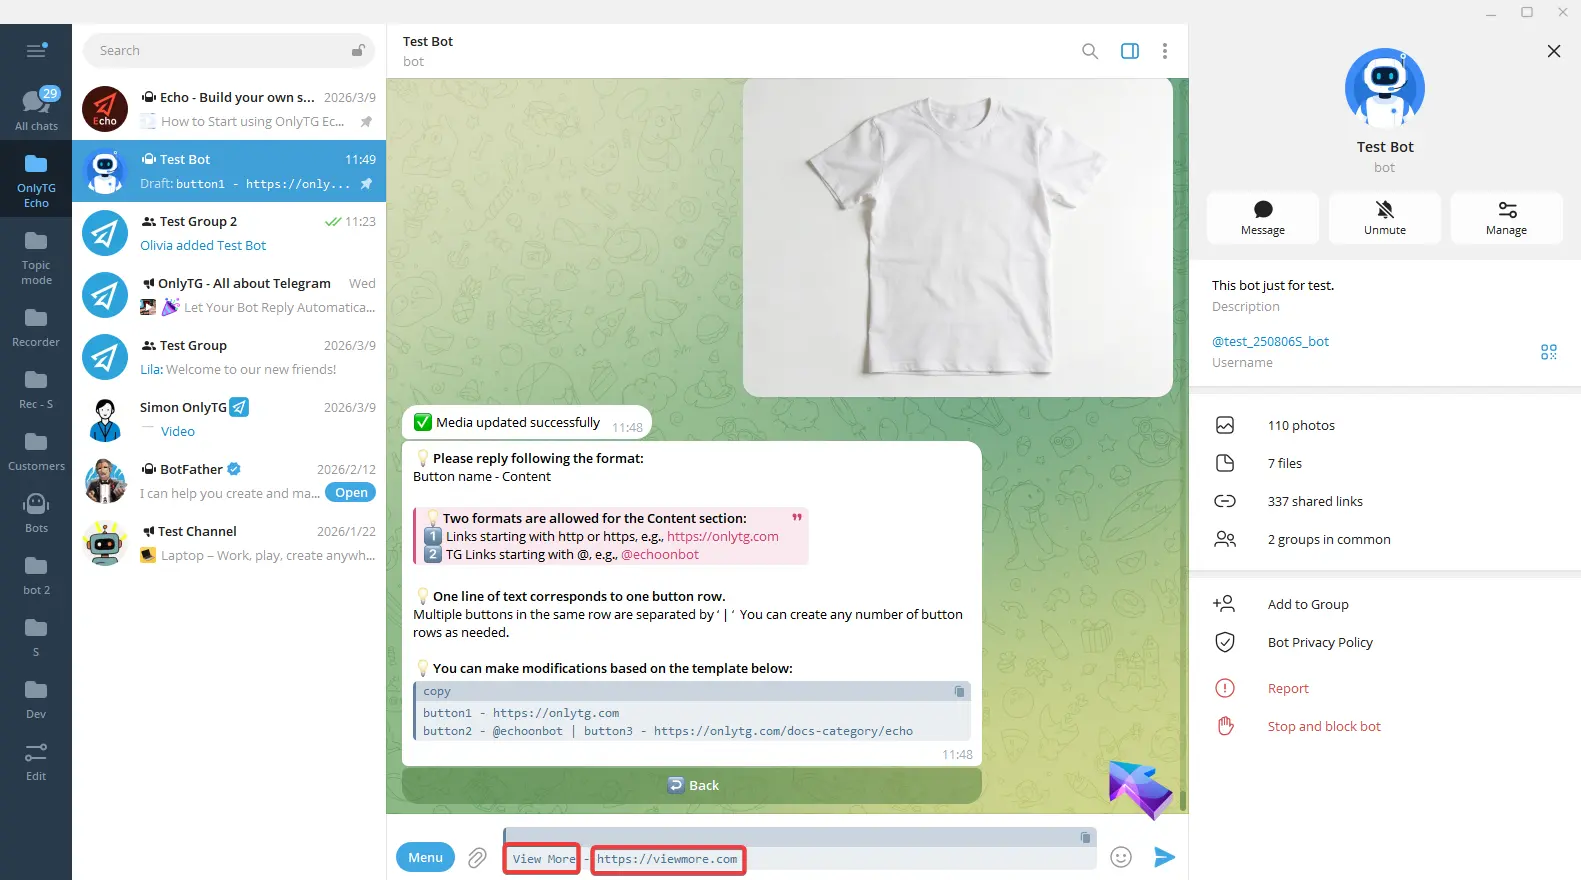
Finish editing and send. Once the update success message pops up, and a checkmark next to the Button means the setup is complete.
Switch to Multimedia: Convert the post to a mode which you can configure text and multiple images/videos, but files and buttons are not supported. We won’t use this mode for now. (Click here to learn how to set multimedia messages)
After completing the above configurations, click here to preview the post.


step 3
You’ll see three features here and you can choose to enable them based on your needs:

Delete Last: When enabled, the previous post sent in this loop will be deleted before a new post is sent.
Preview Link: When enabled, it will show a preview of the link in your post.
Pin: When enabled, this post will be pinned in the group.
step 4
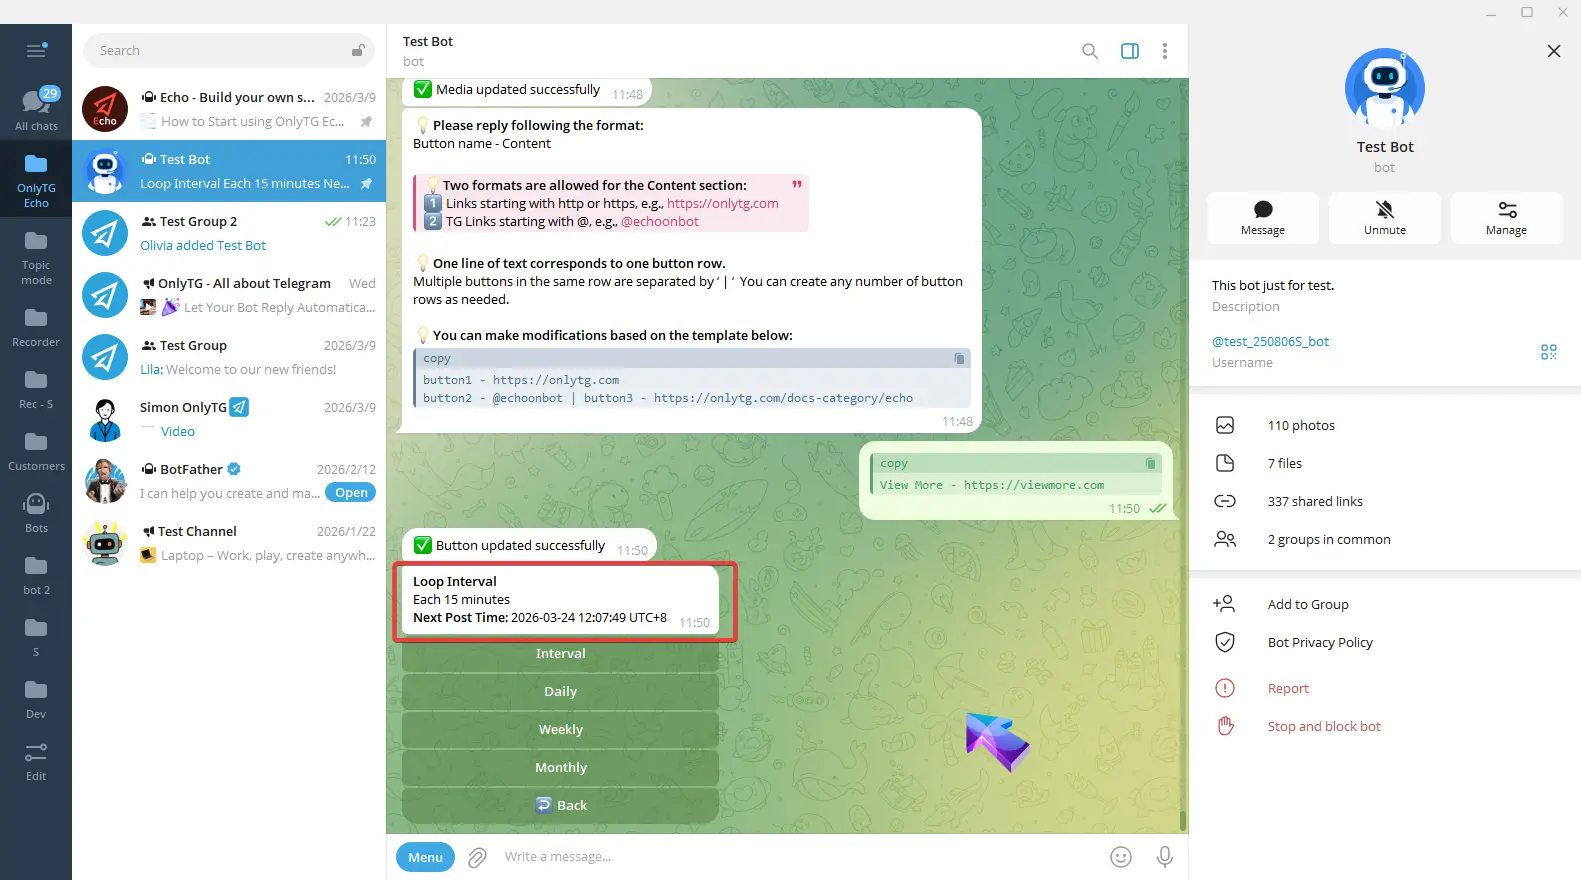
Next, click Loop Interval.

You can directly use these buttons here to set Daily, Weekly, or Monthly loops.
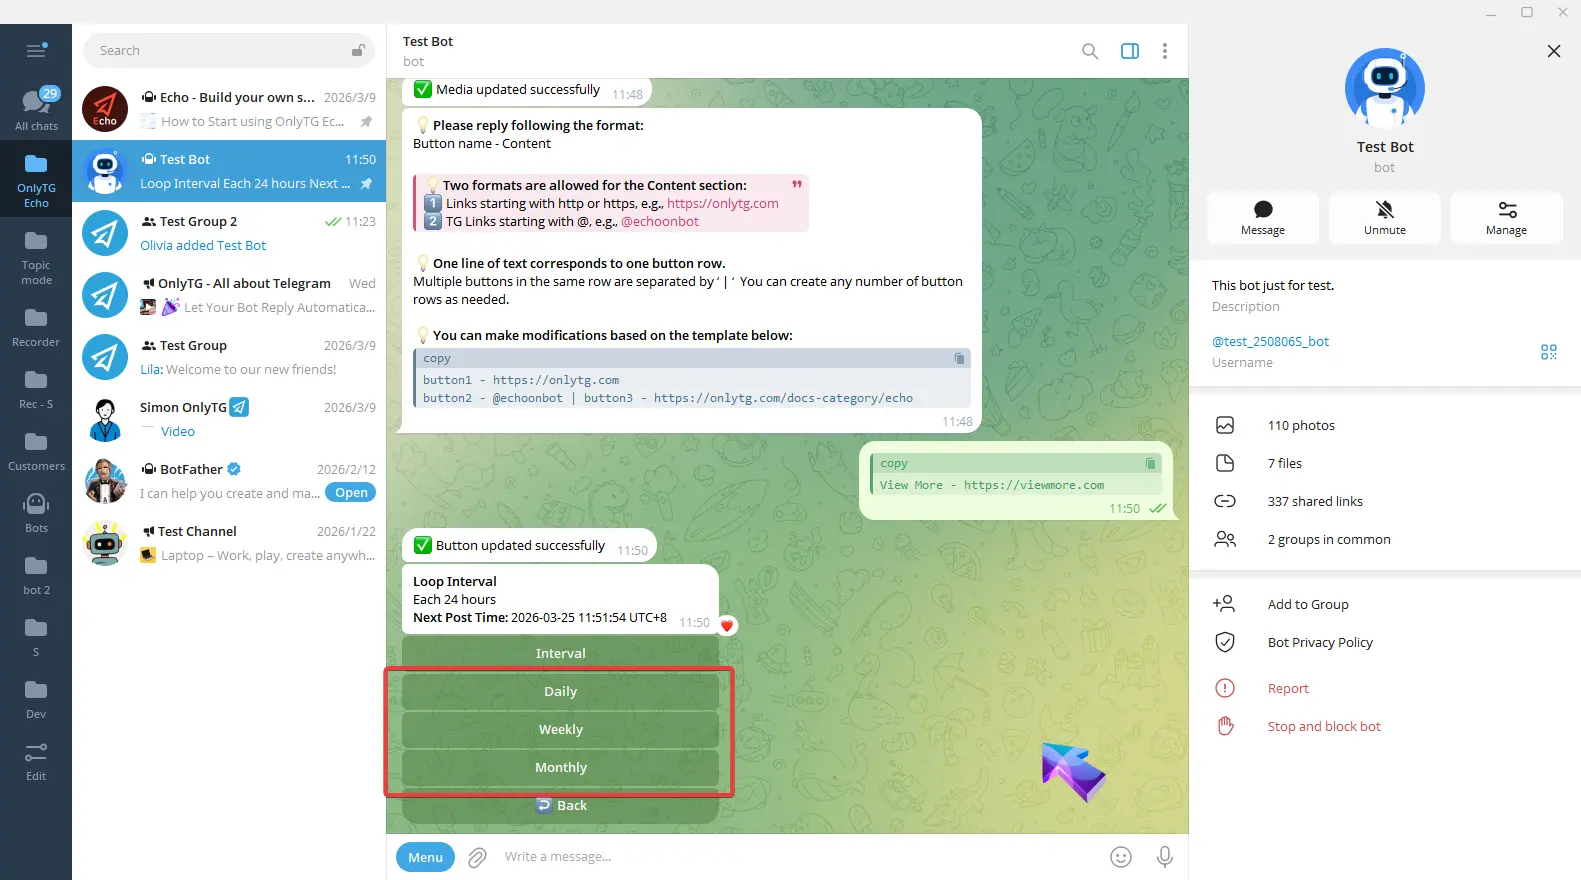
Or click Interval to set an interval within 24 hours.

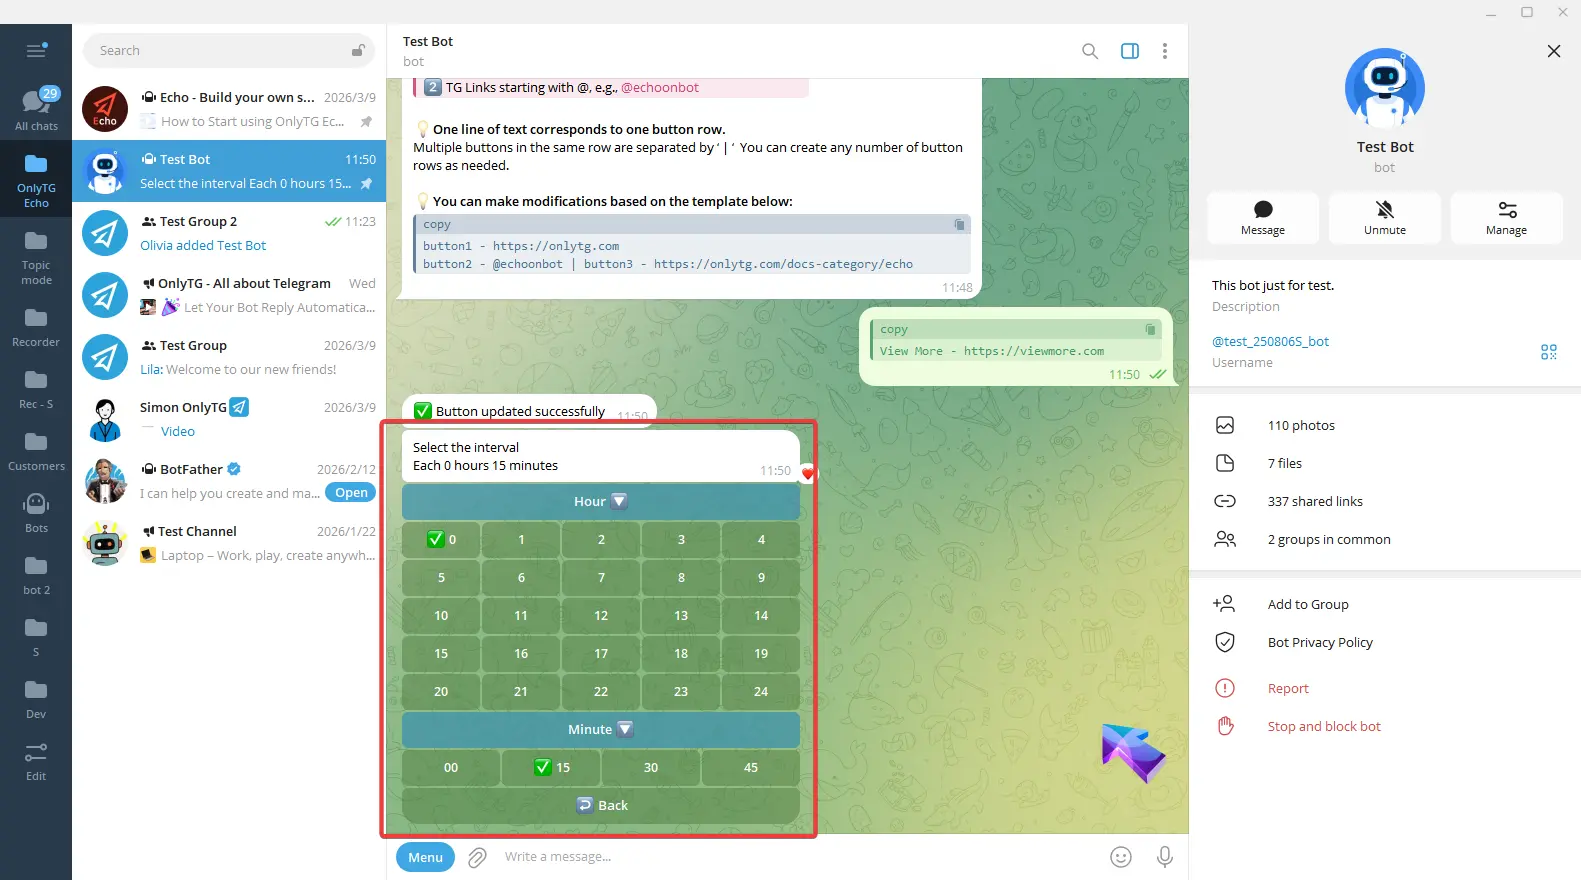
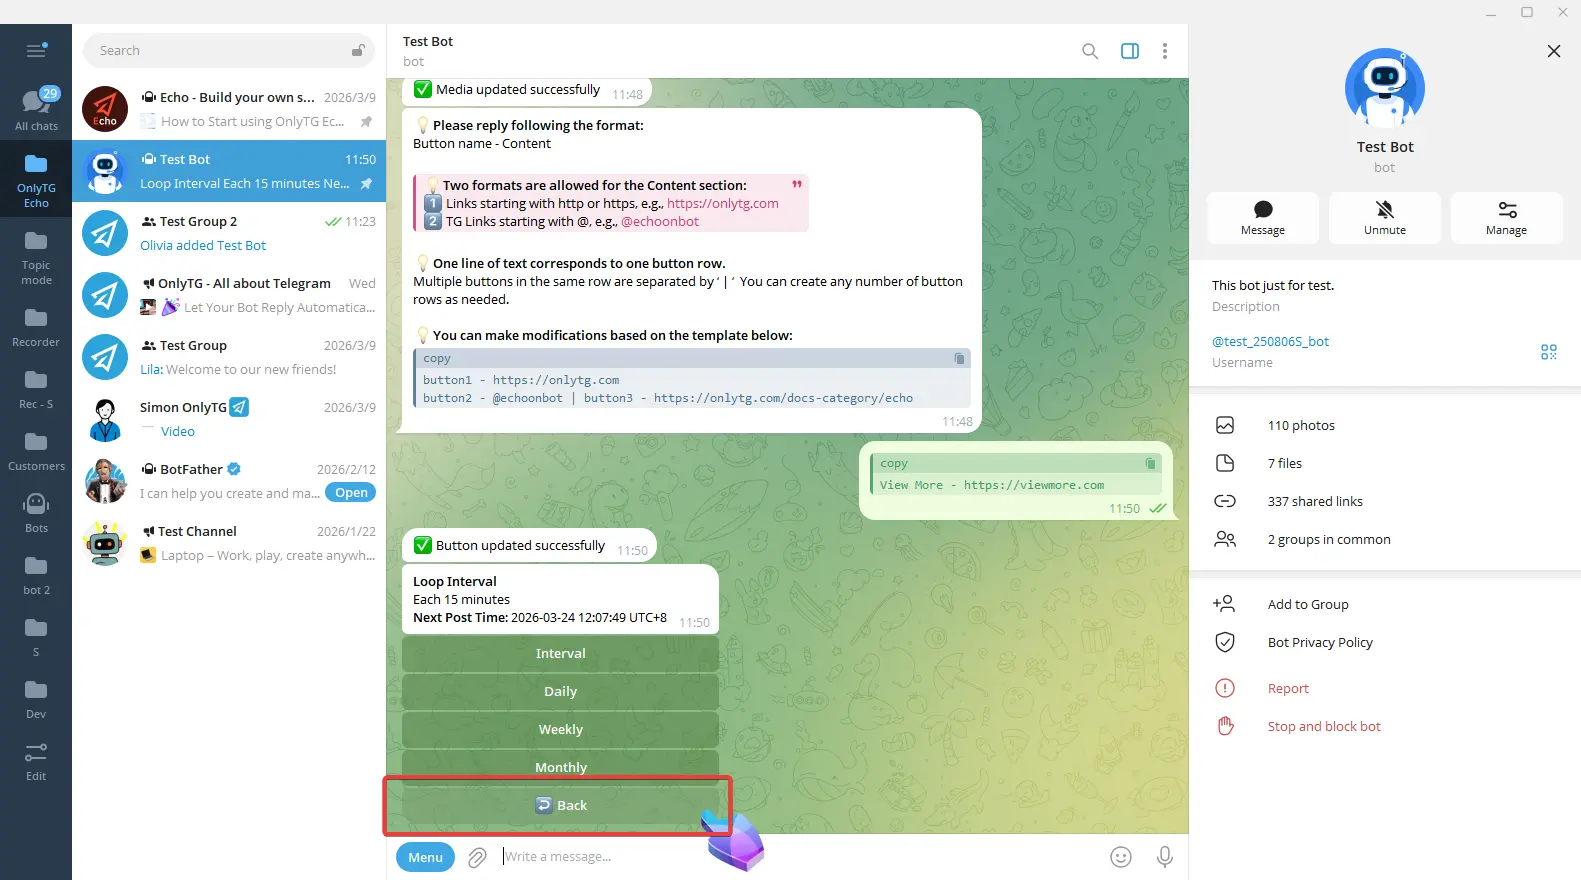
Click Back, Here you can view the loop interval and the exact time of the next post.

Click Back, then click Next Step.
step 5
You can click Post Now to publish immediately. Or you can click Schedule to set a future publishing time.
Post Now
After clicking Post Now, a confirmation message will appear.
Schedule
Click Schedule

You can either click Today directly or reply the date according to the format of YYYY/MM/DD.

After setting the date, select the specific Hour and Minute (the time follows your configured time zone).

Finally, click Confirm and Post. The post will be published in the channel at the scheduled time.


step 6
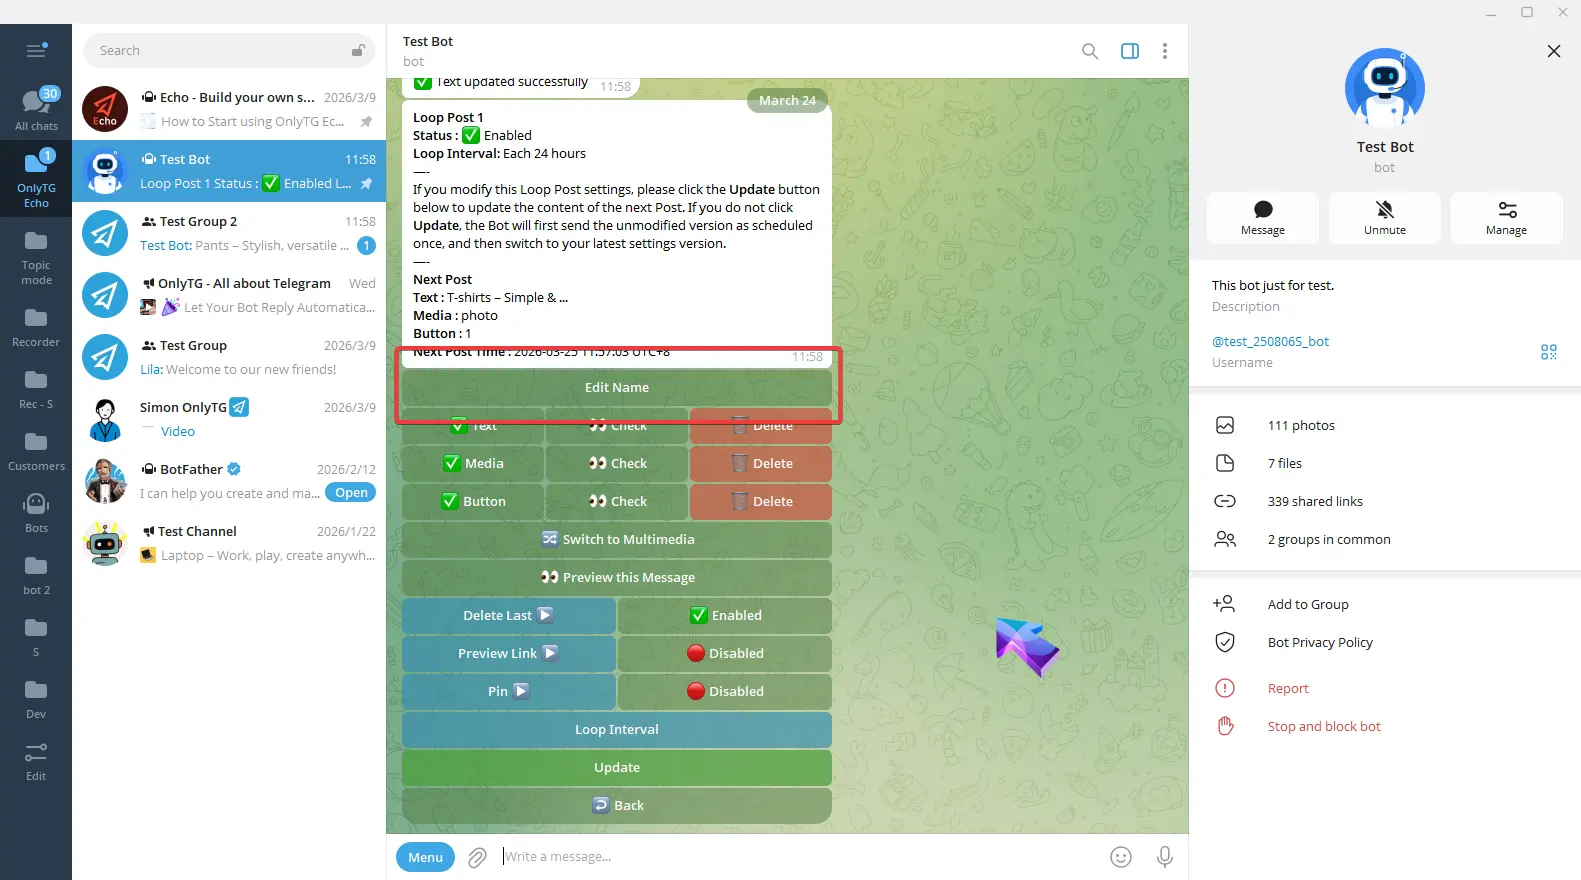
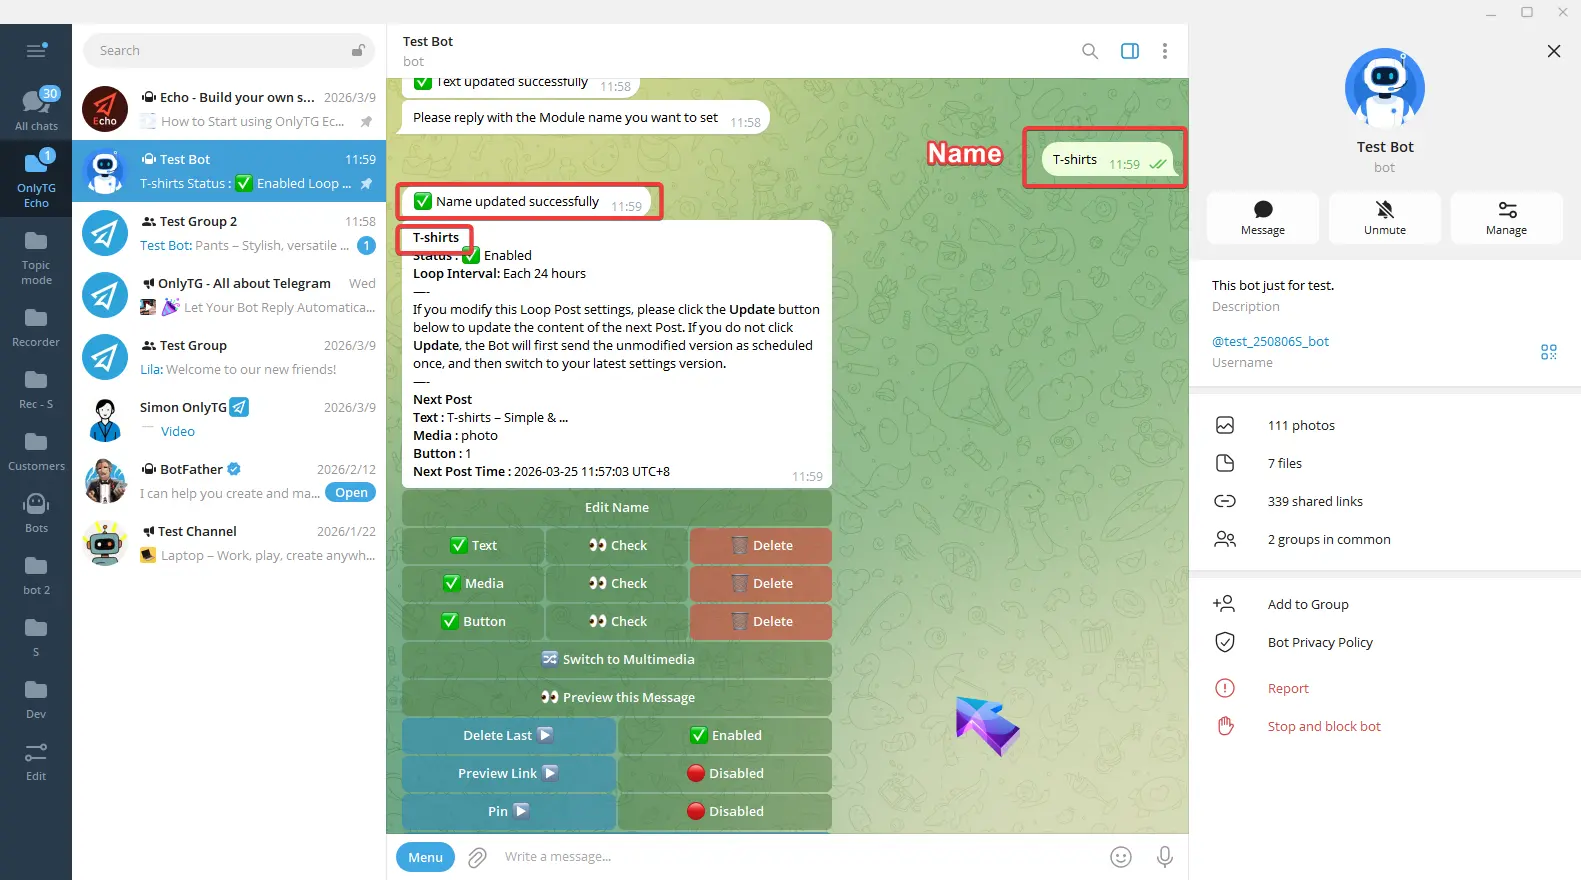
In addition, you can edit the name of this loop post by clicking Edit Name and replying with the new name.This is for easier identification and search.
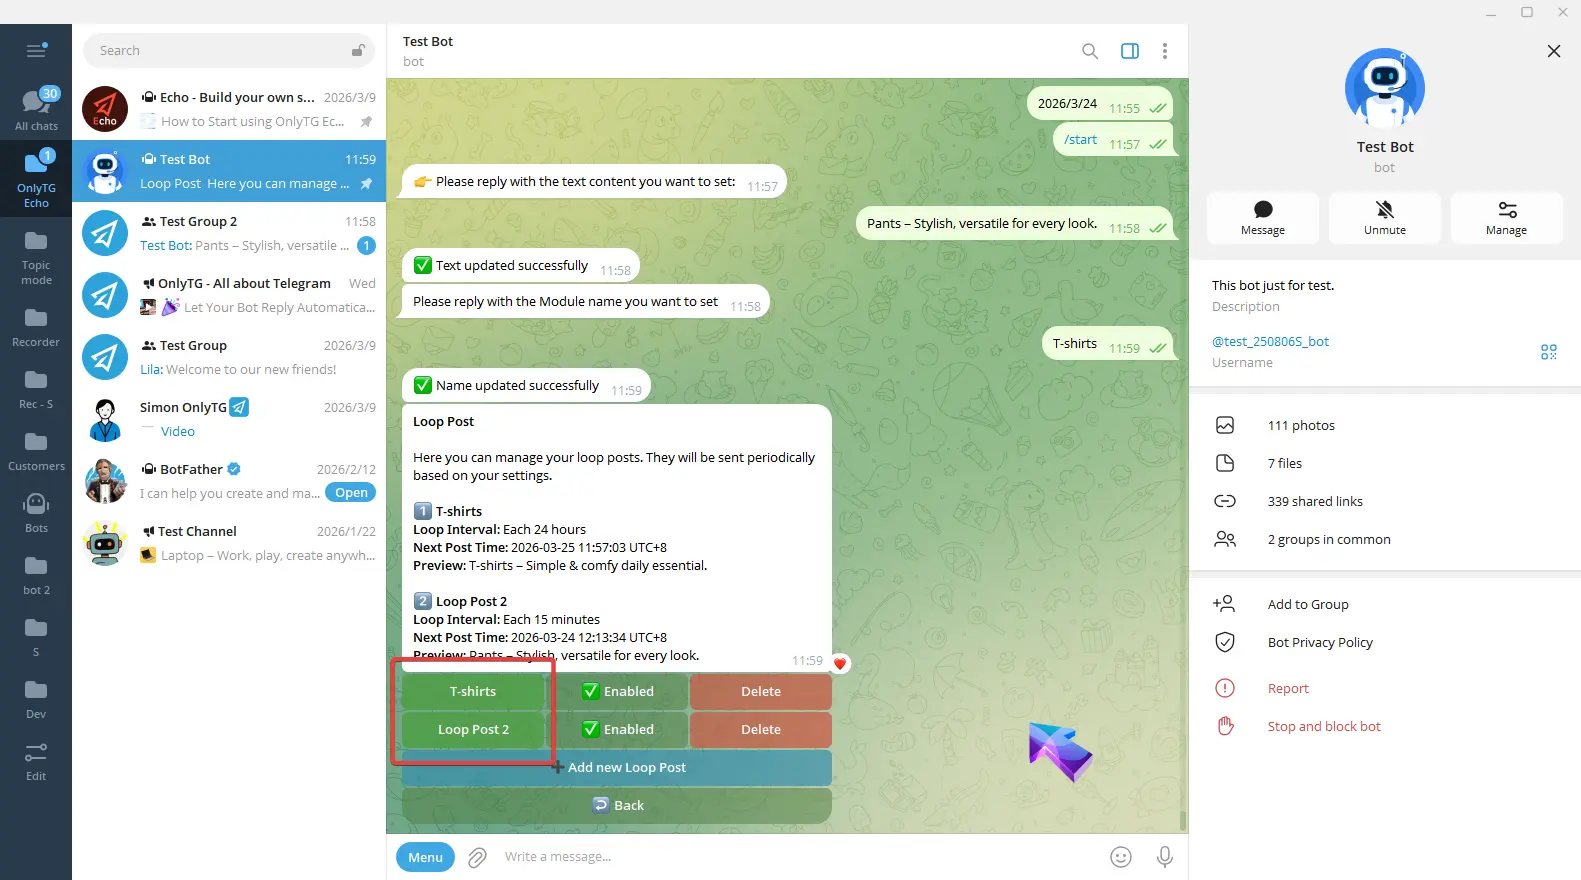
Repeat the above steps to add multiple Loop Posts, and you’ll achieve the effect of having multiple posts auto-looping simultaneously.
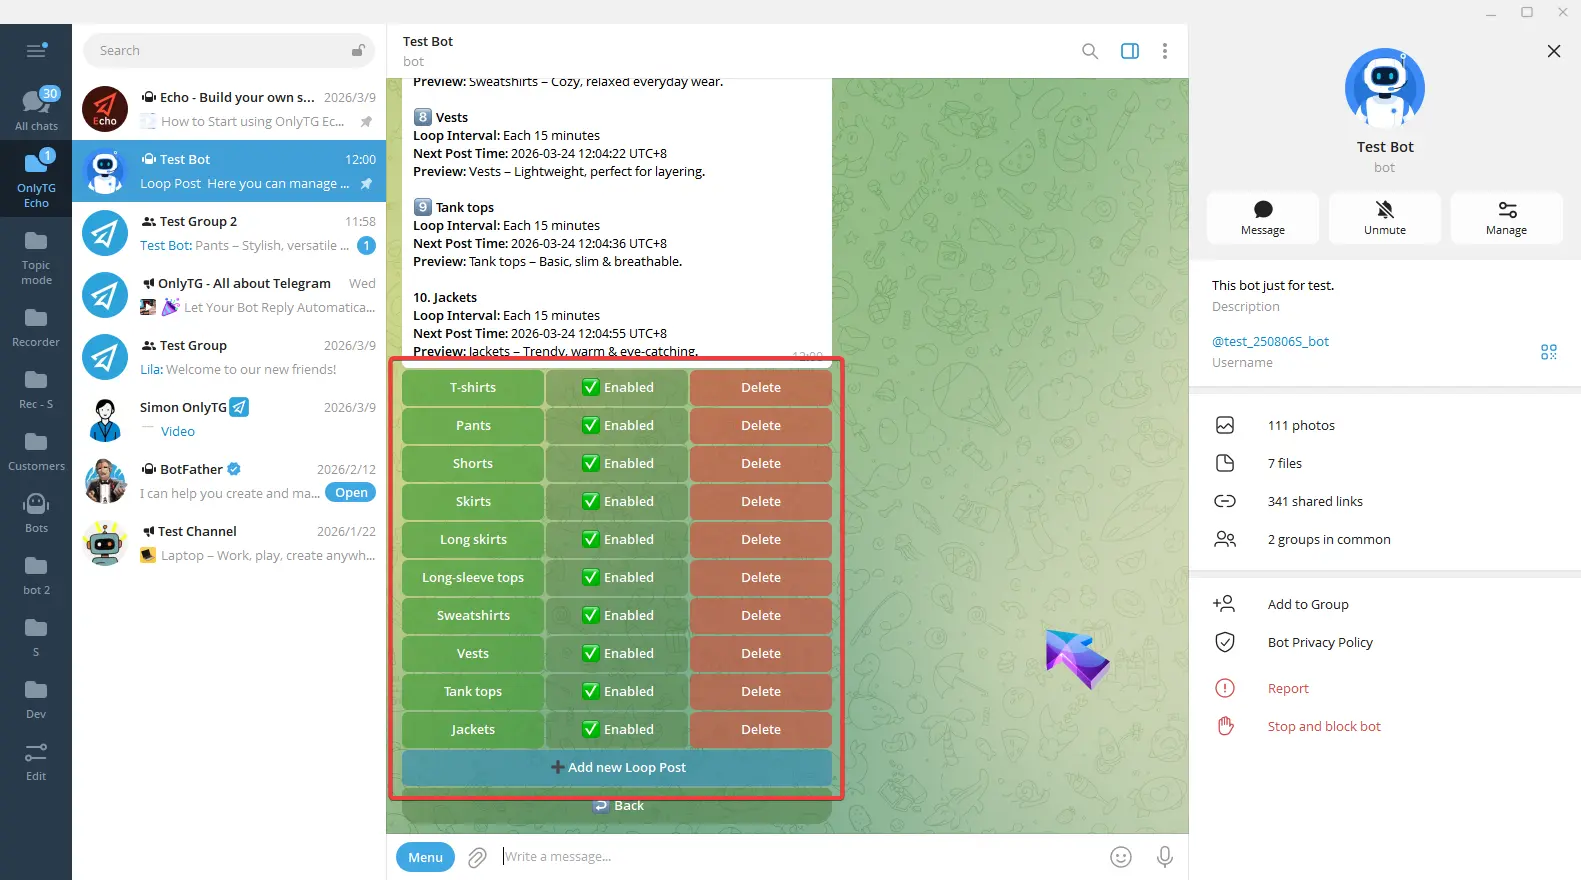
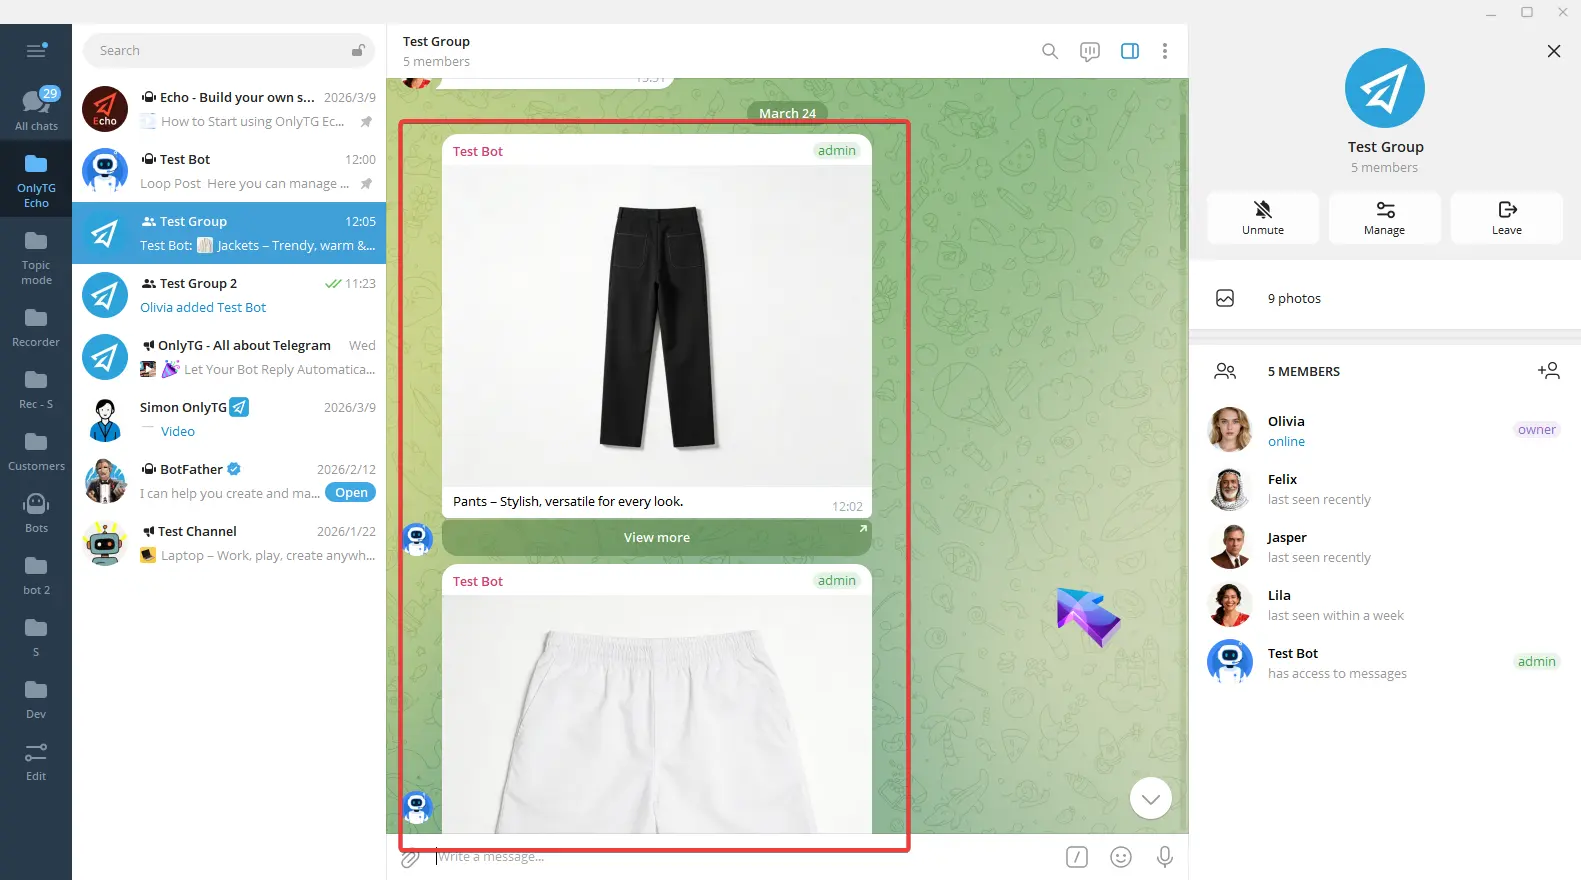
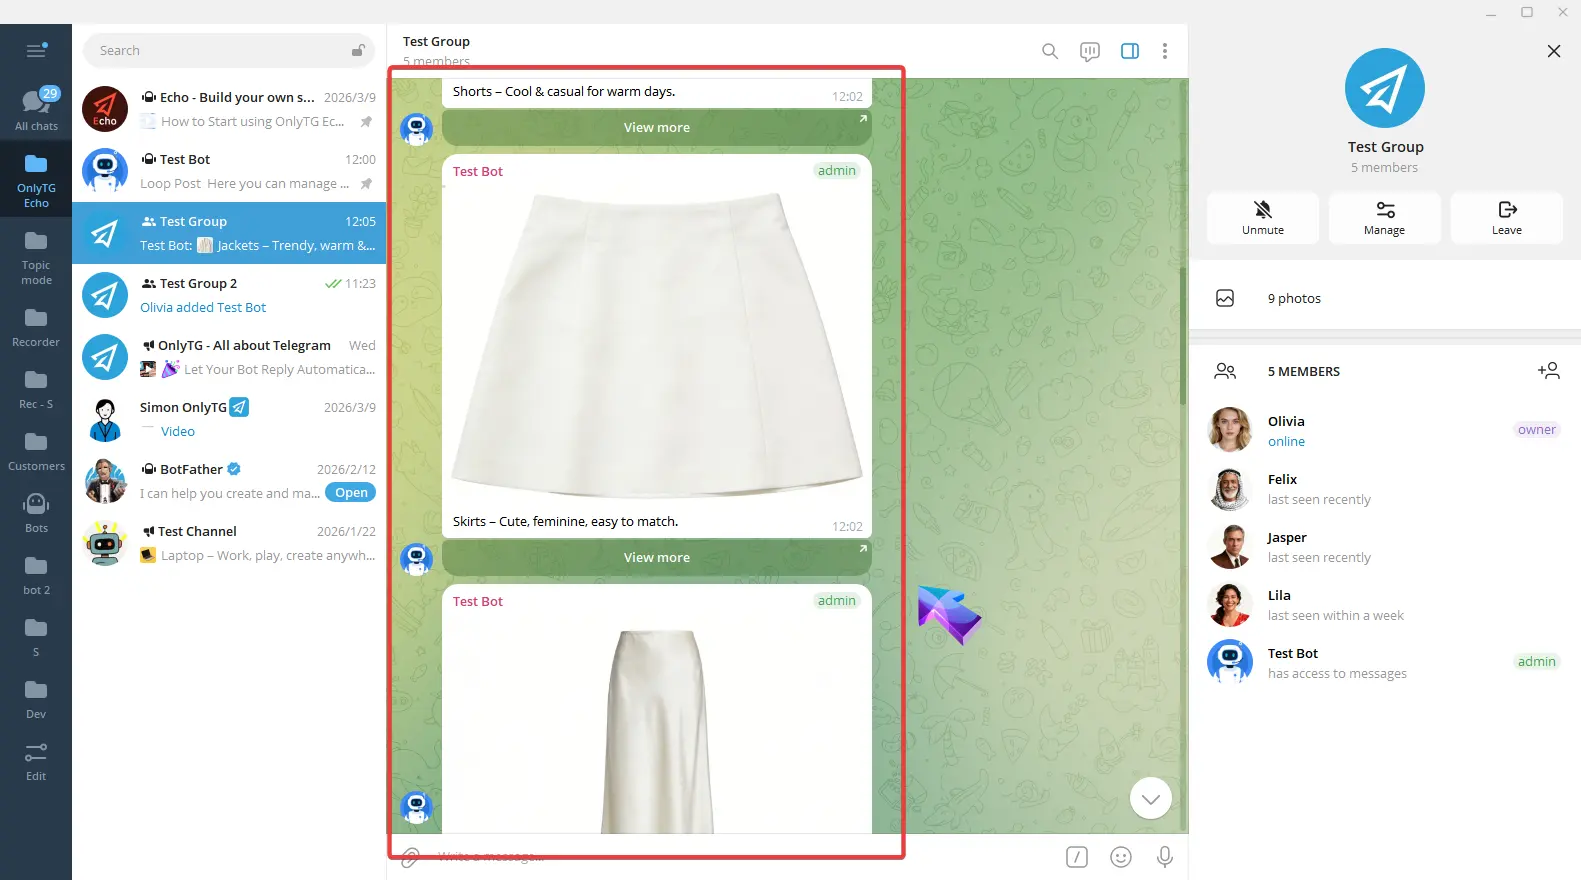
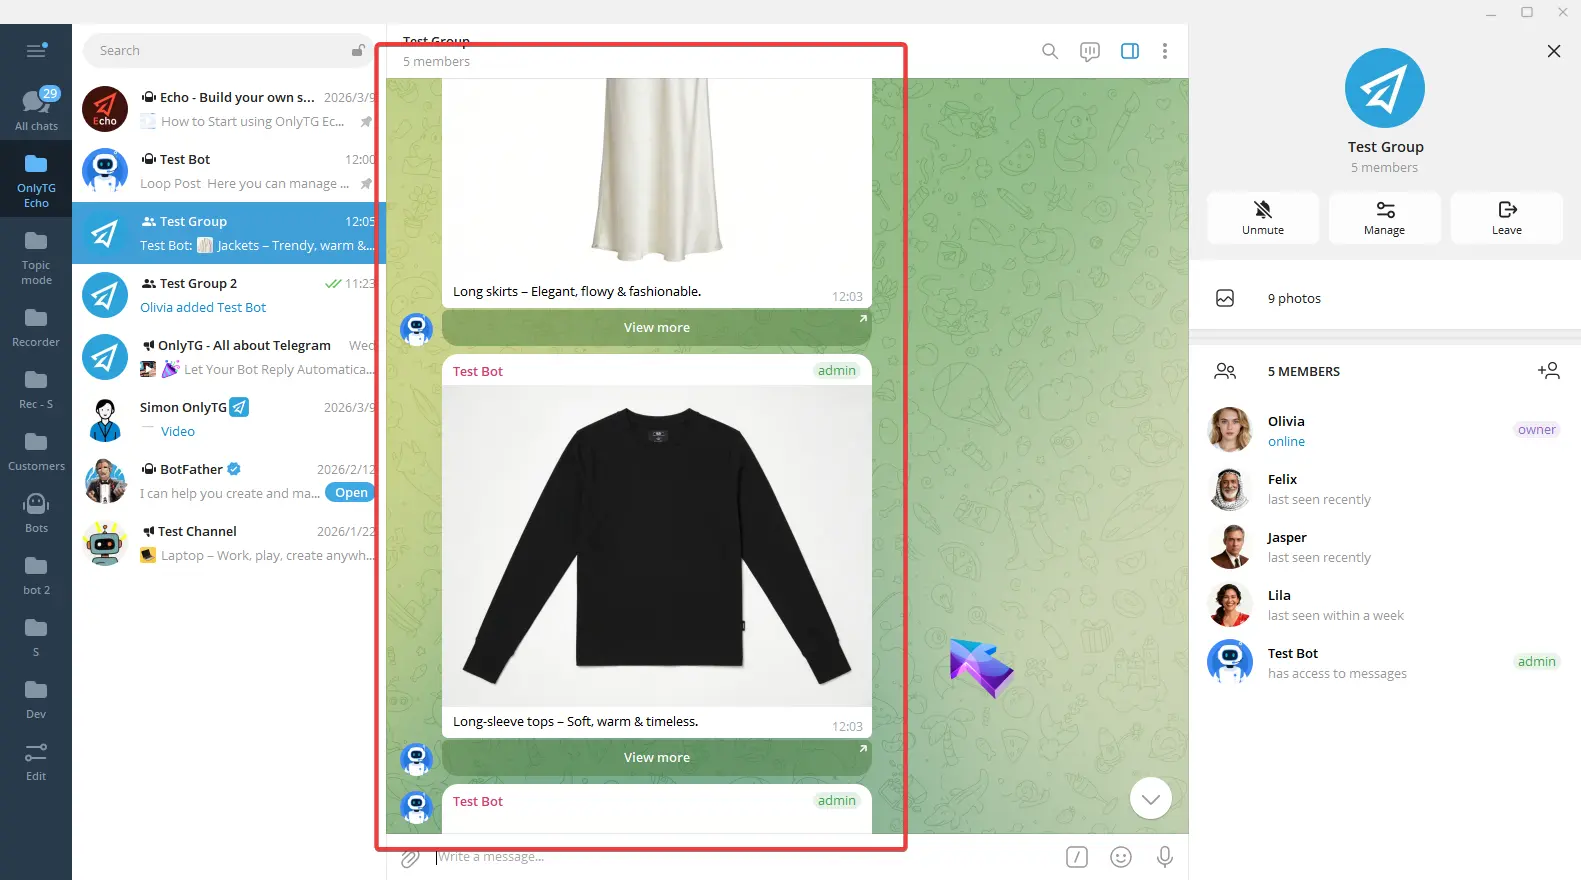
Now these Post will automatically loop in this channel at the set interval.
step 7
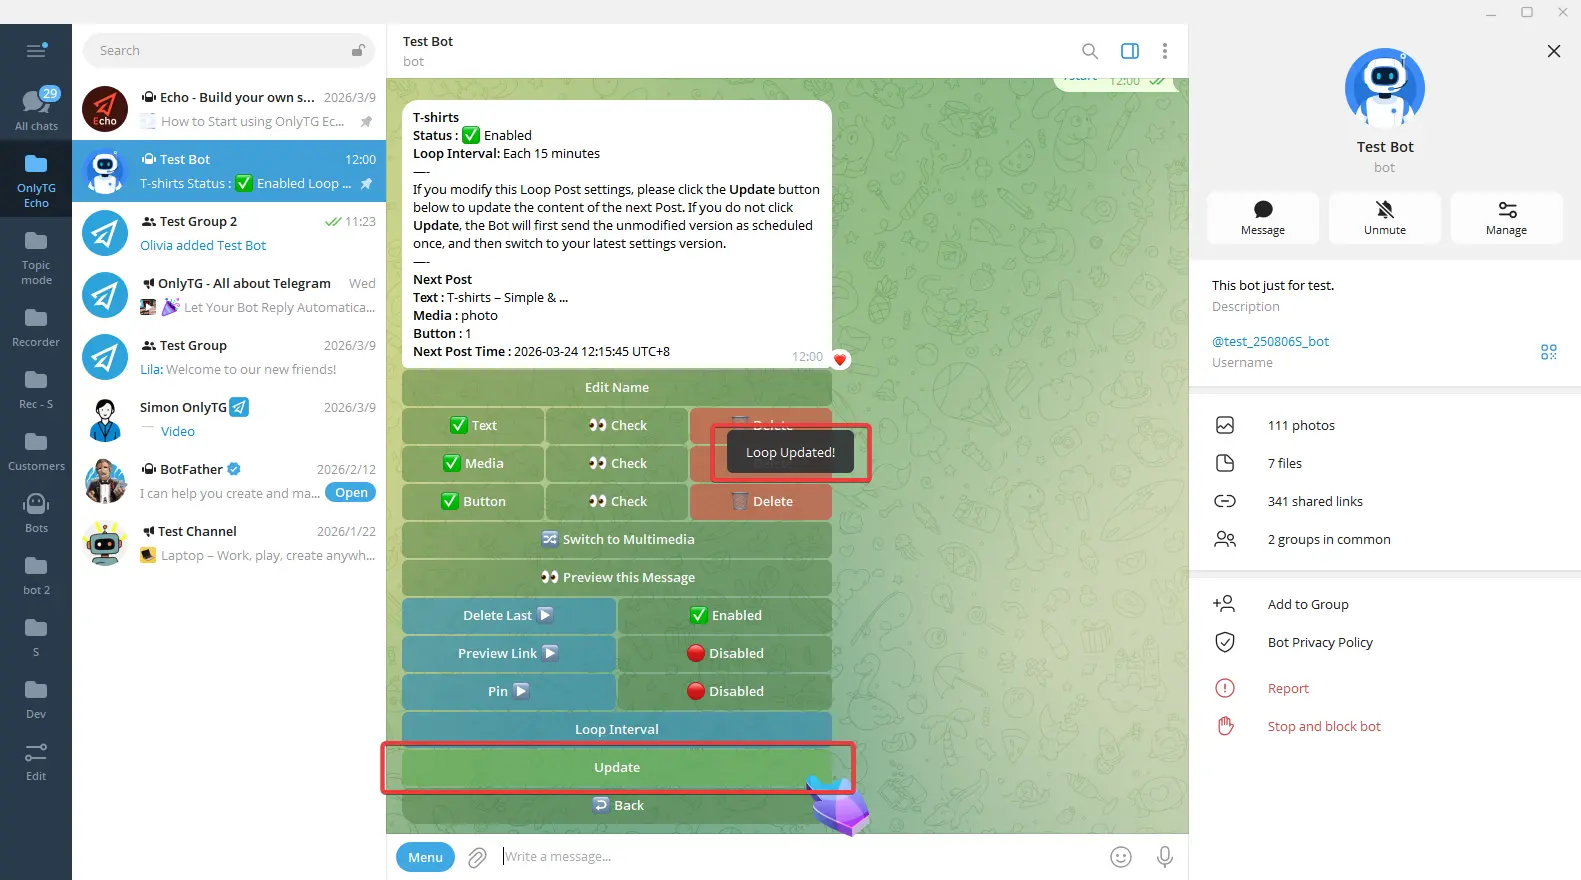
When you need to modify posts that are already in the loop—including post content, loop intervals, and other settings—you must click Update after making the changes for them to take effect immediately. Otherwise, the old version of the post will be published one more time before switching to the new version.


