OnlyTG Console provides the function to add multiple custom tags to contacts.
Video Tutorial
step 1
Access the OnlyTG Console. You can access it by clicking Open App in @EchoOnBot, or directly enter app.onlytg.io in your browser.

step 2
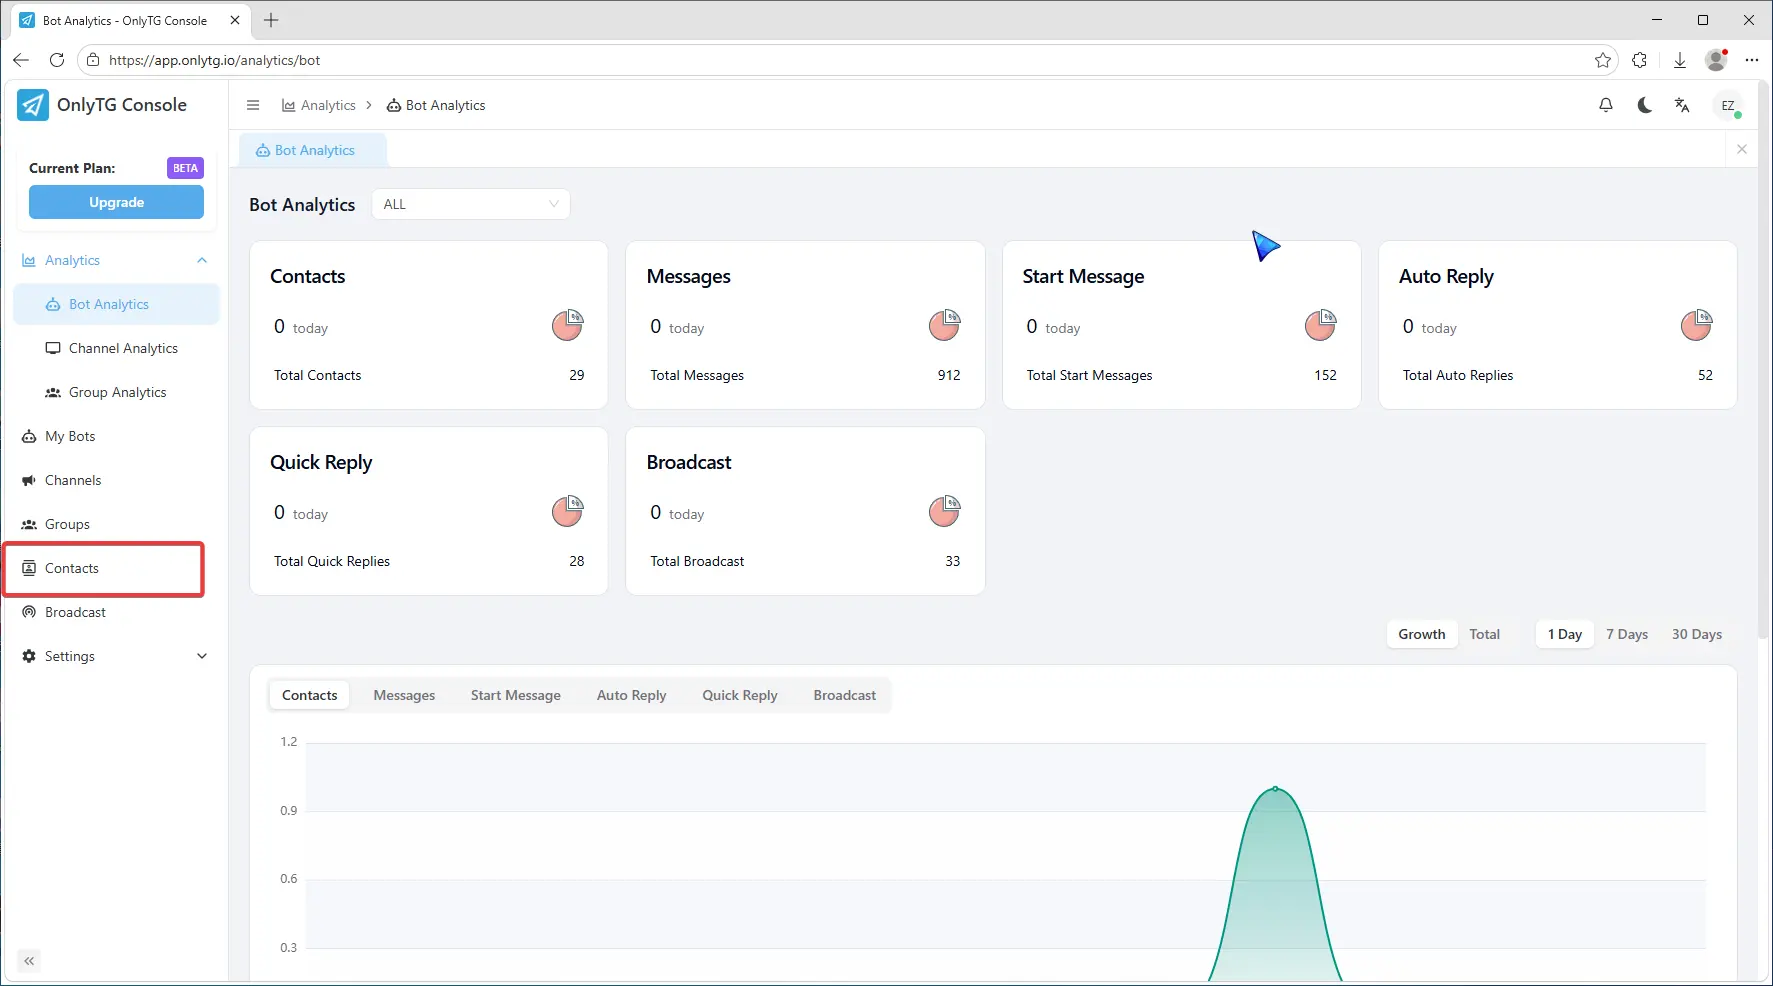
Click Contacts in the left menu.
Simply click the + icon in Tags column to tag this contact.
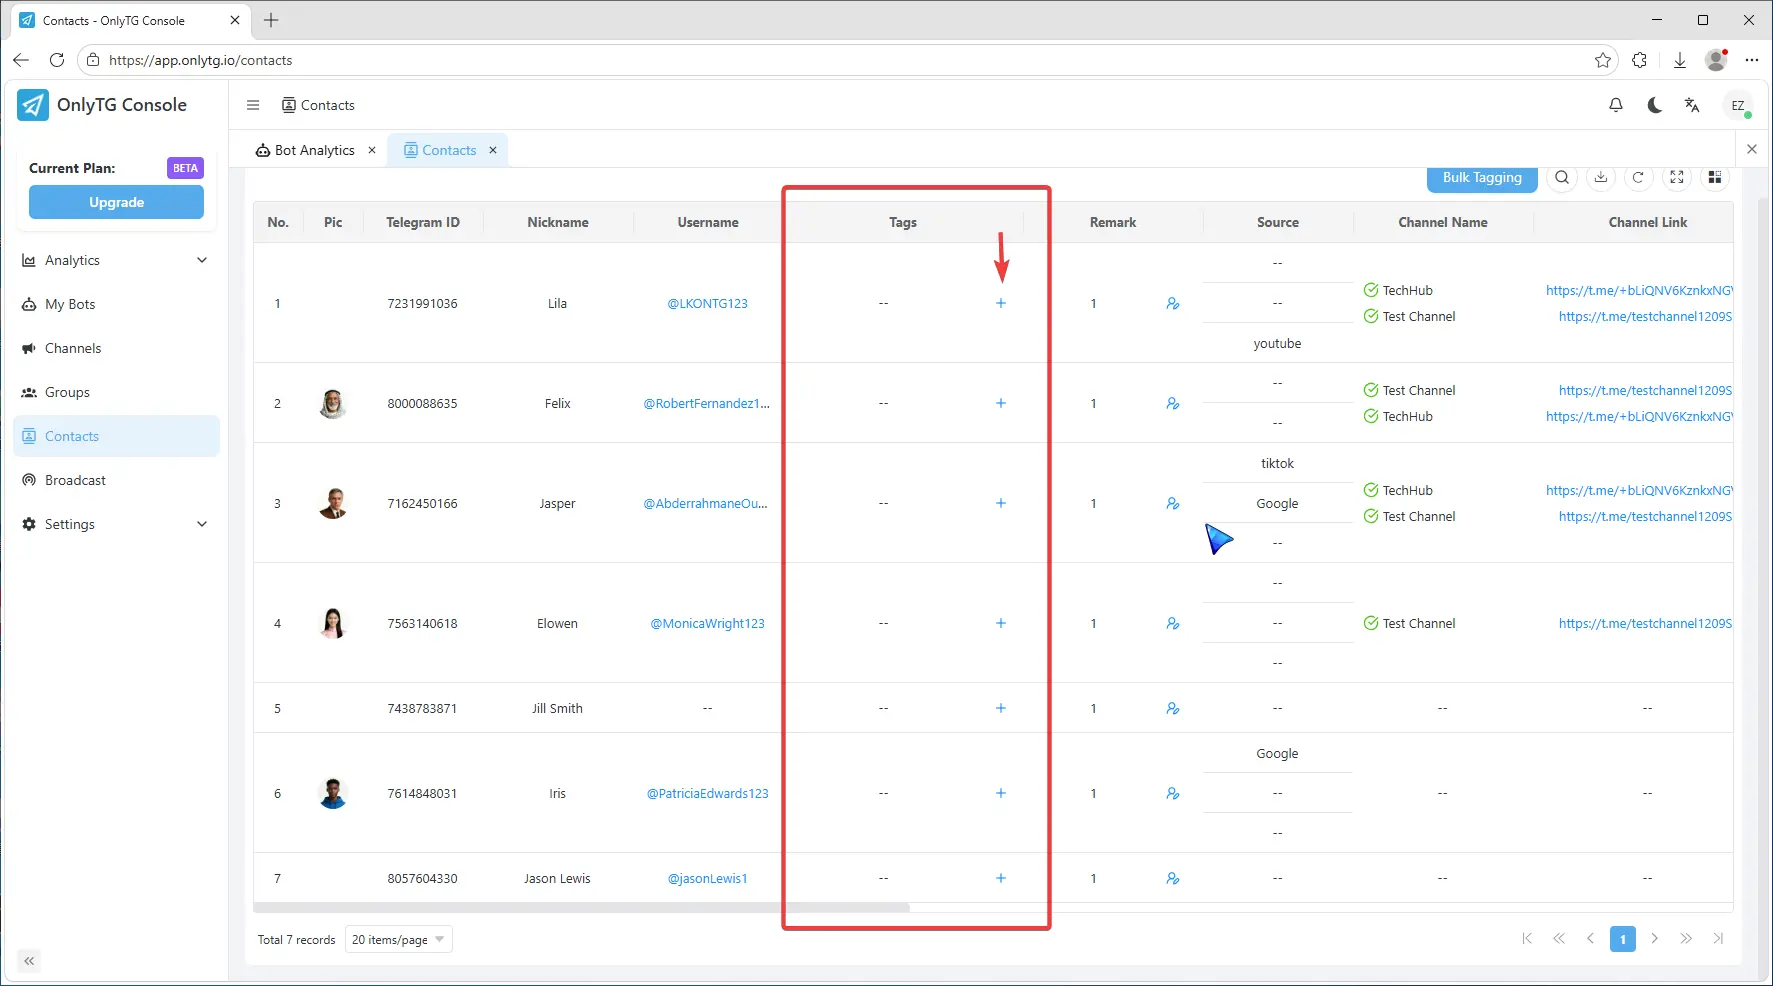
Enter a tag, such as T1, then press Enter to create a new tag.
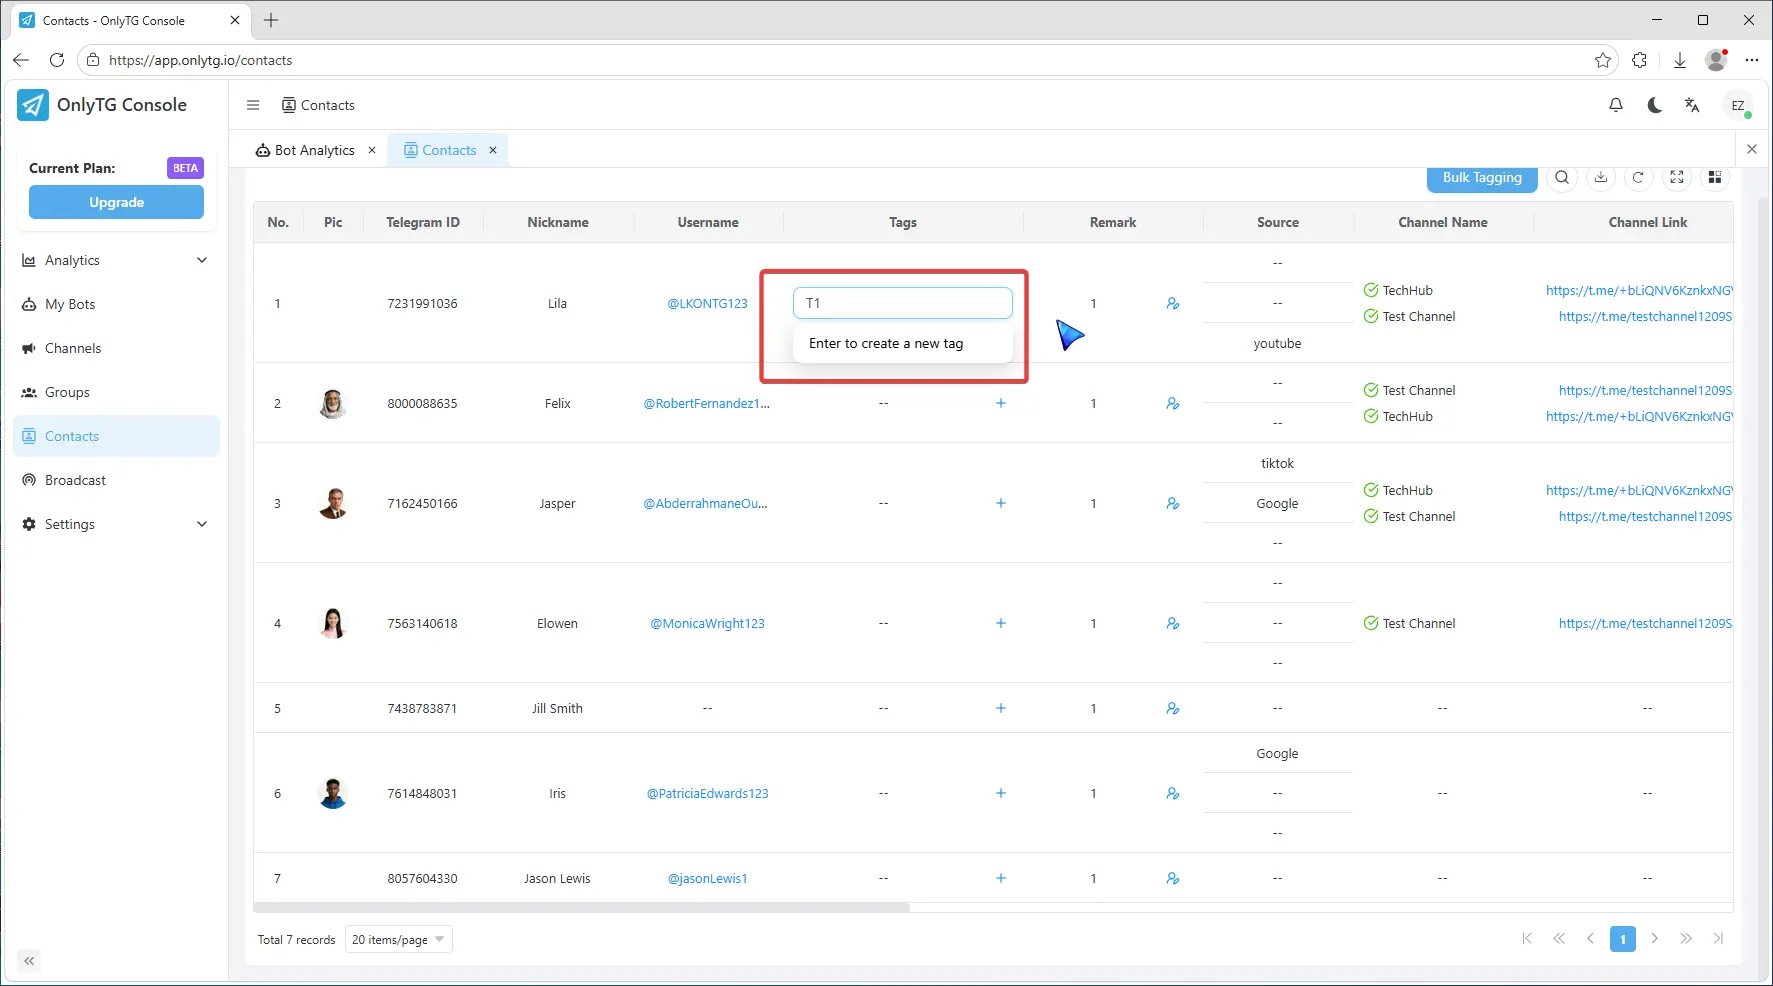
You can repeat this step to add multiple tags to one contact.

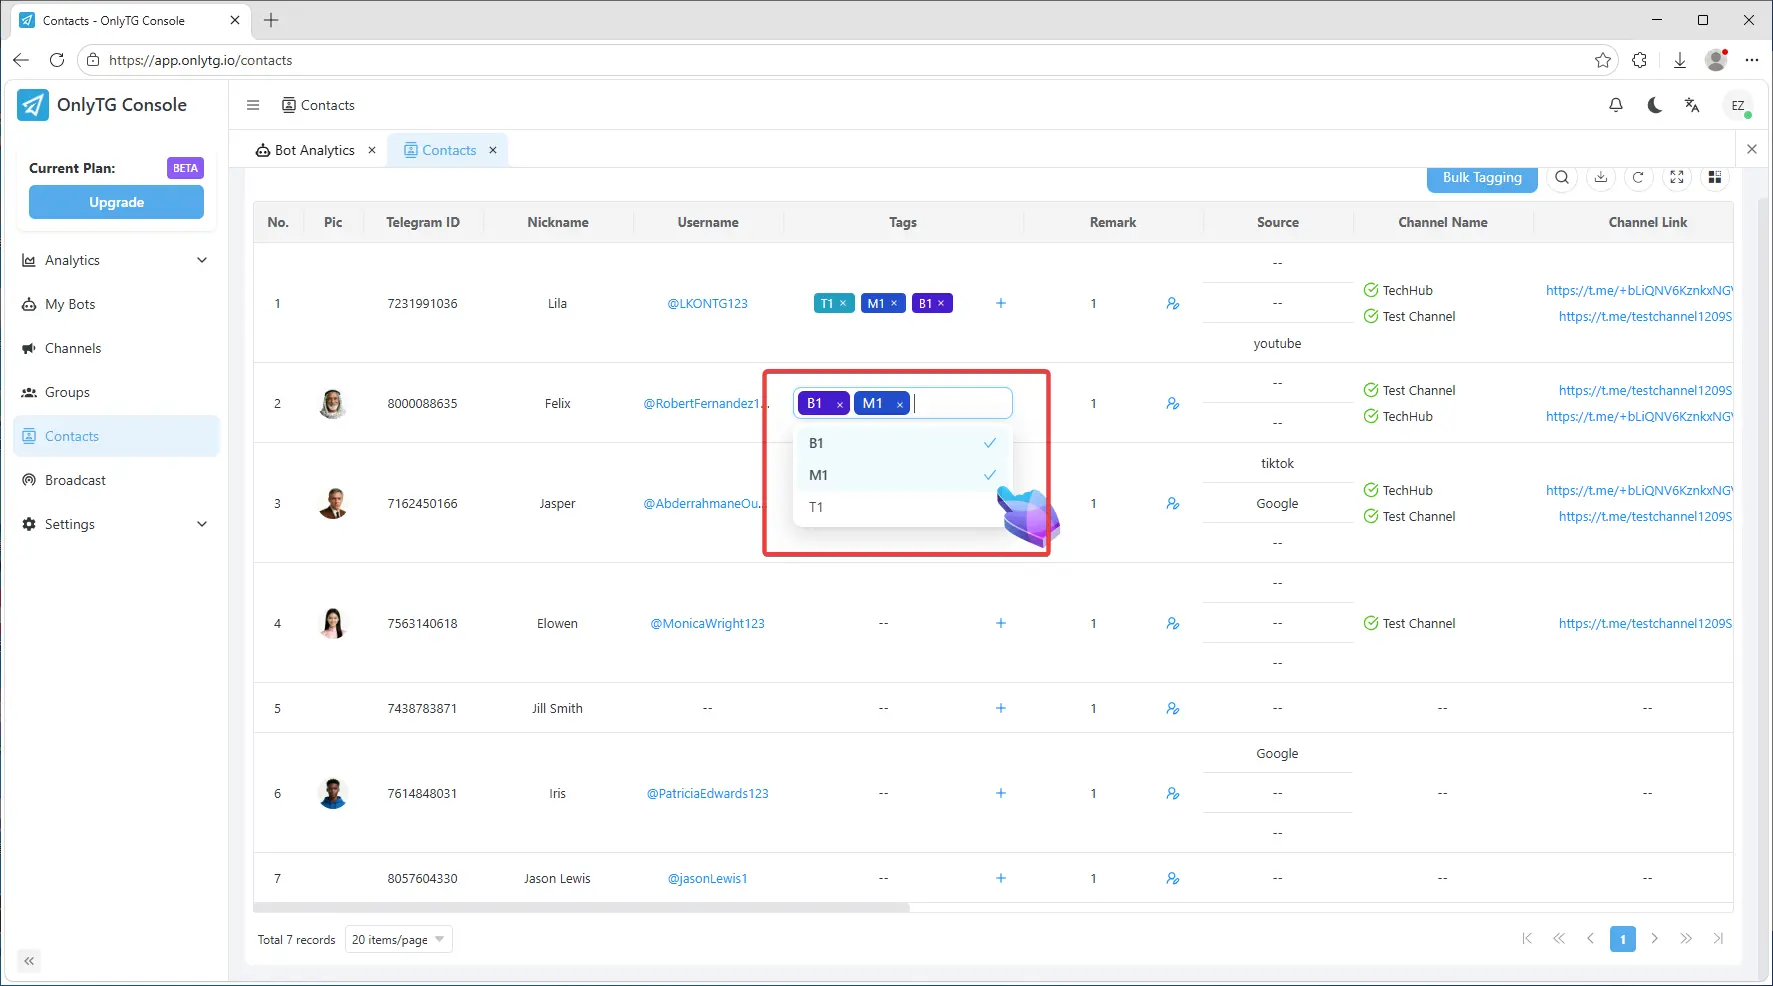
If you want to use the existing tags, just select Tags from the dropdown menu.
step 3
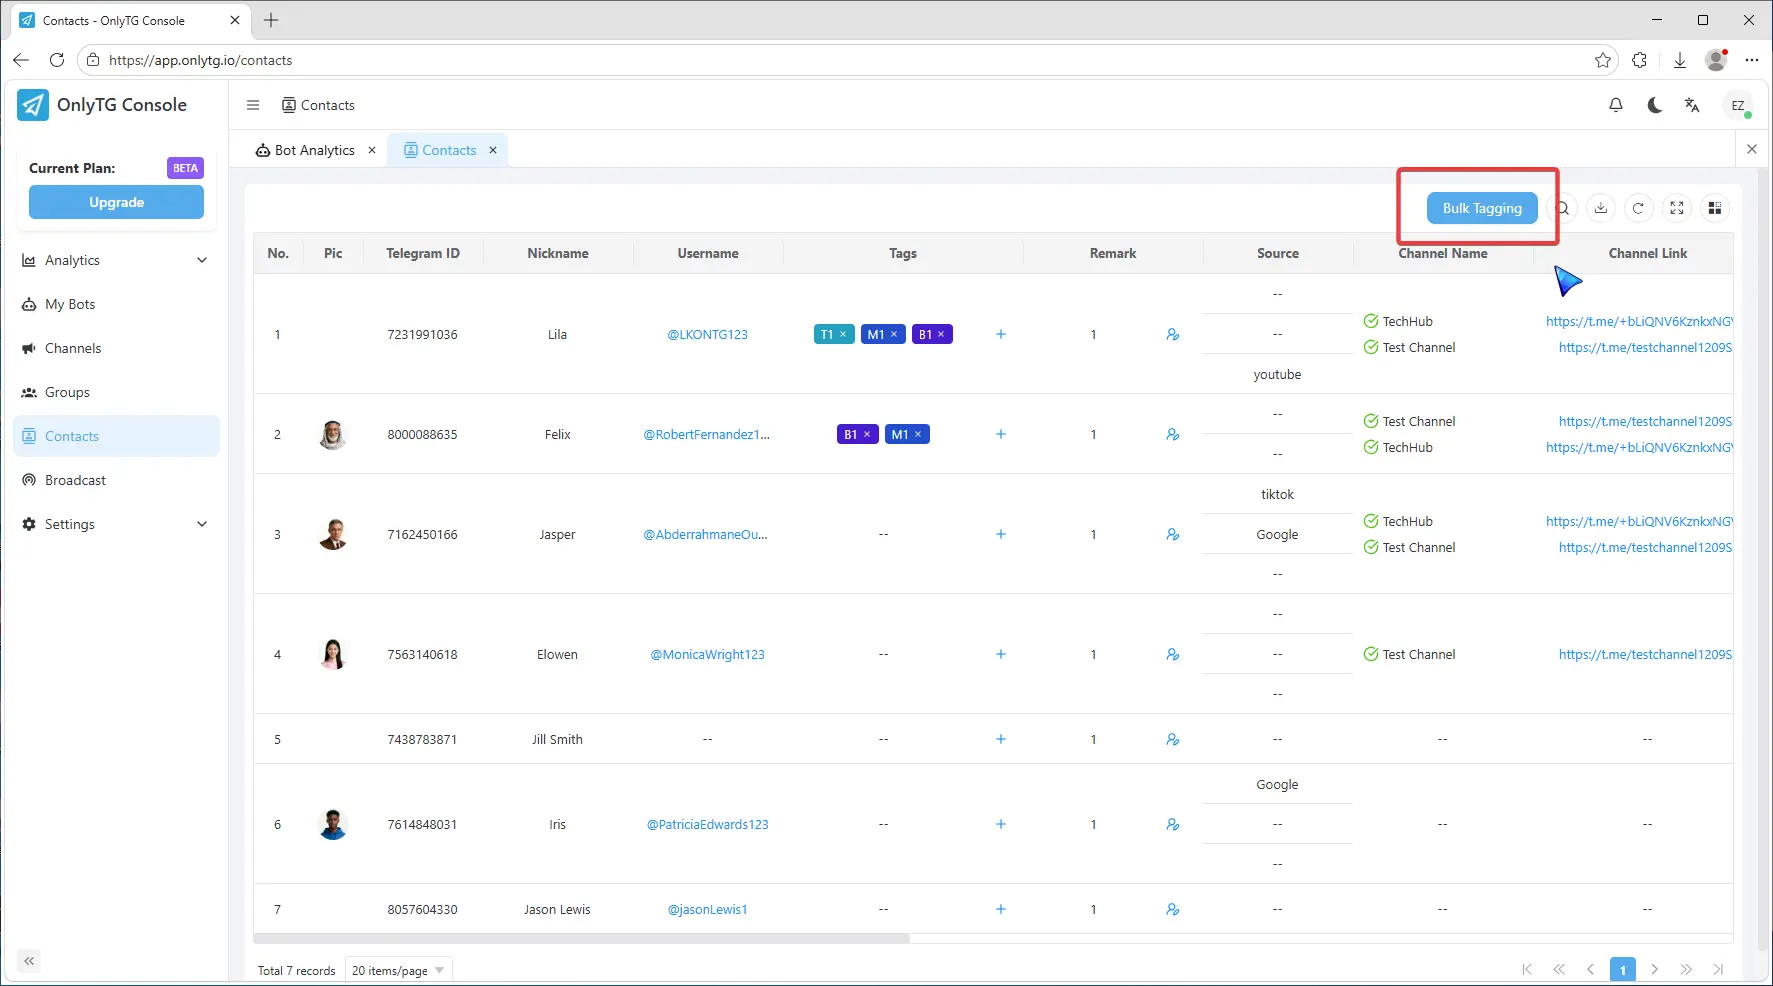
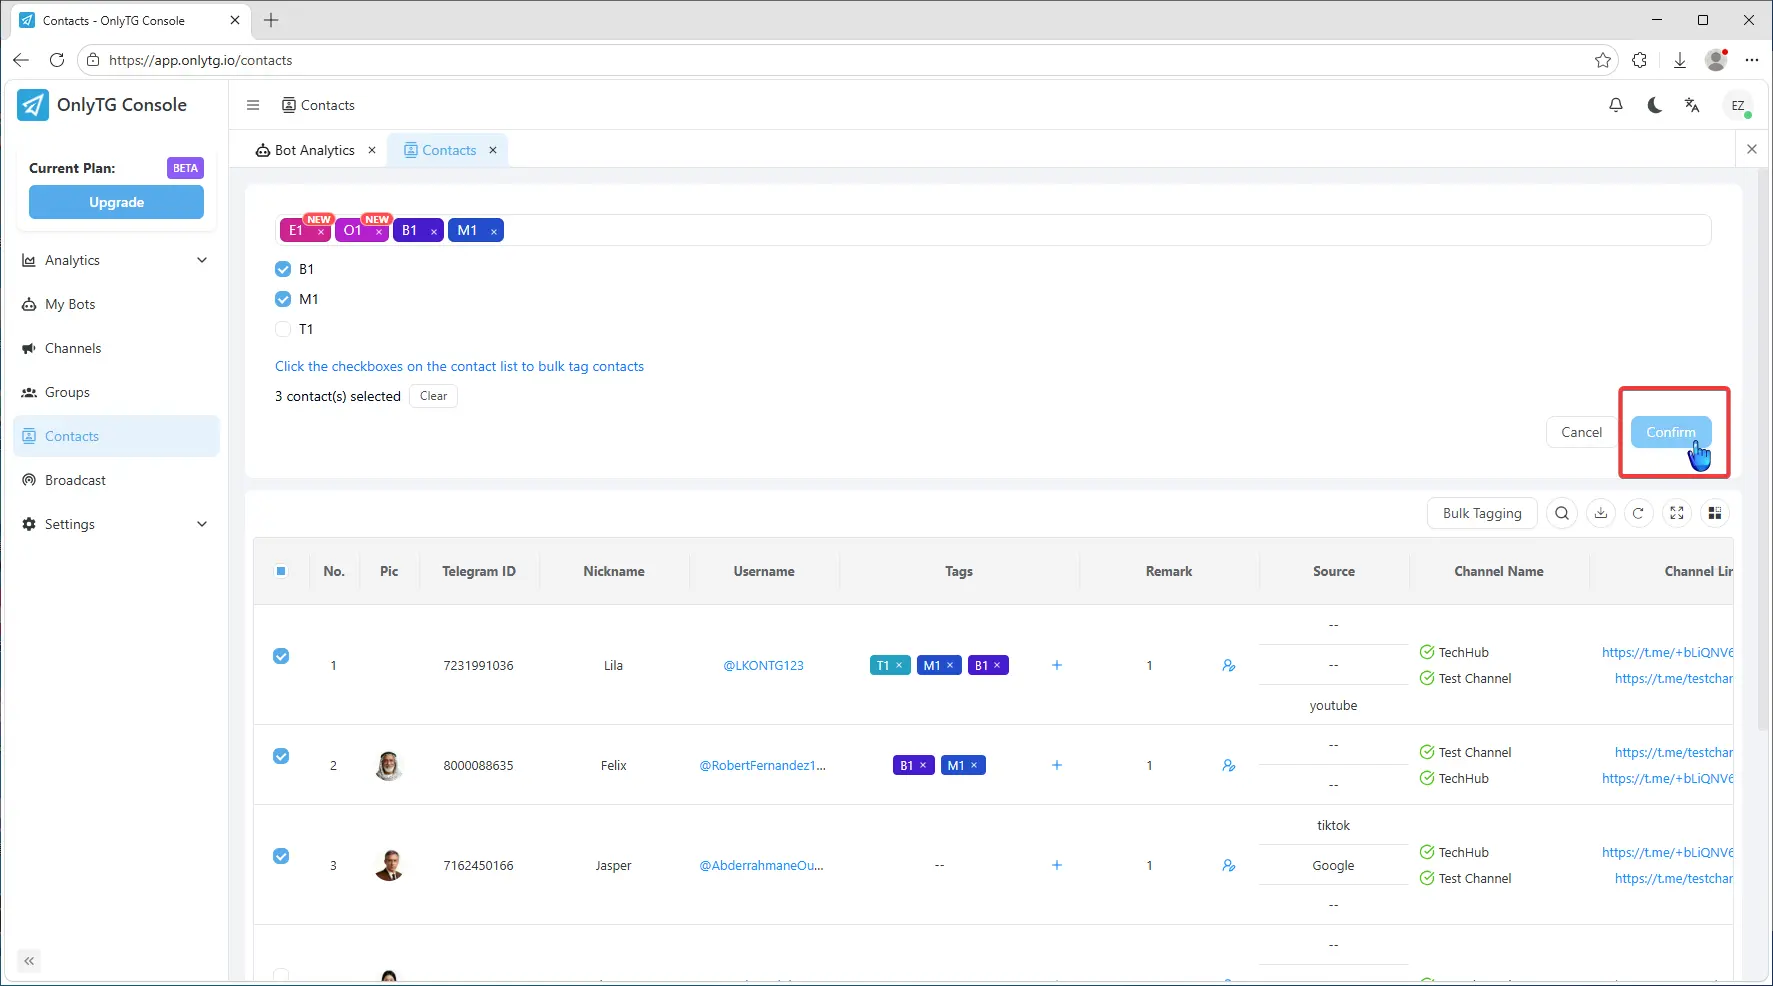
Click the Bulk Tagging button to tag contacts in batches.
After clicking, enter one or more new tags here, or directly check existing tags below.
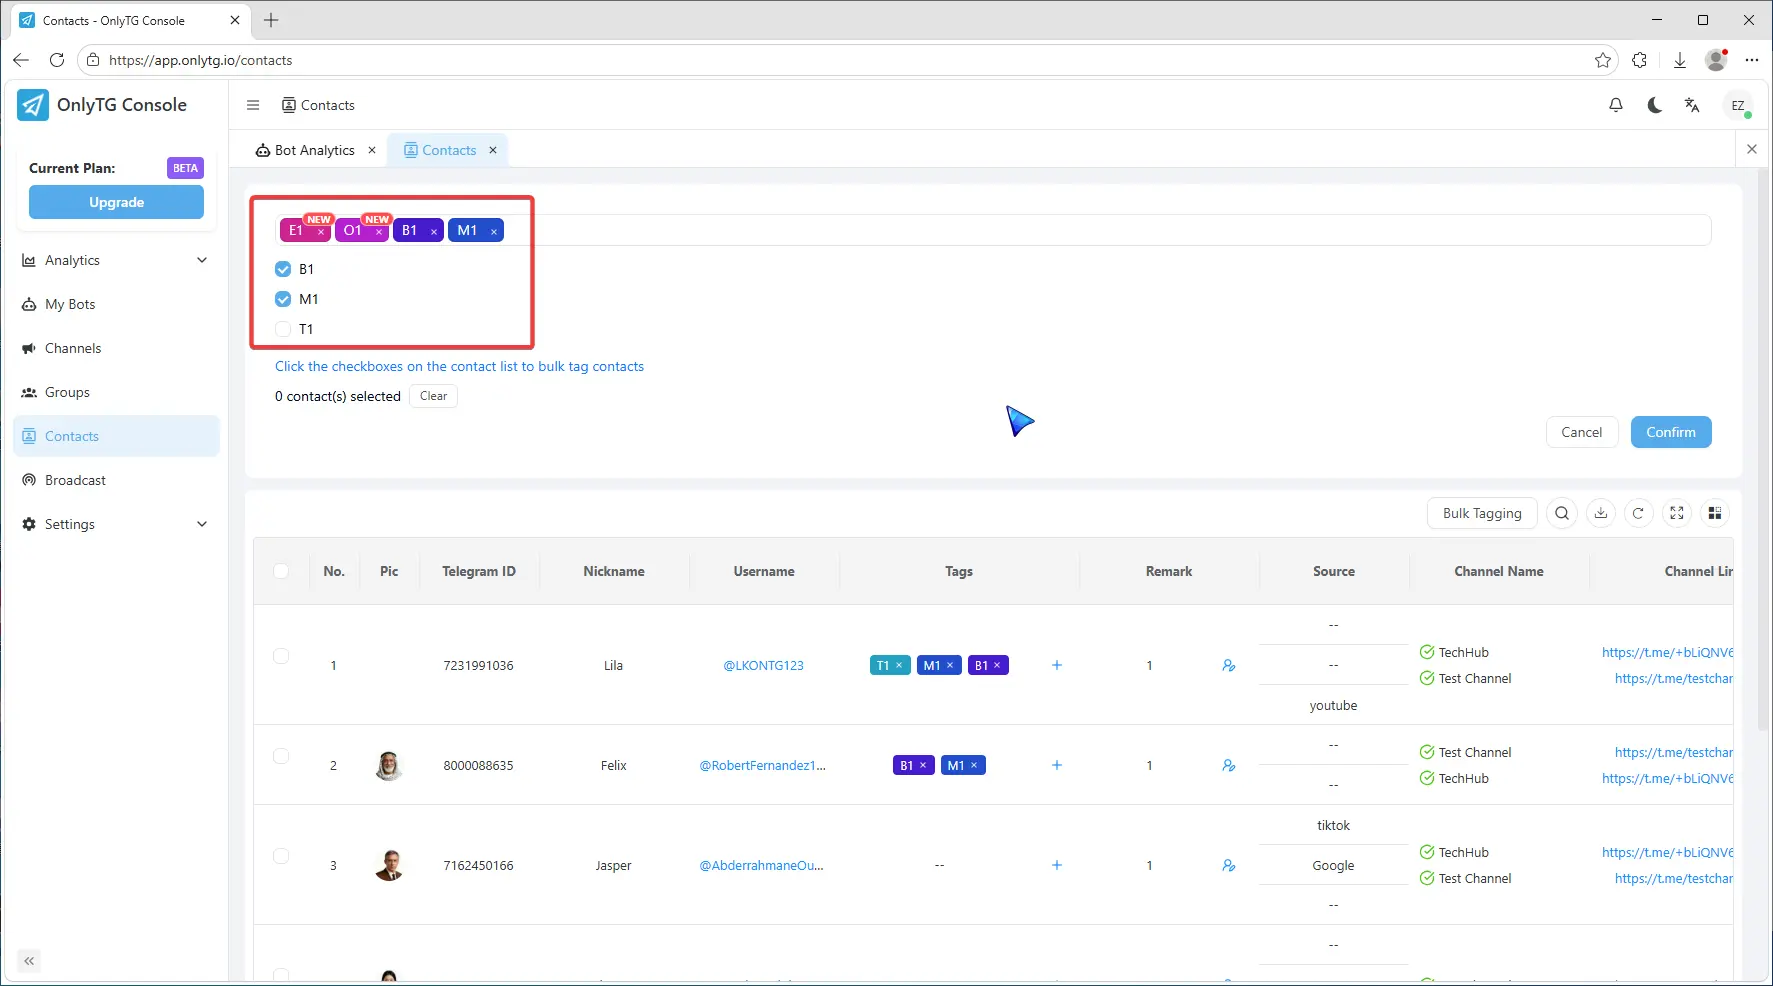
Then select contacts by ticking the checkboxes in the contact list.
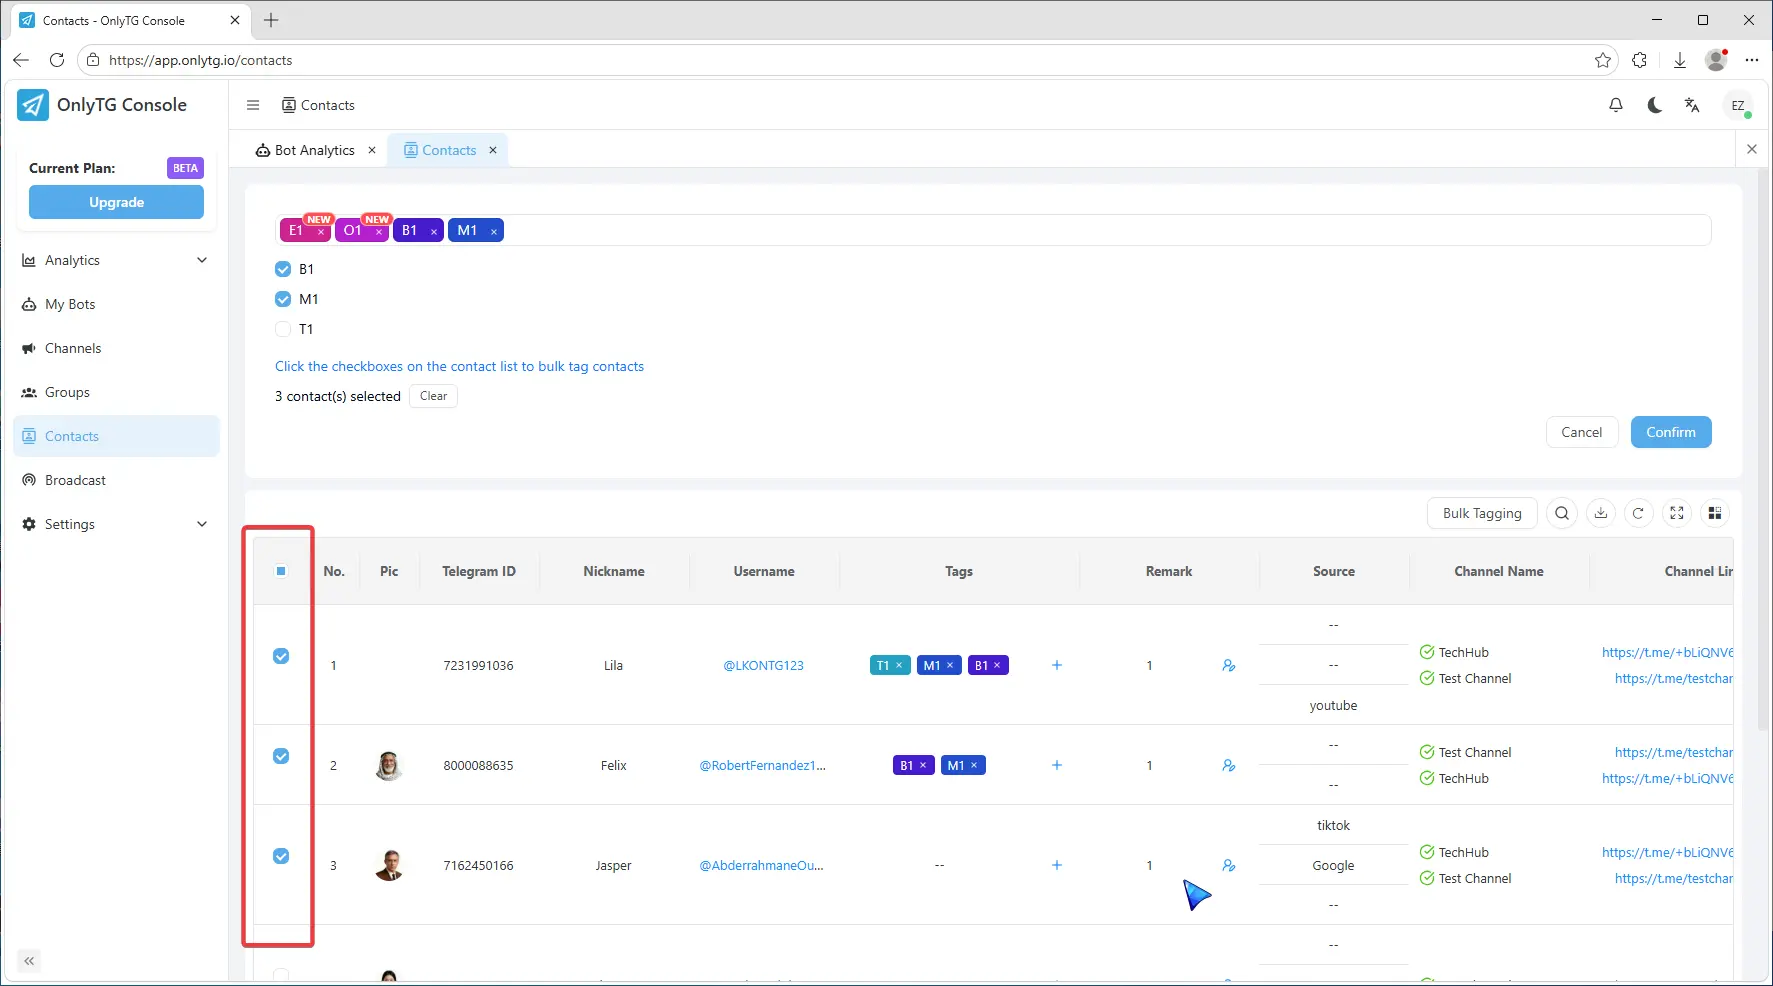
Finally click Confirm to finish bulk tagging.
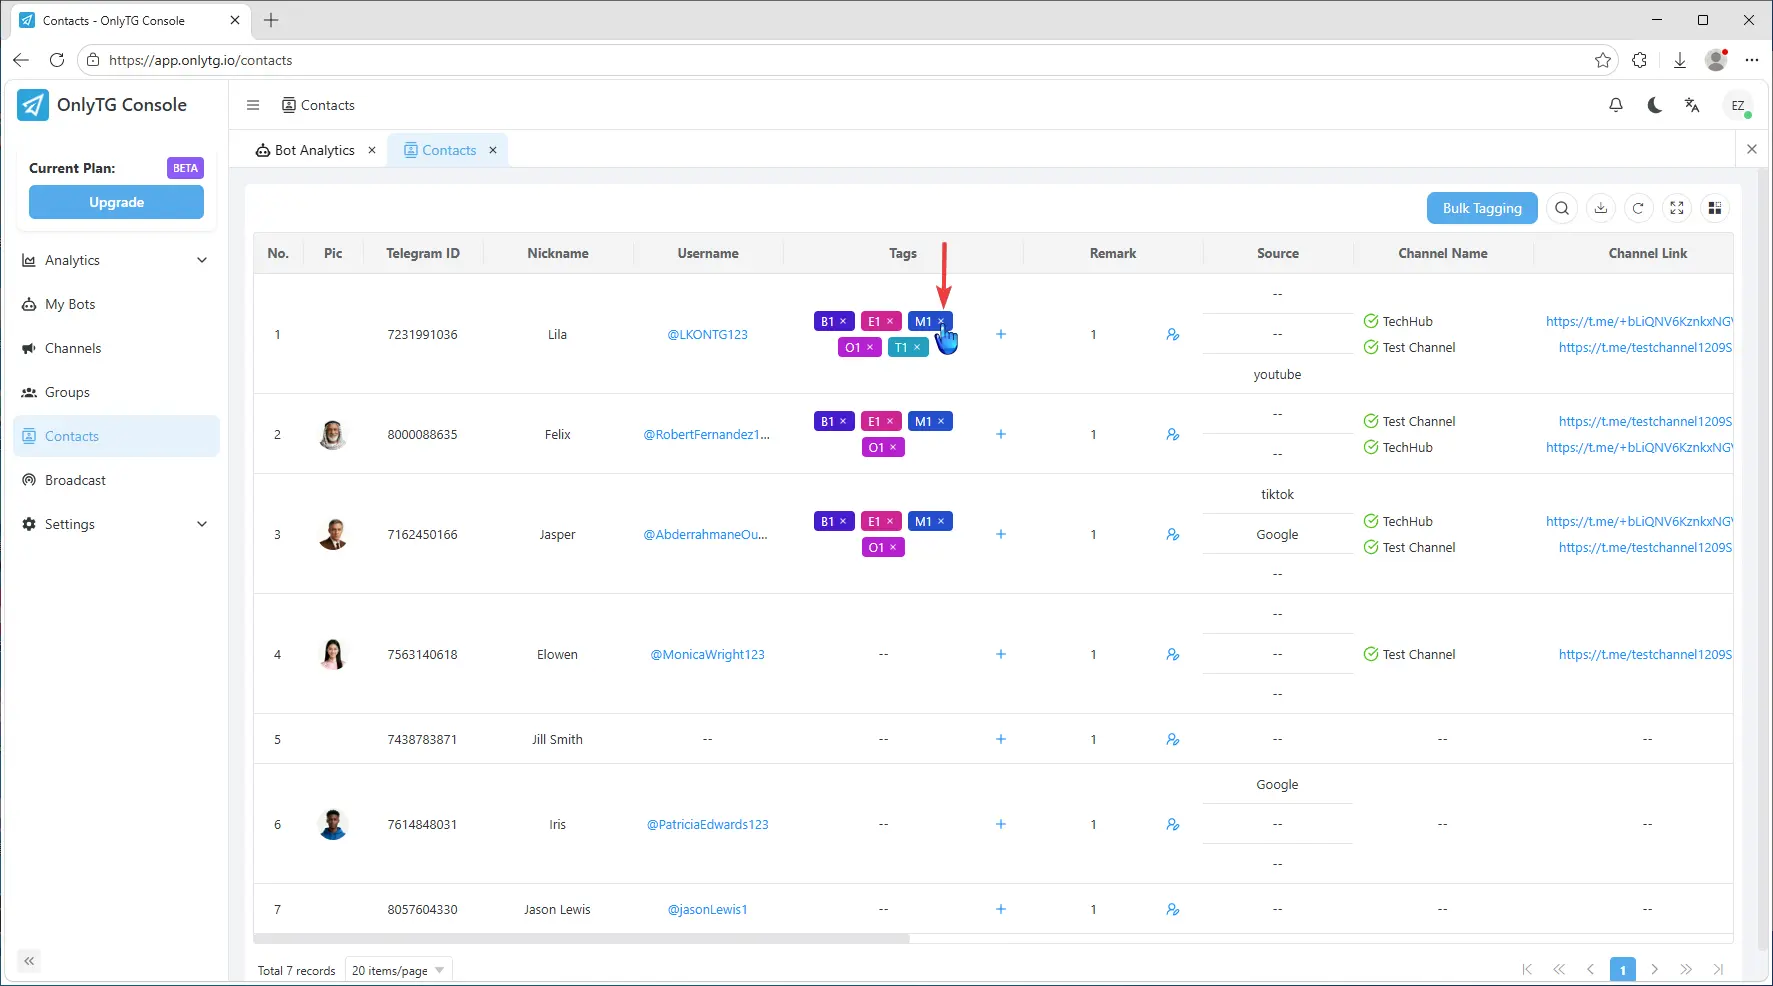
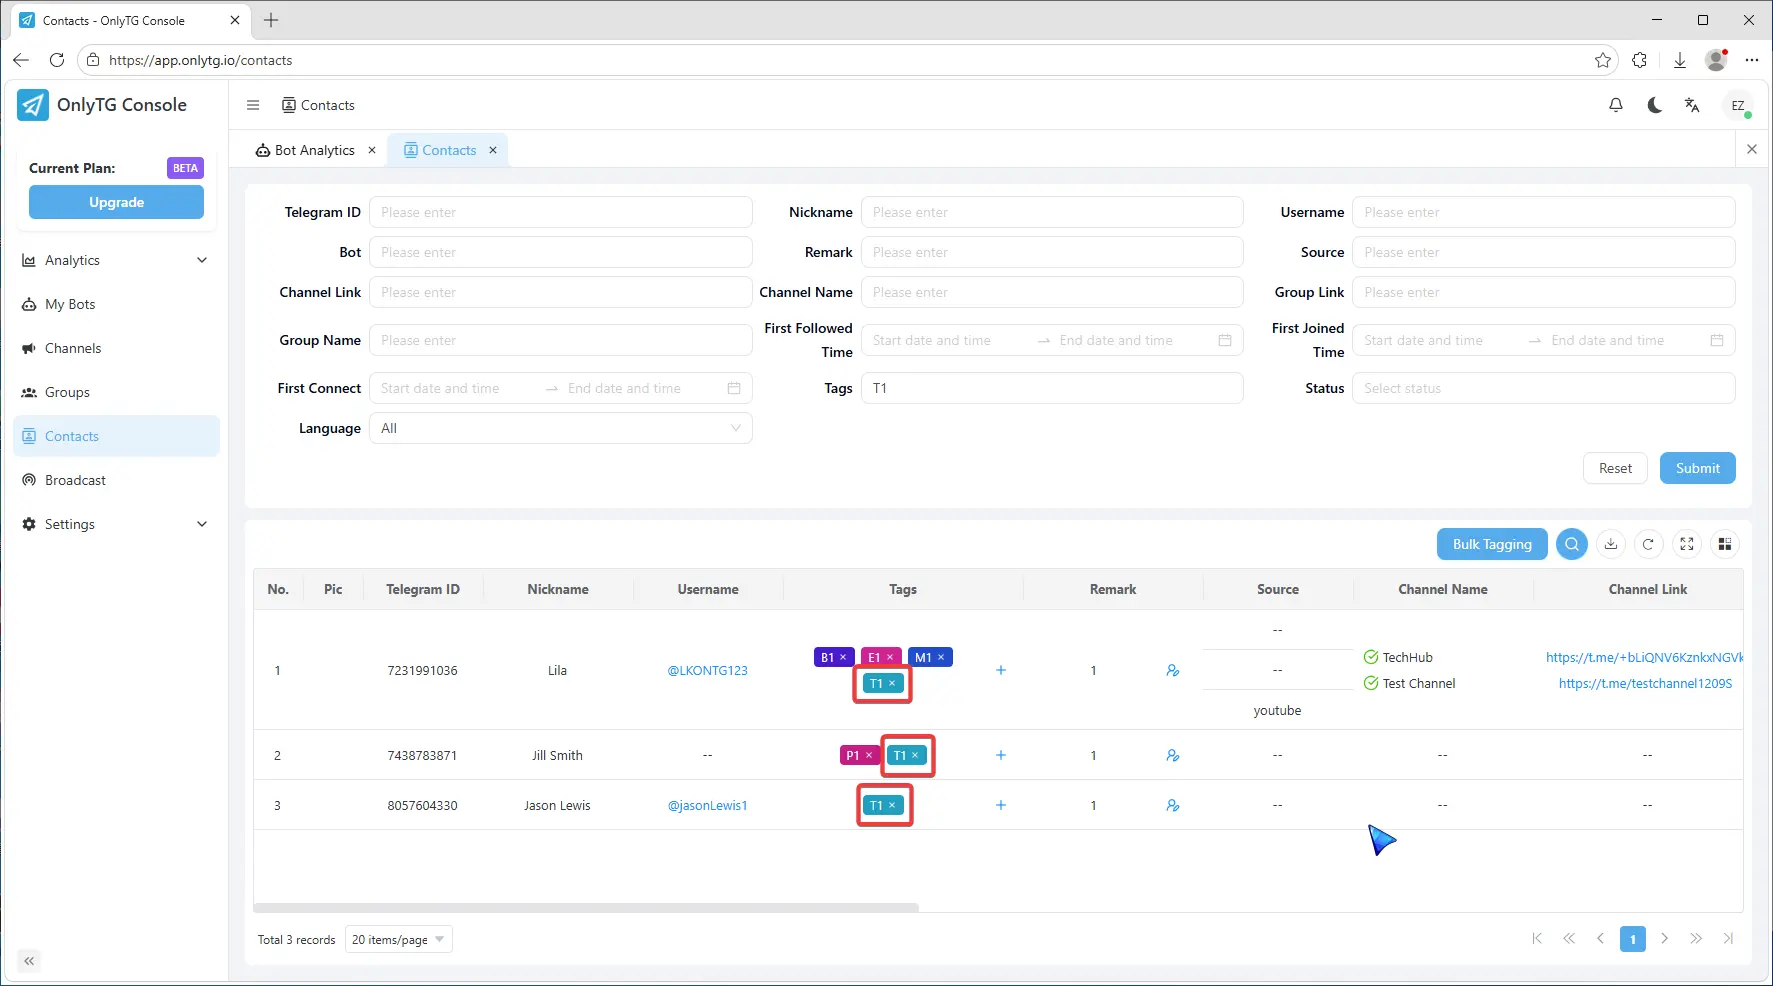
When you need to remove tags from the contact, simply click the X icon on the tags.
After tagging, you can quickly filter contacts by these tags. Click the search icon in the top right corner.
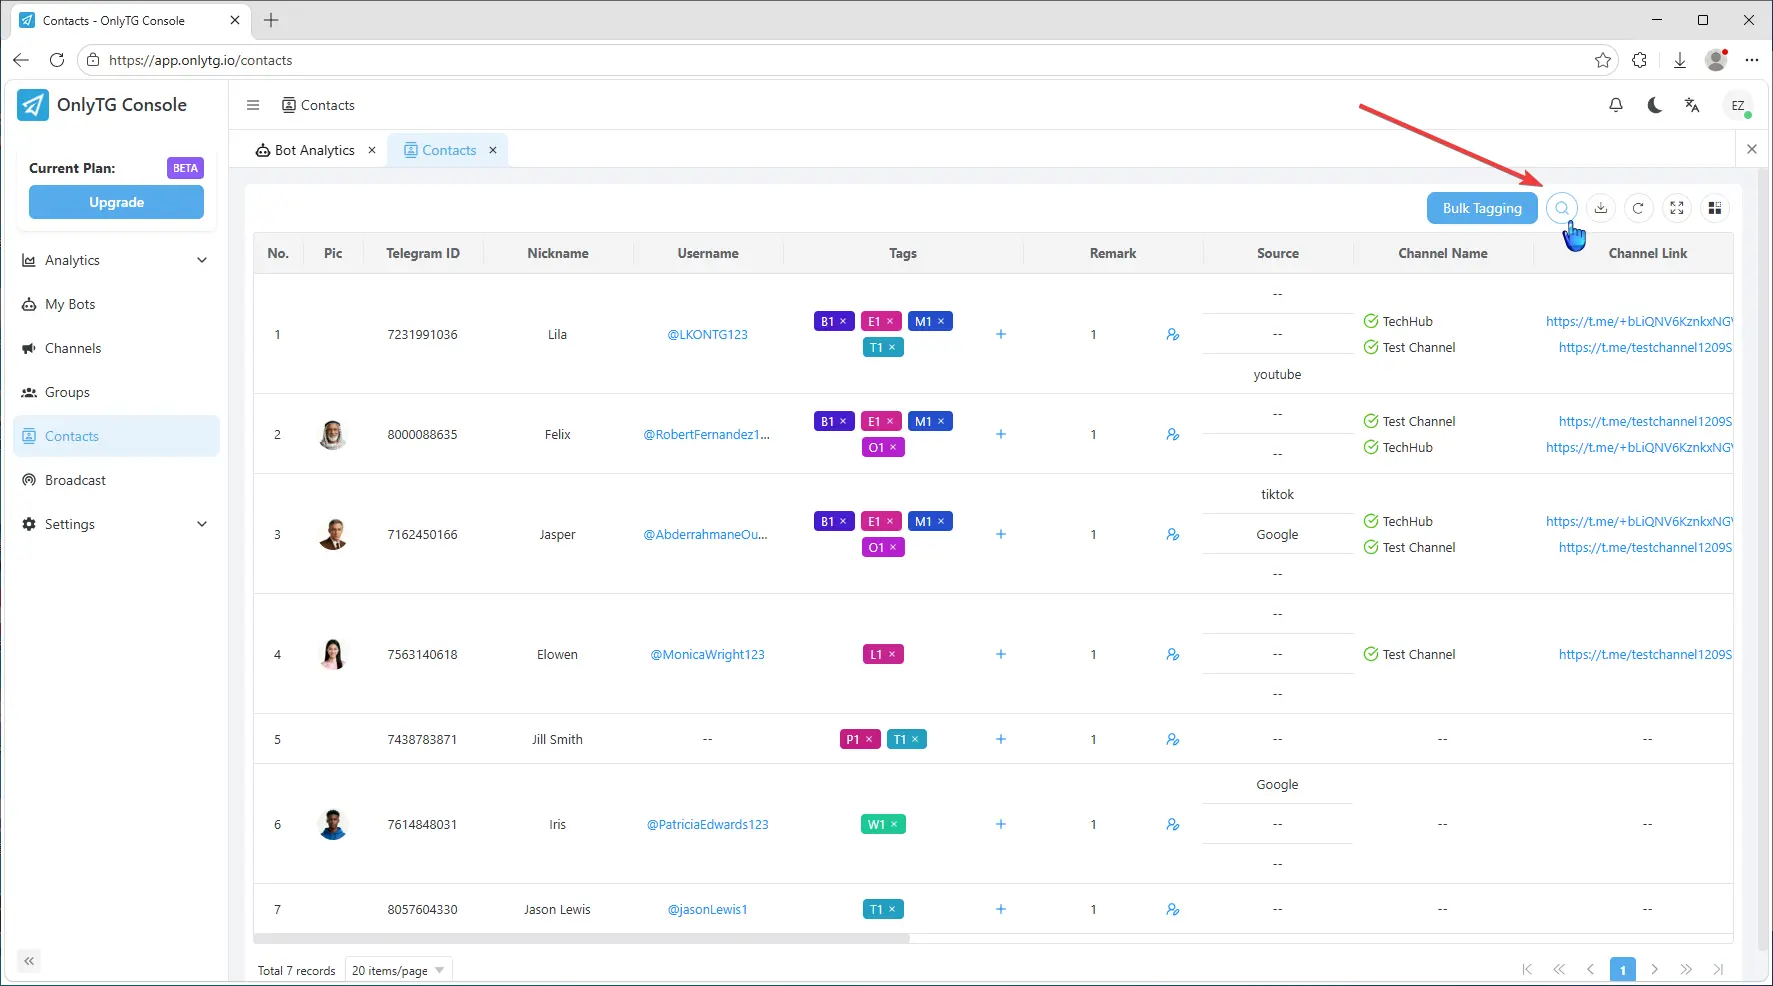
Select tags in the Tags field, then click Confirm.
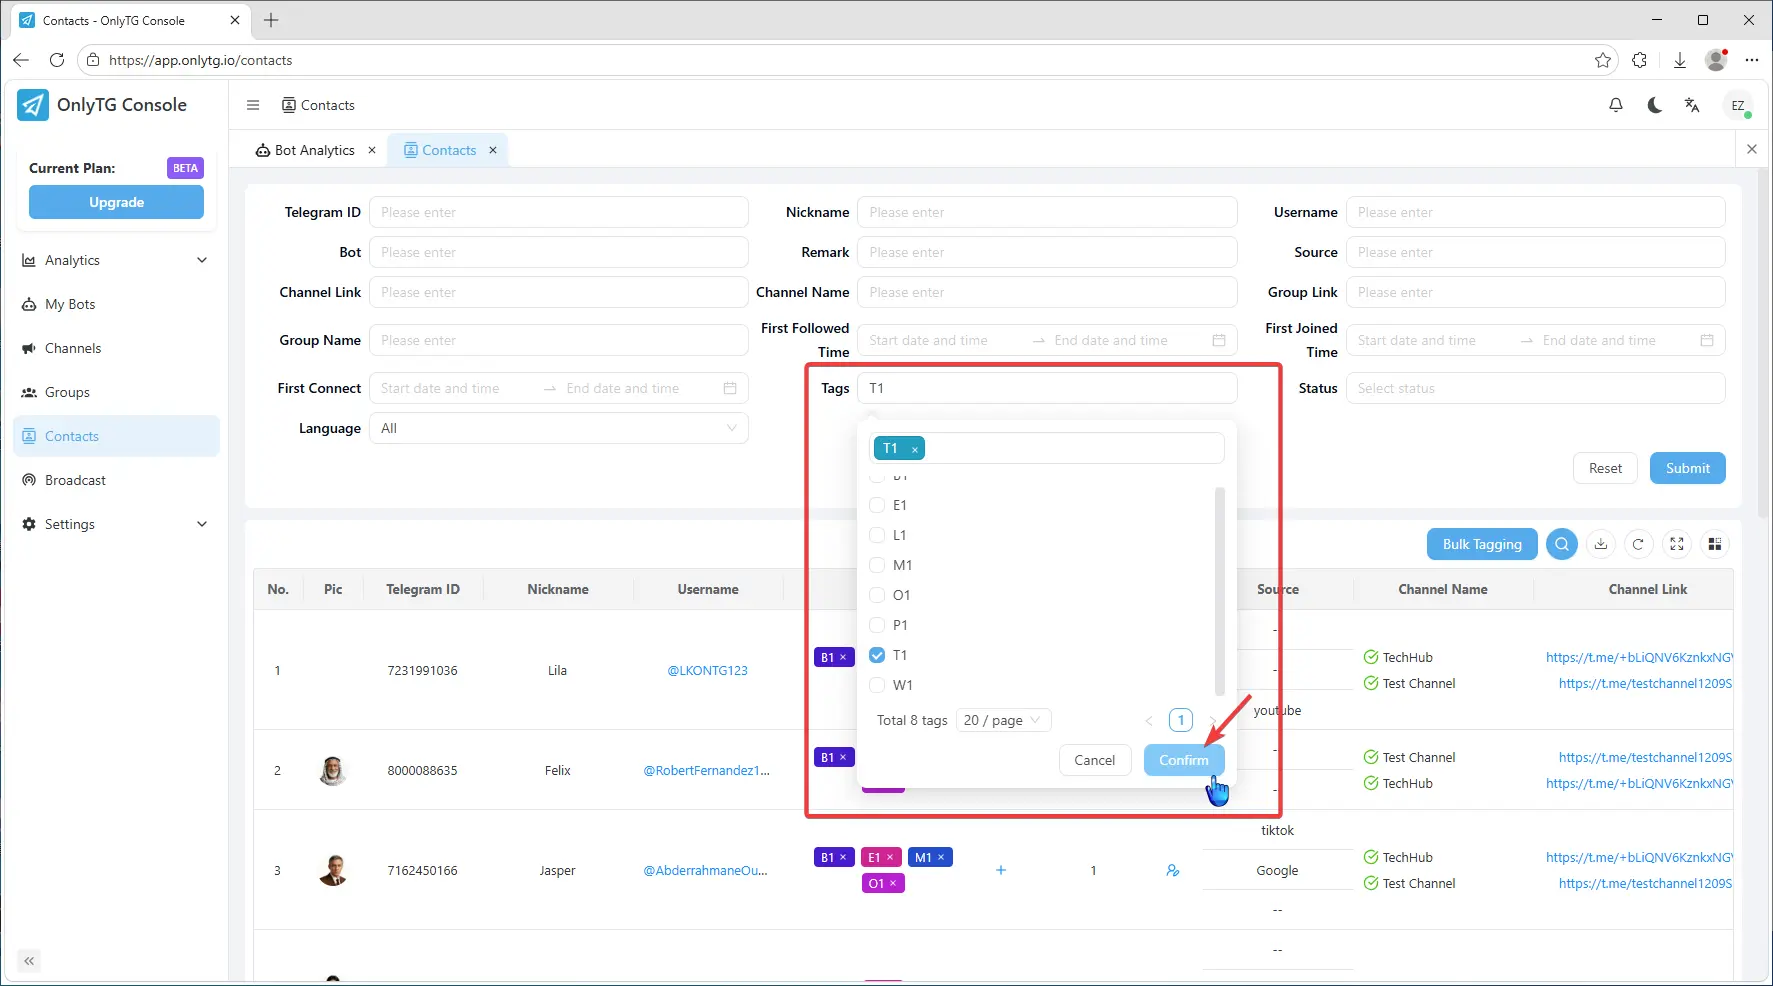
The list will now only show contacts with those tags.
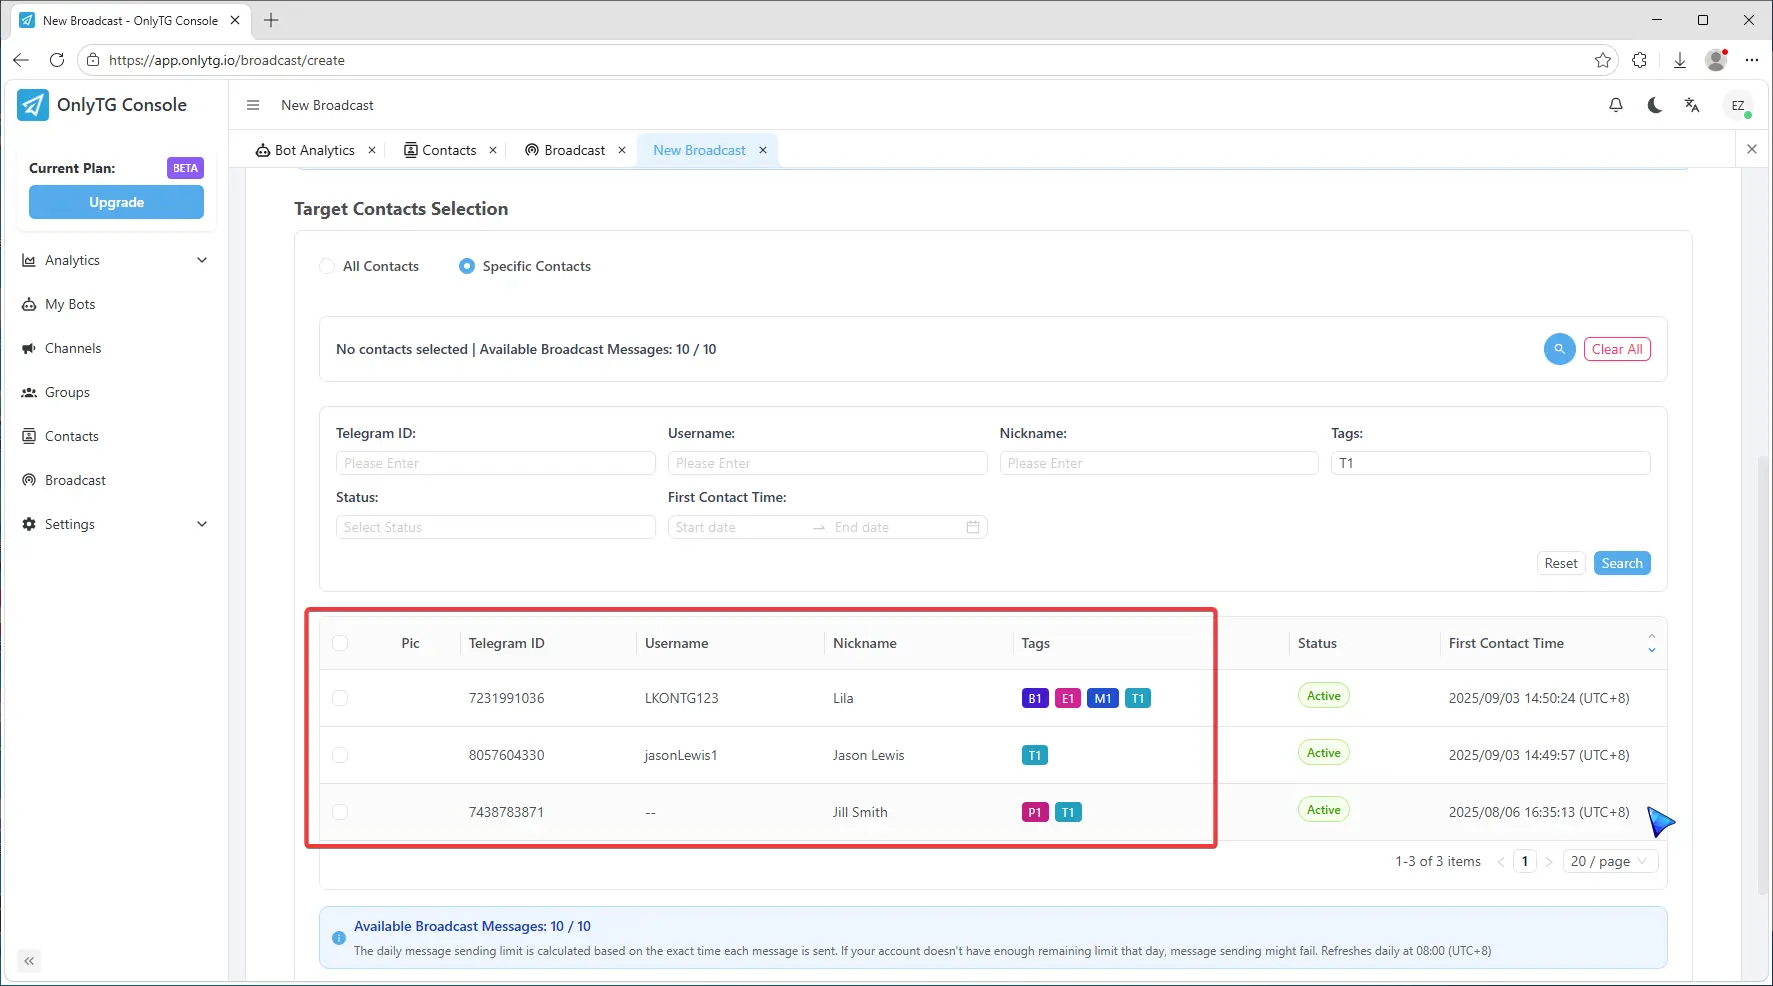
Use in Broadcast
When you reach the step of selecting target contacts, click the search icon in the top right corner,
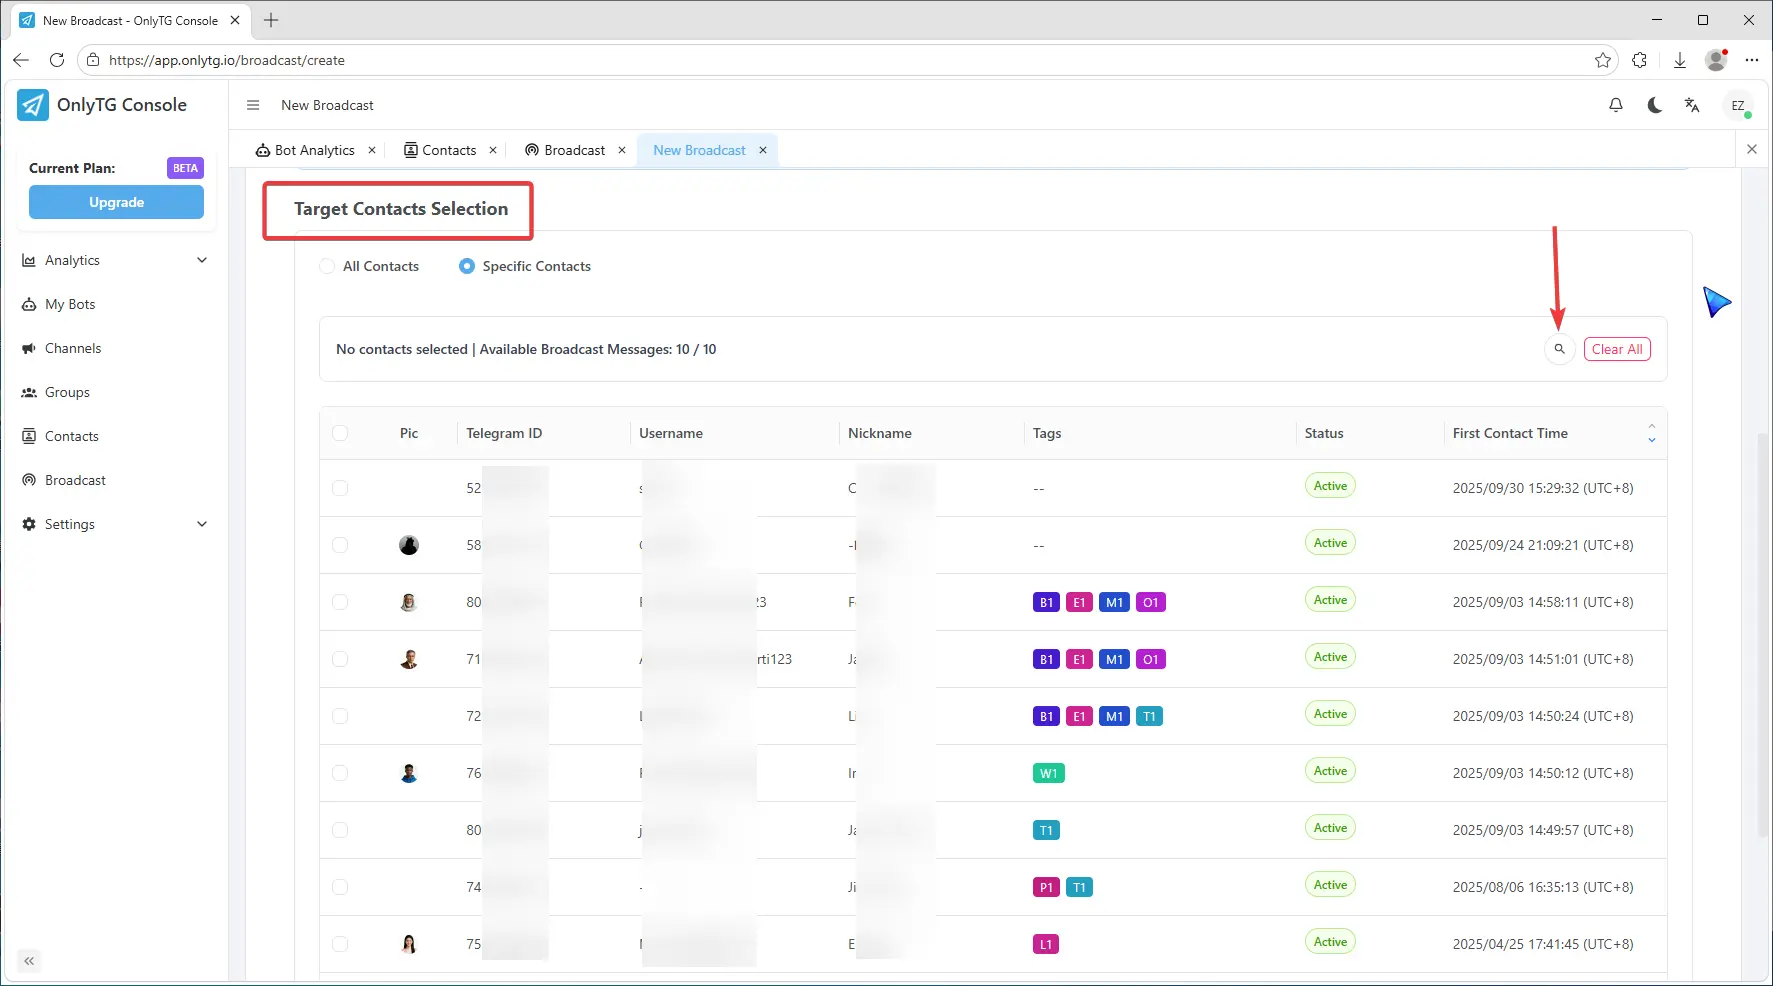
Select tags, and click confirm.
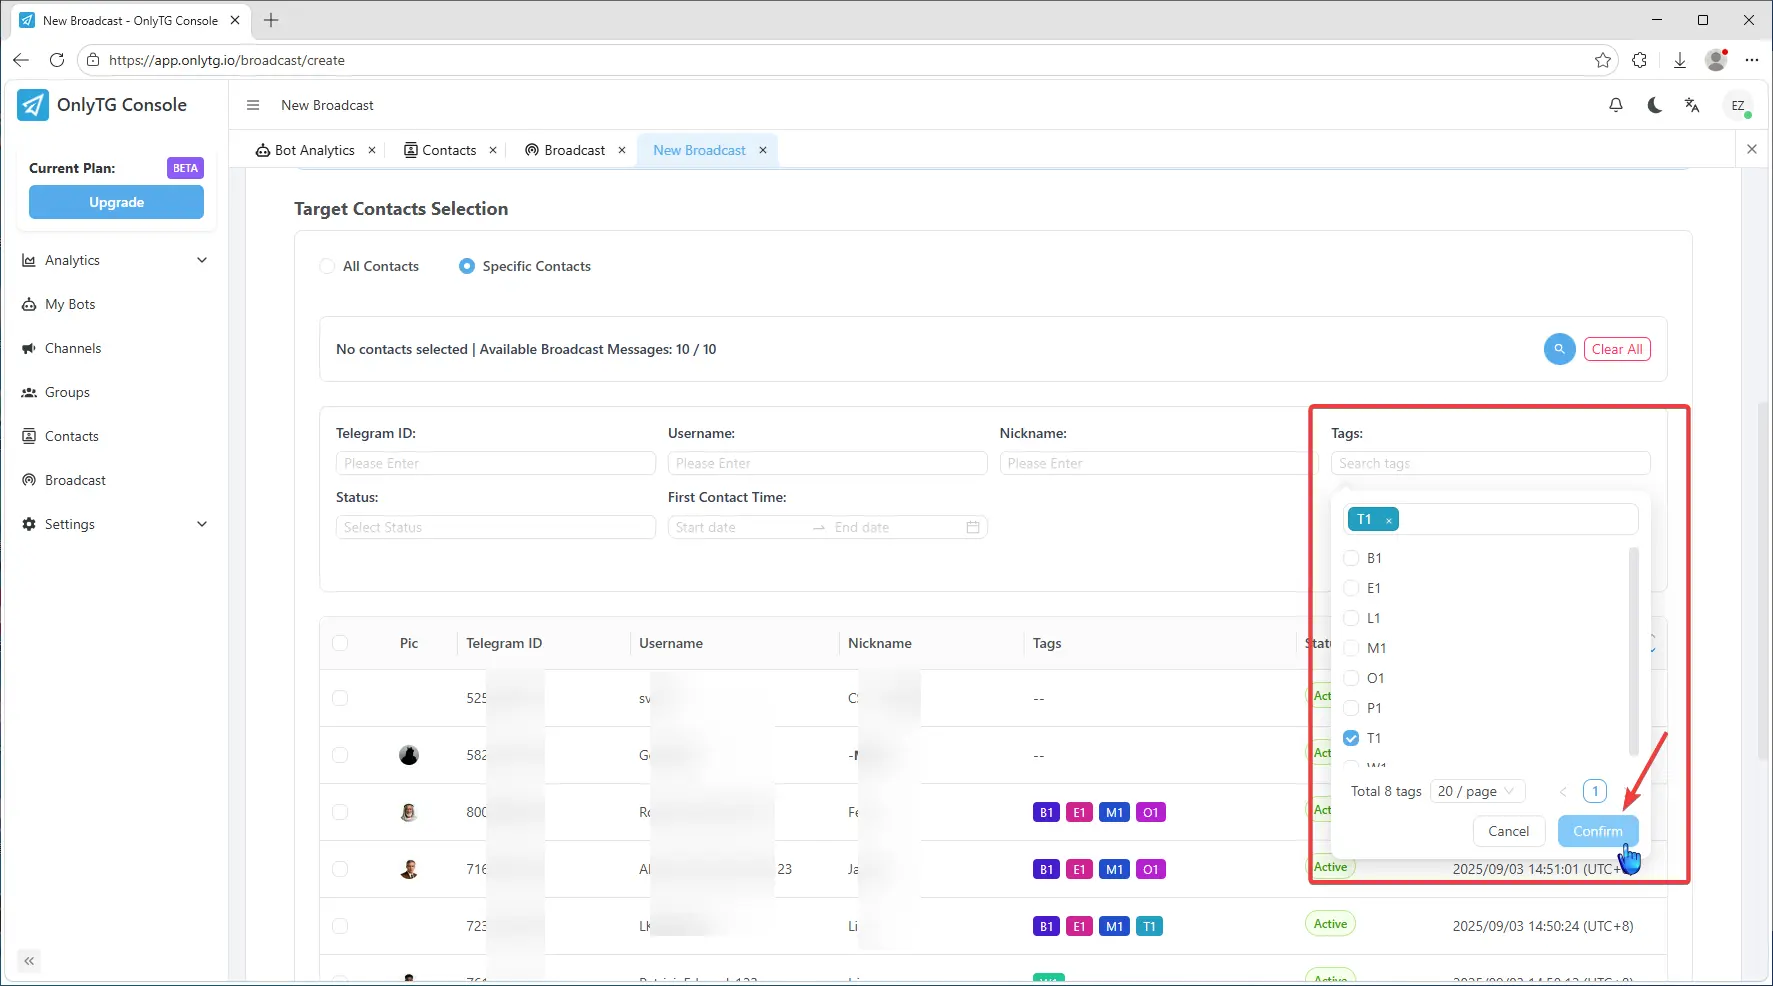
The list will now only show contacts with those tags.