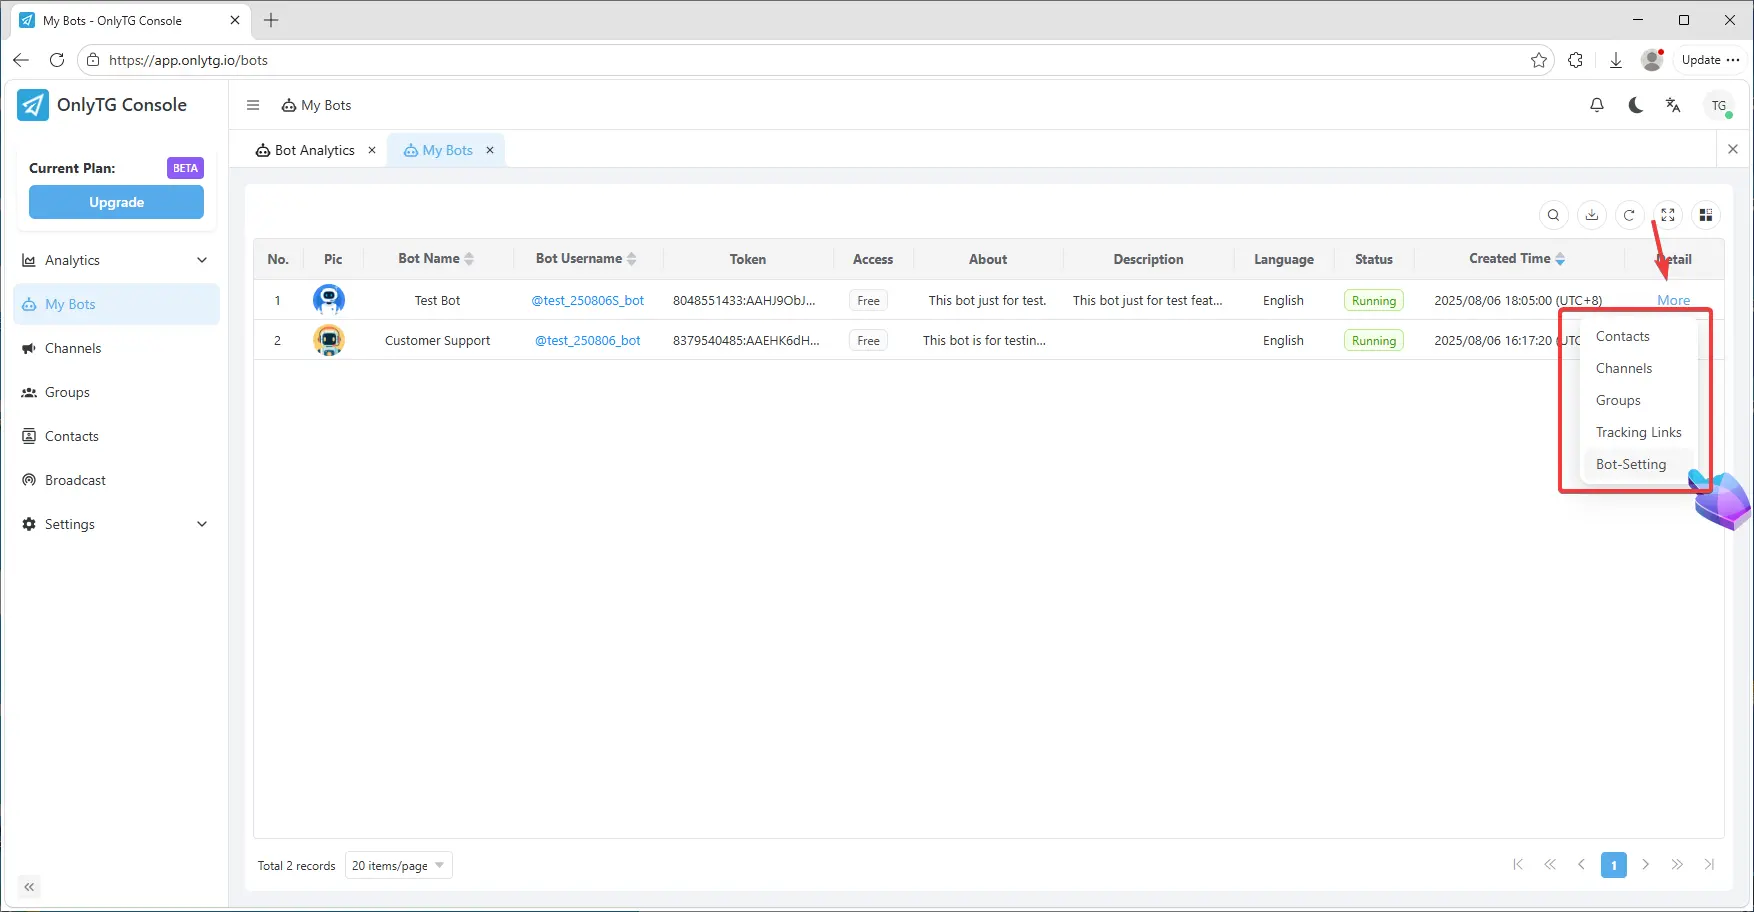
OnlyTG Console provides the function to authorize other users to manage your Bot.
Video Tutorial
step 1
Access the OnlyTG Console. You can access it by clicking Open App in @EchoOnBot, or directly enter app.onlytg.io in your browser.

step 2
Click Settings in the left menu.
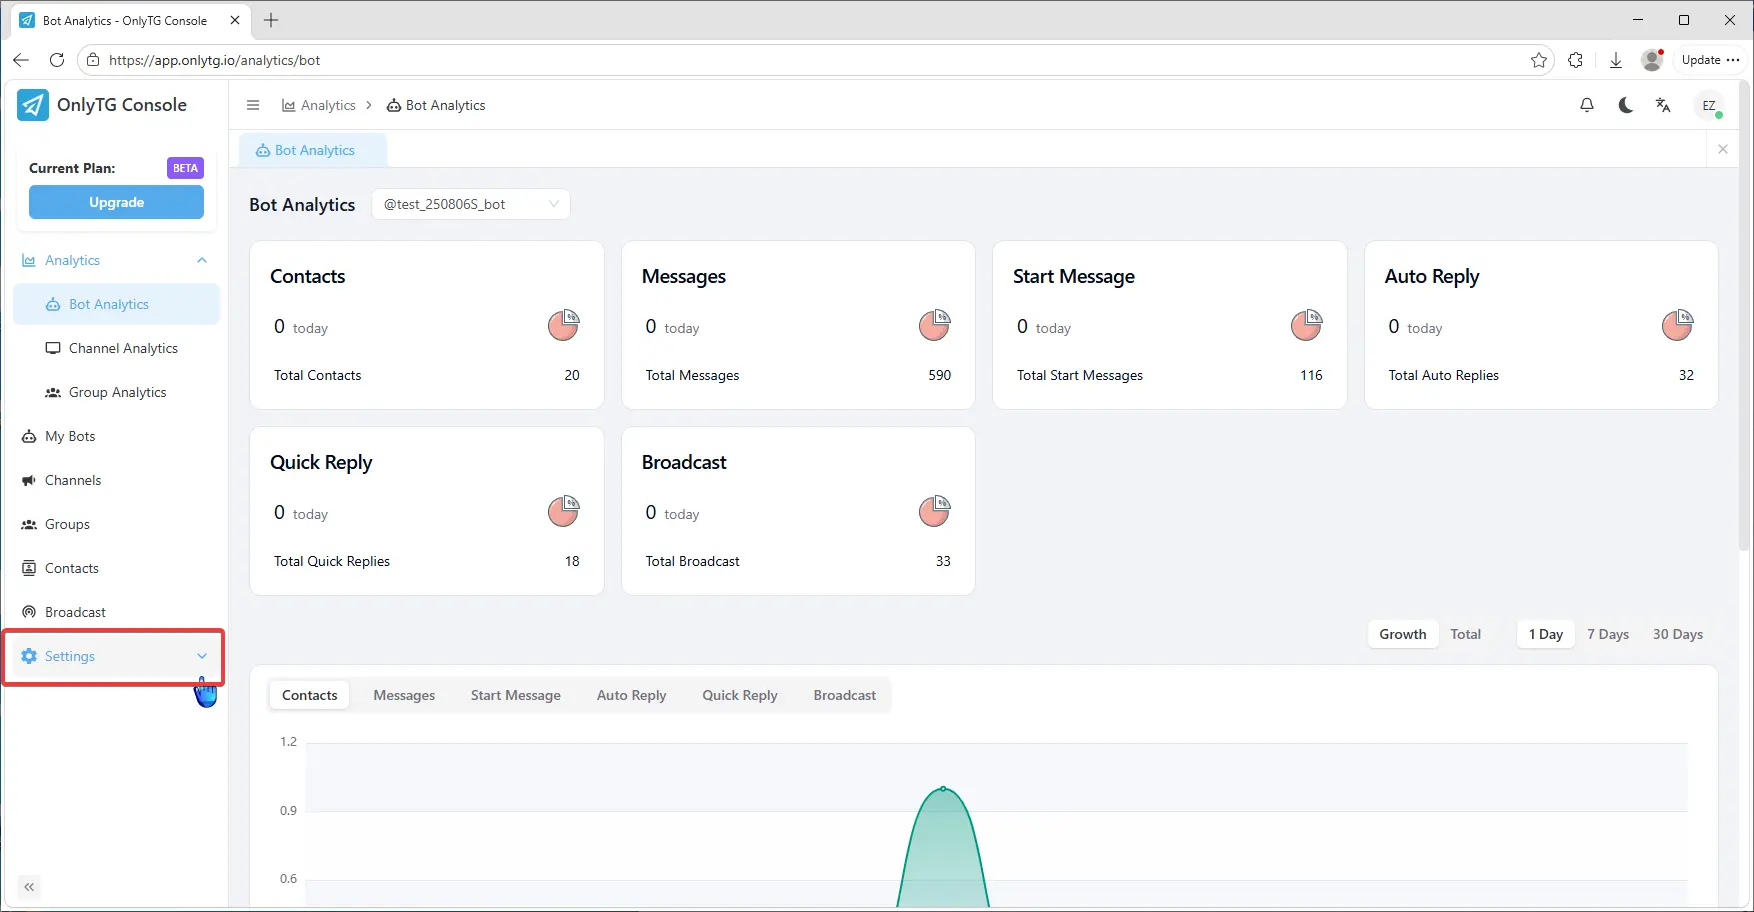
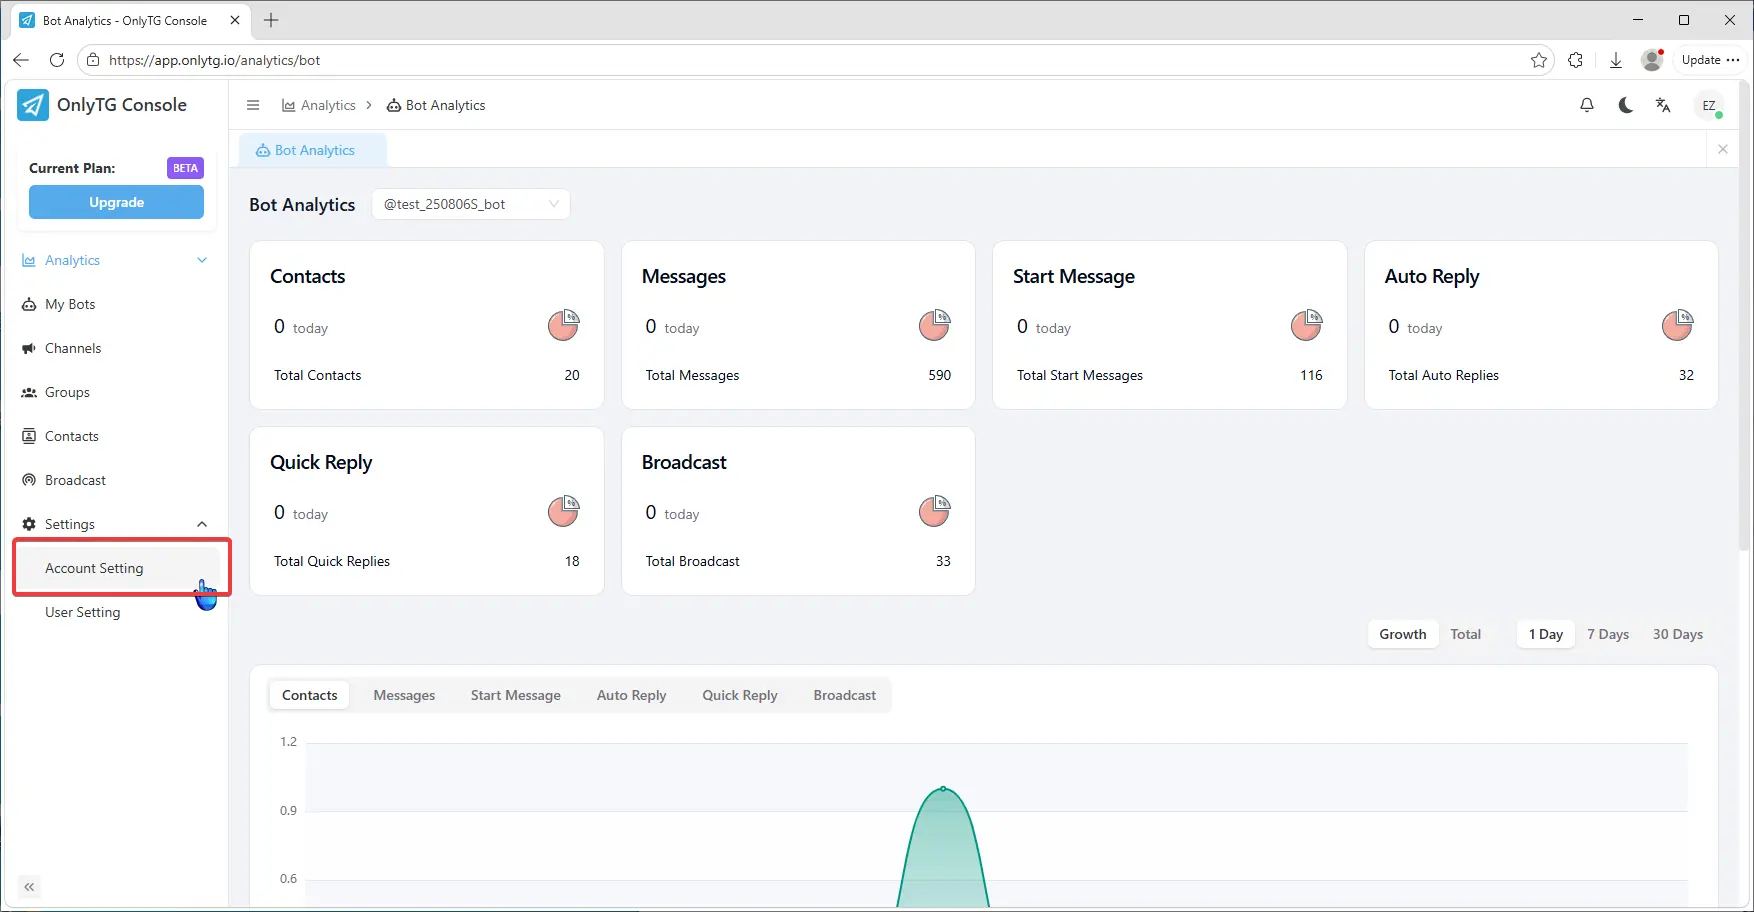
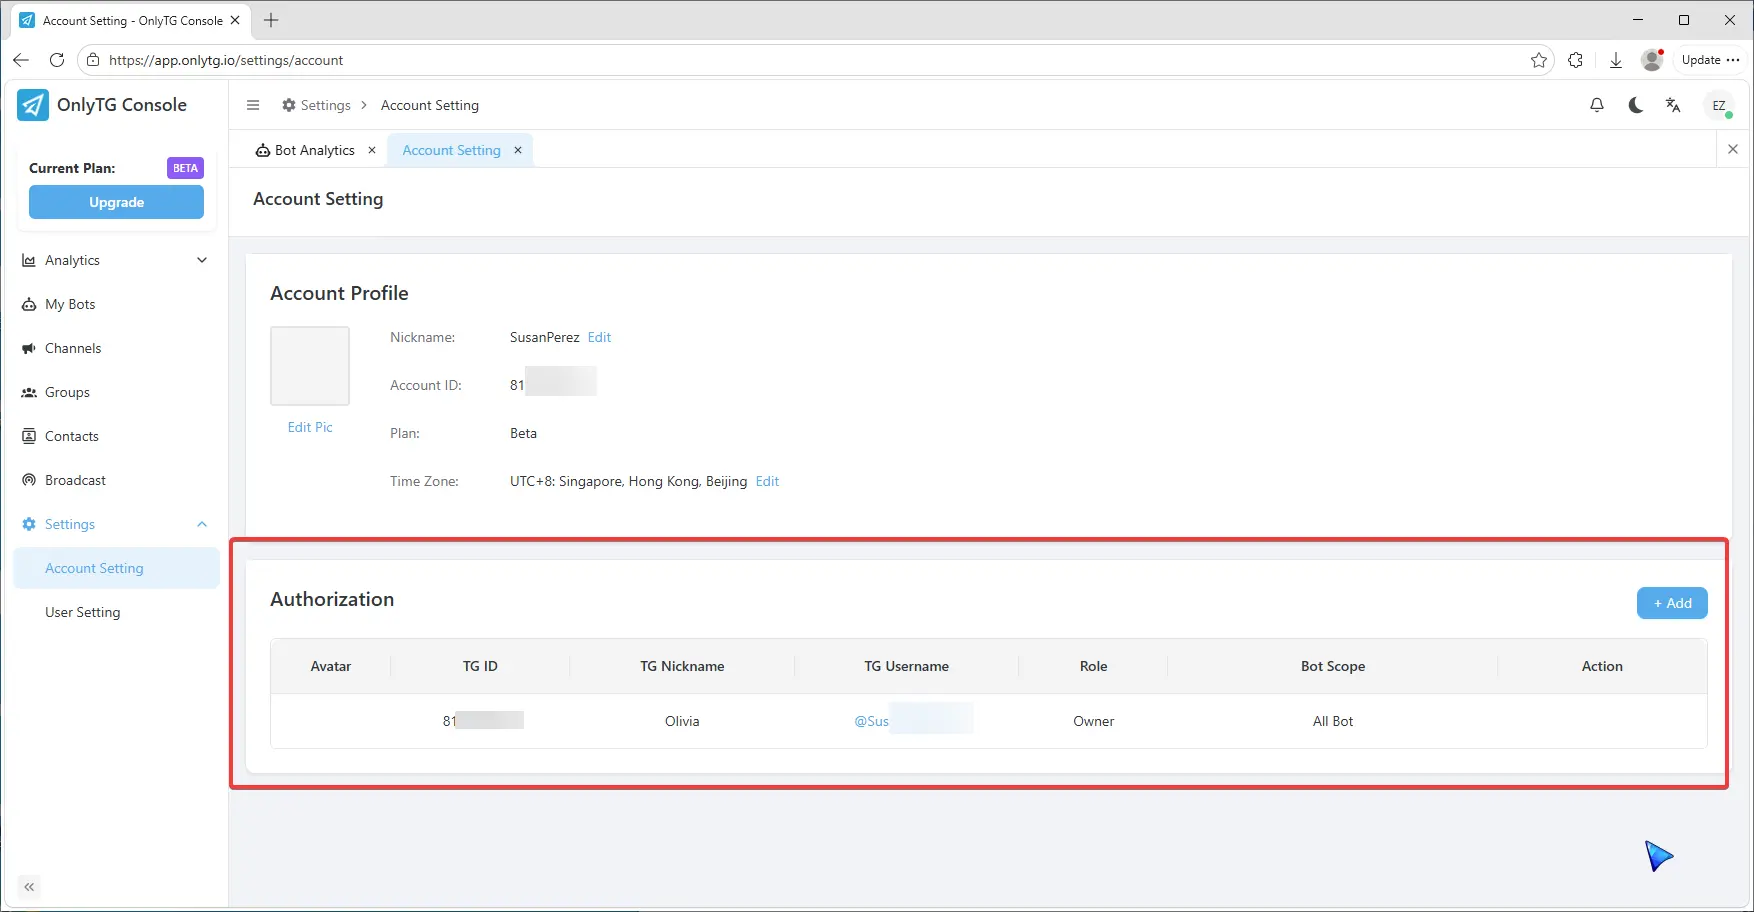
Click Account Setting.
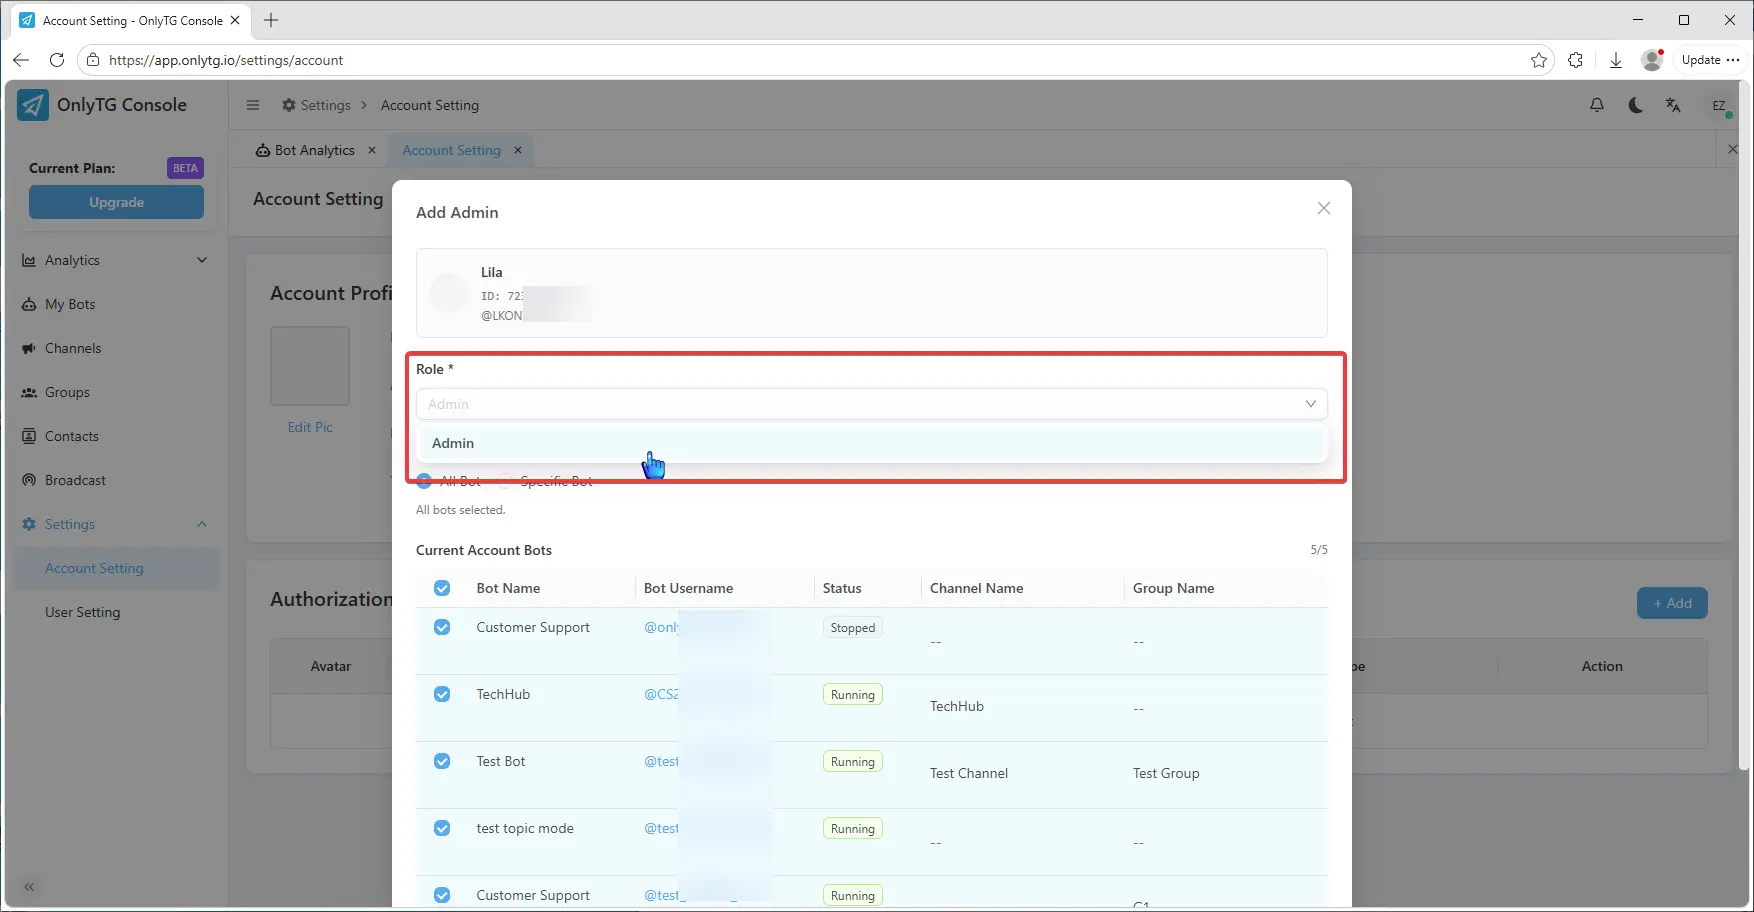
Here you can find the Authorization feature.
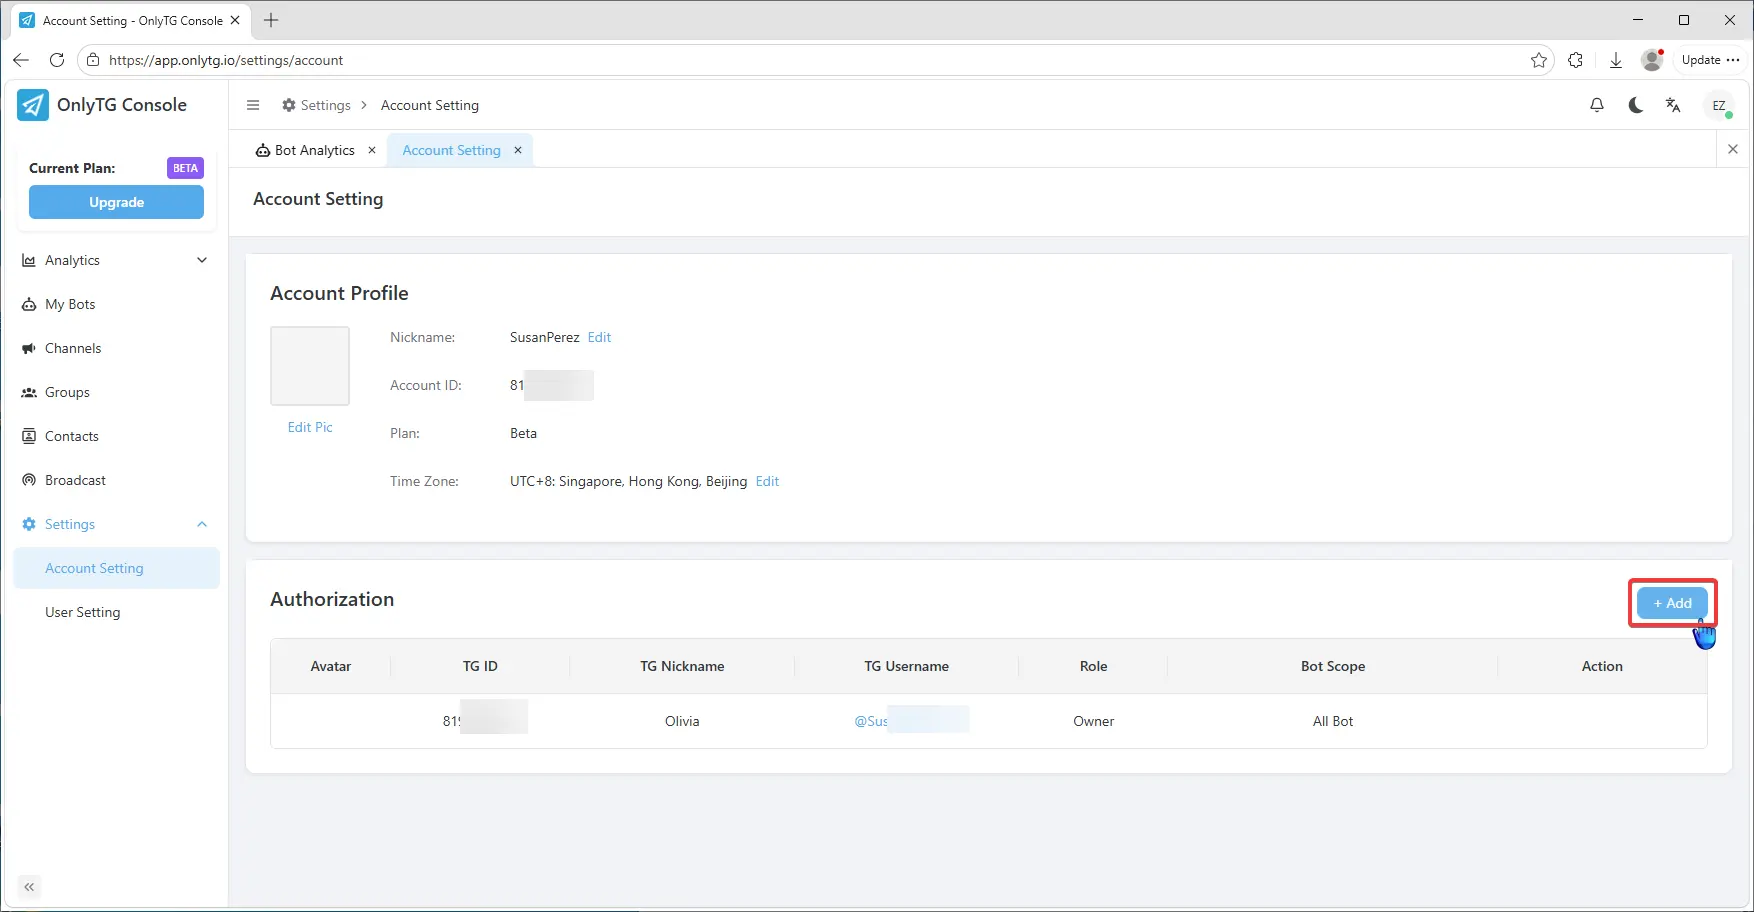
Click the Add button to add an admin.
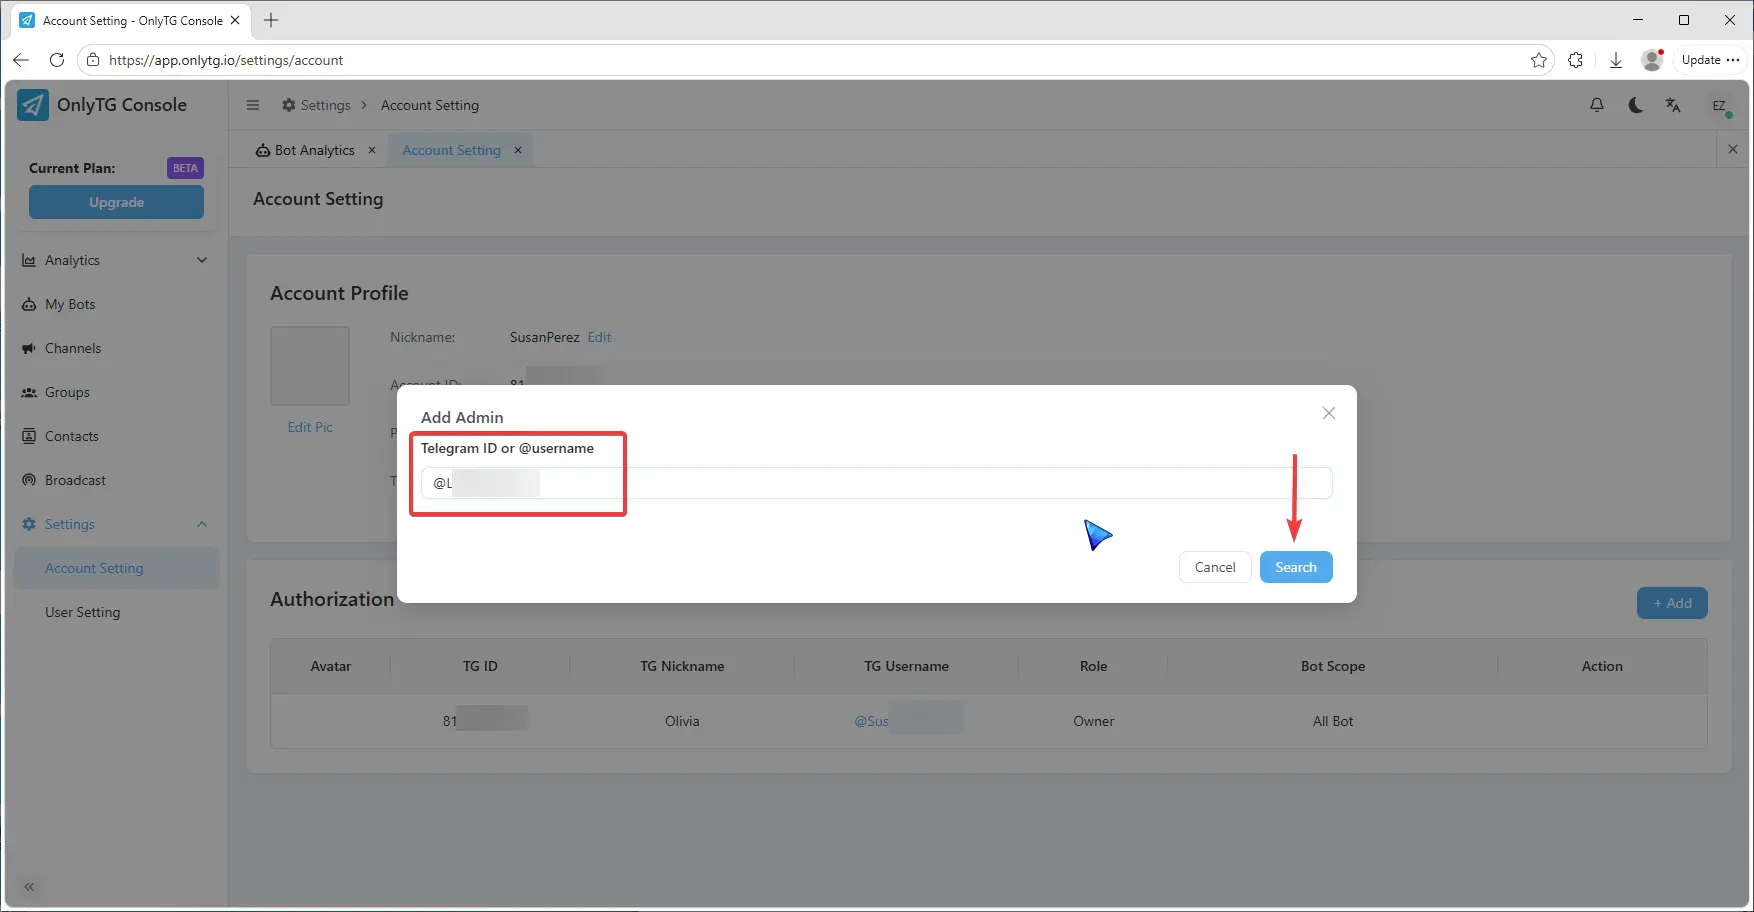
Enter the authorized Telegram ID or Username in the search box, Click Search.
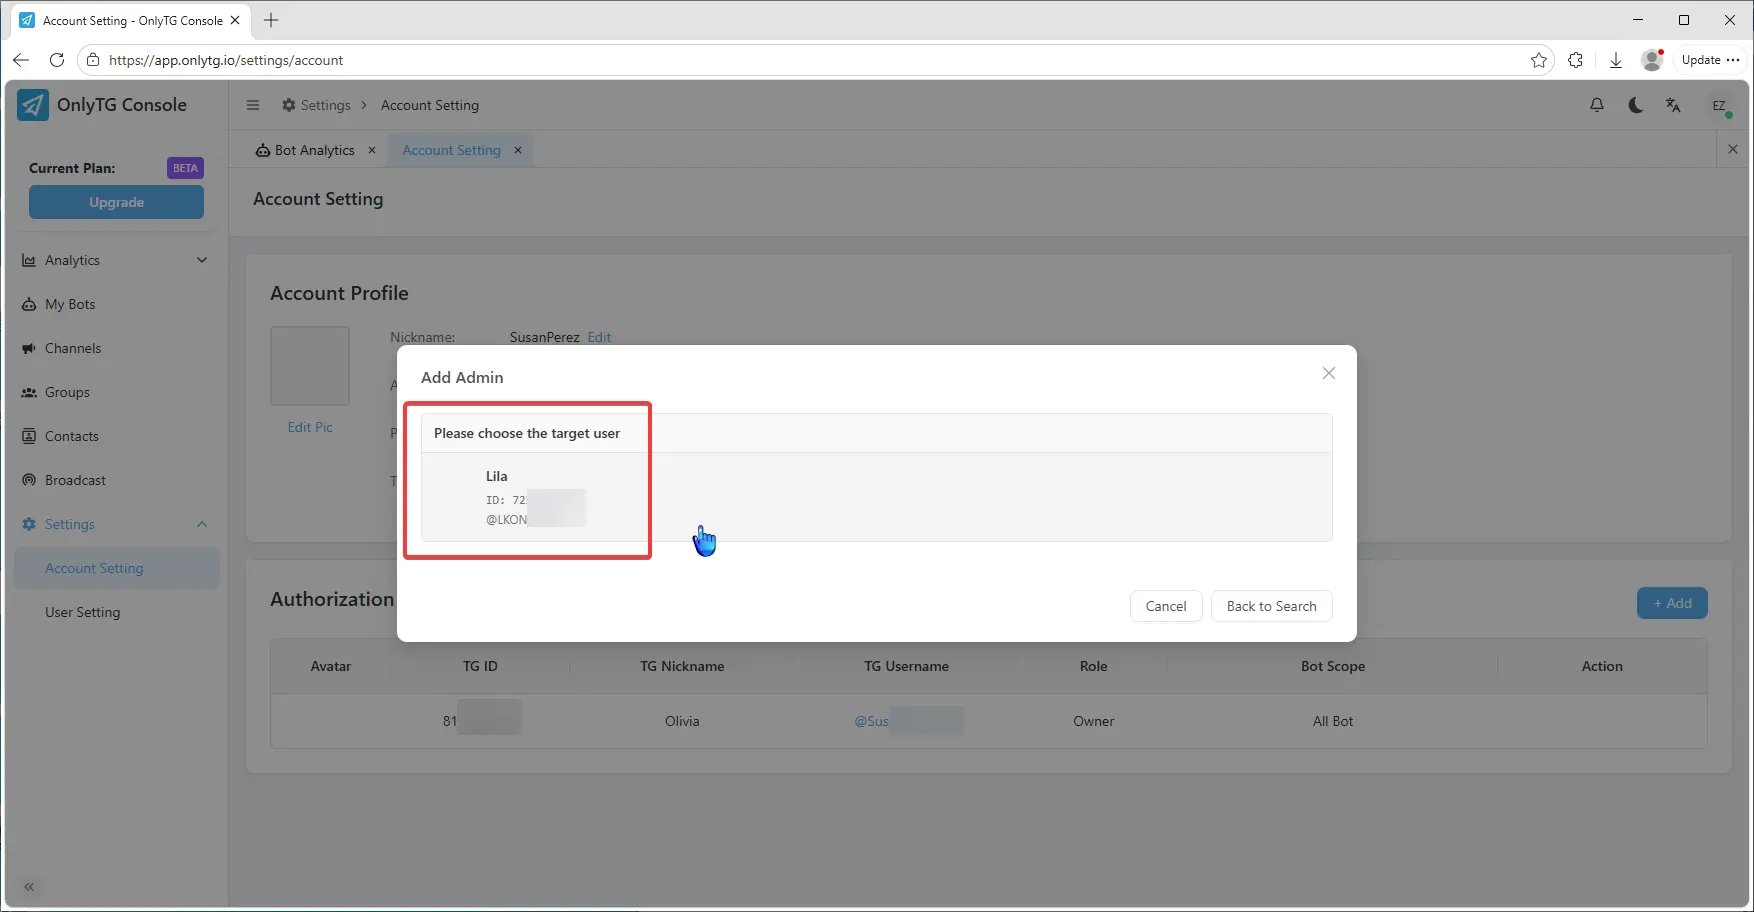
Then select the target user.
Select the Role for the authorized user, which is currently Admin only.
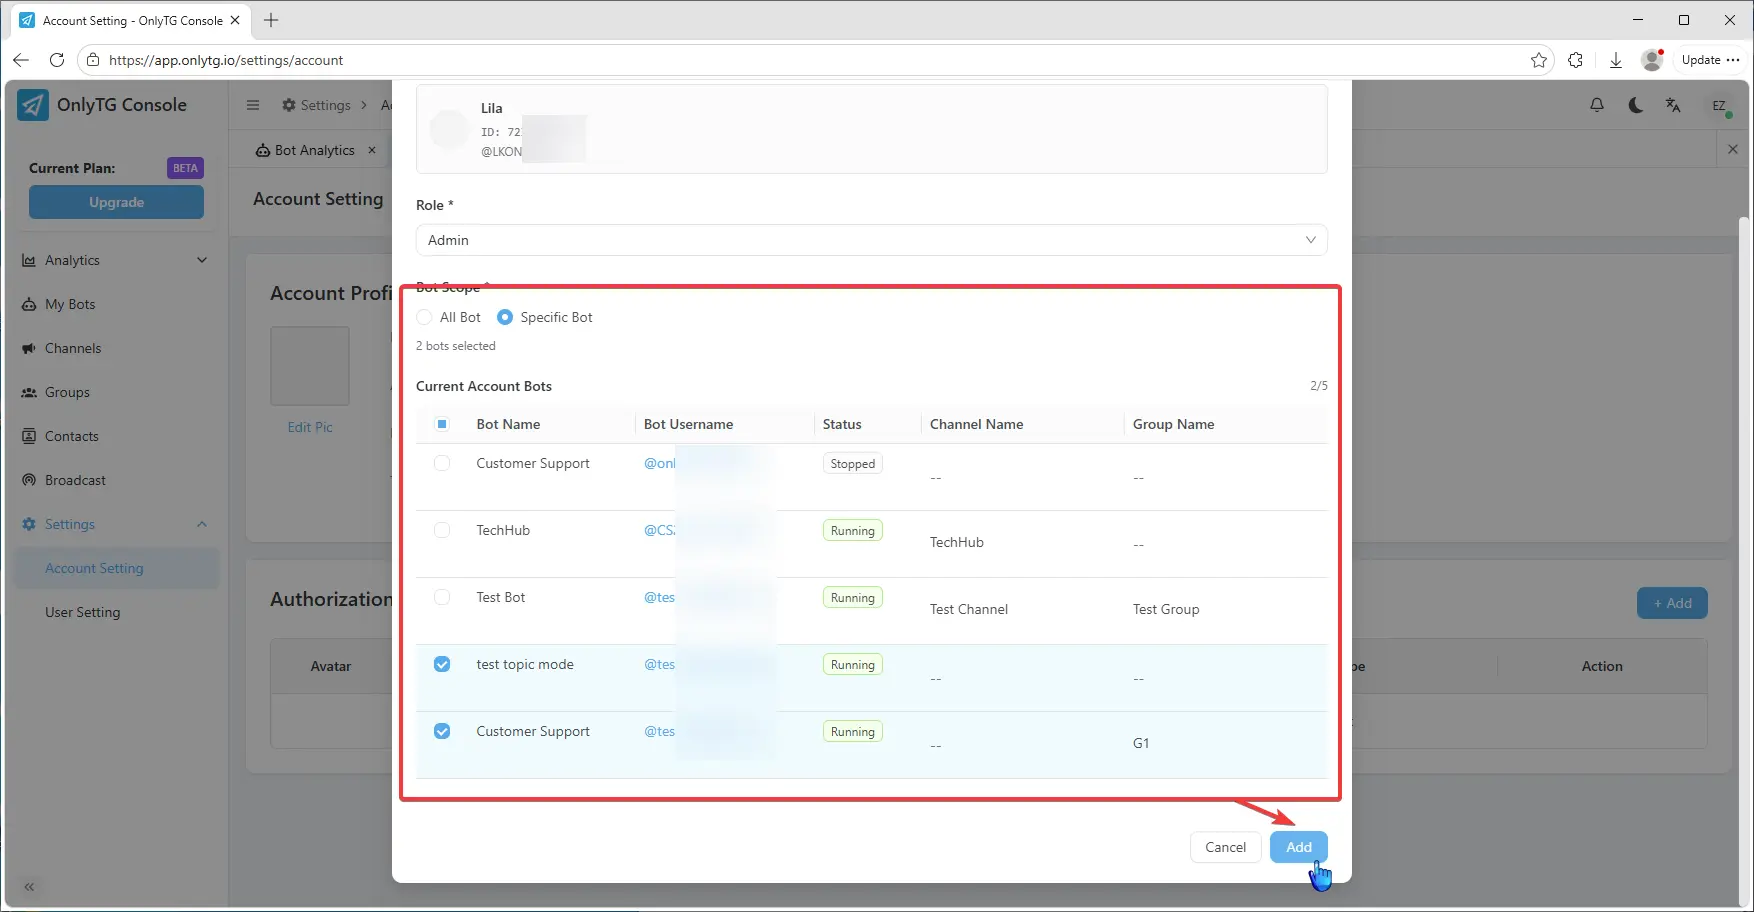
Select the Bots Scope to authorize — you can choose All bots or only specific ones. Click the Add button to complete authorization.
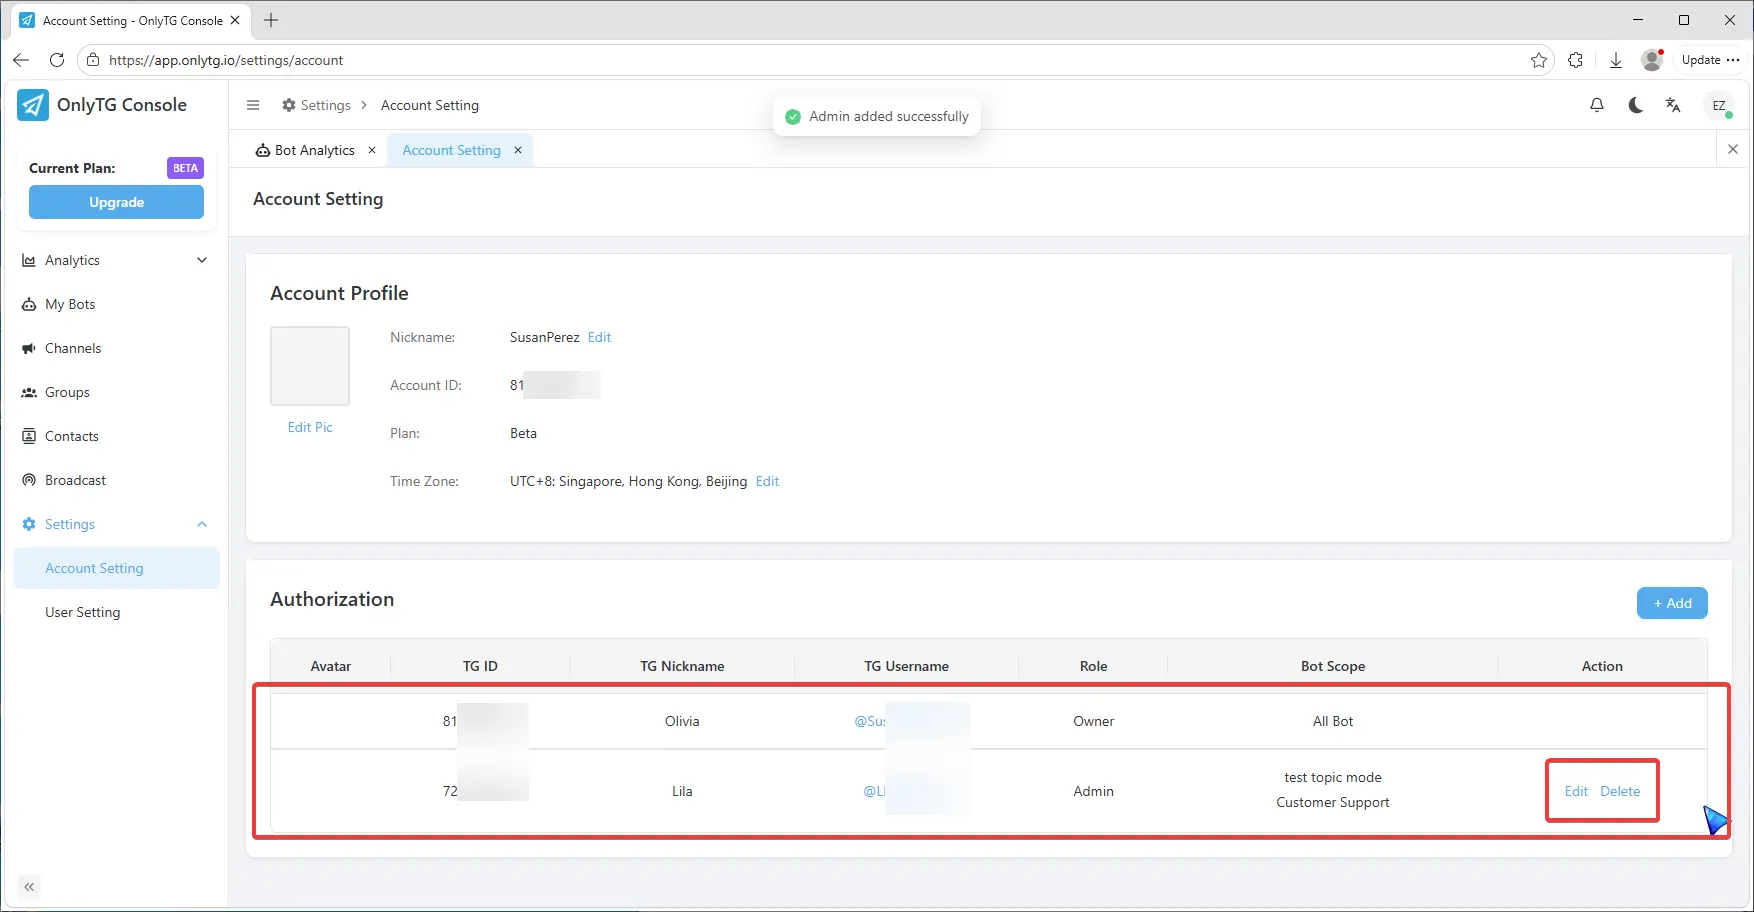
Here you can view an overview of authorizations, and you can click the buttons on the right to Edit or Delete them.
Authorized User’s Console
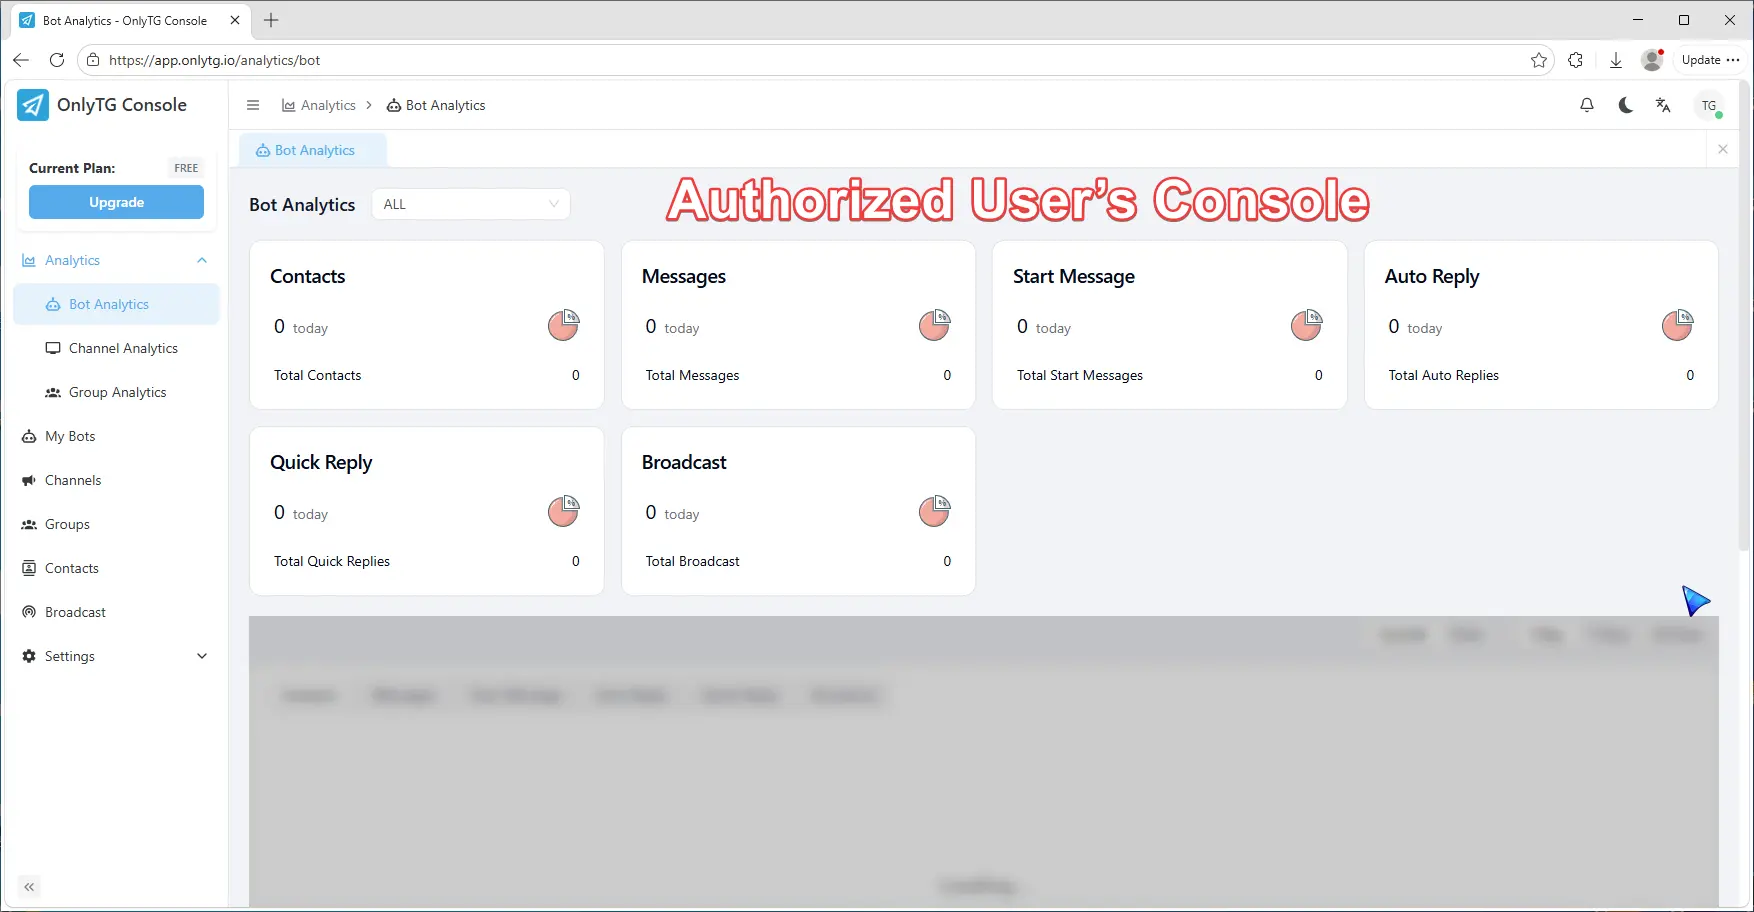
Click the button at the top right corner. Under the Account section, you will notice that in addition to the authorized user’s own account, there is now an additional account belonging to the grantor. You can click here to switch between.

After switching accounts, the authorized user will be able to manage the permitted Bots, as well as view detailed data including contacts, channels and groups linked to these Bots.
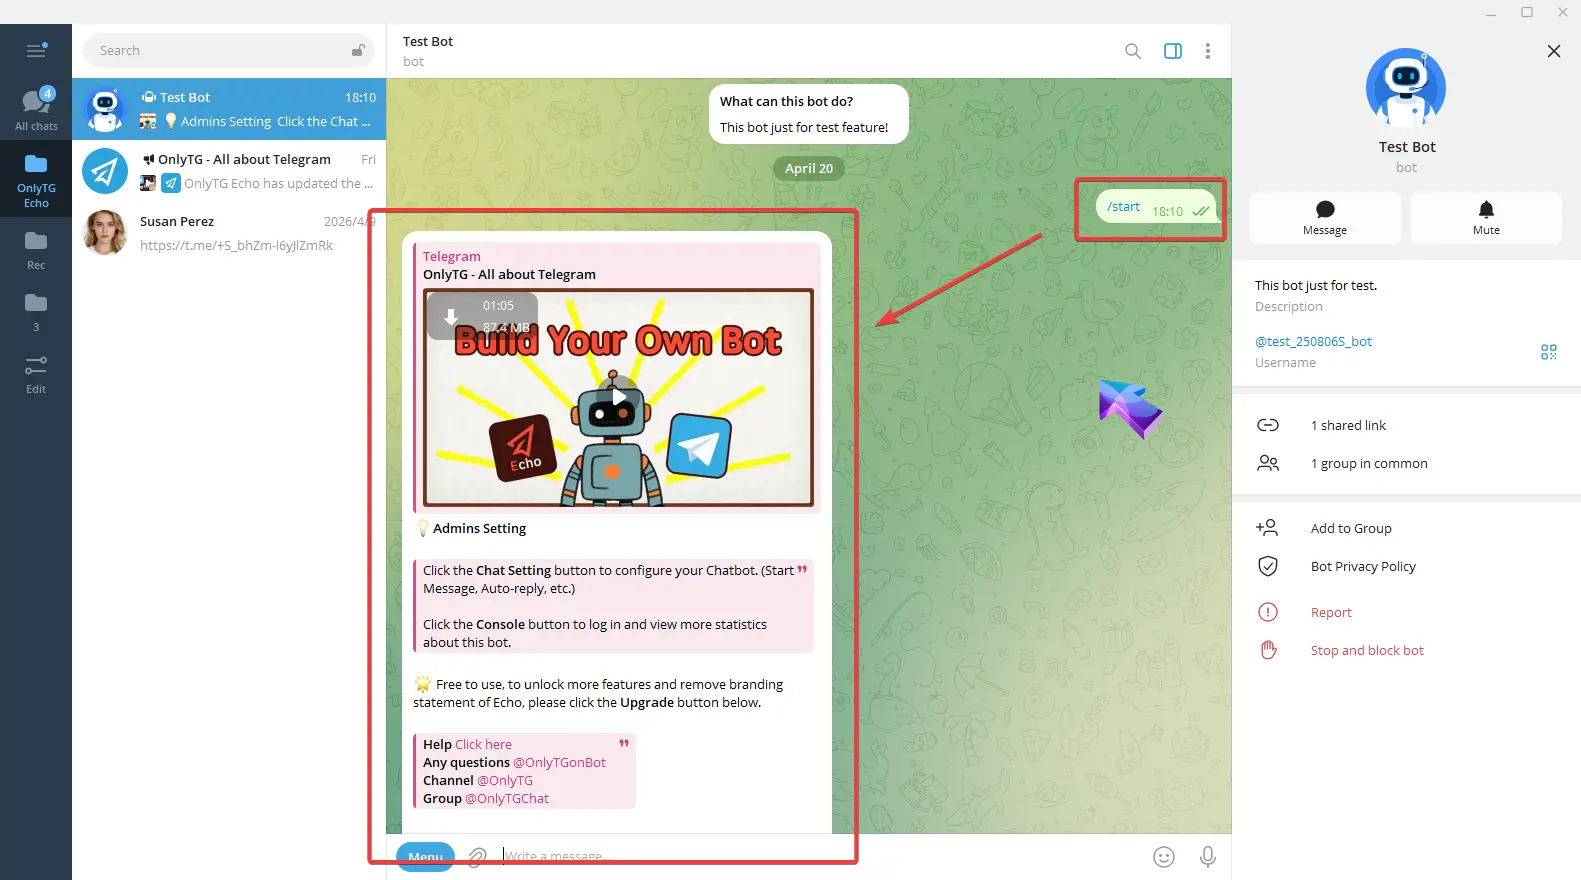
Additionally, when the authorized user sends the start command to these Bots on Telegram, an Admin settings message will appear just as it does for the bot owner, allowing them to manage and configure the bot features.