Skip to content
OnlyTG Icon
  • ProductsExpand
    • Echo
    • Recorder
  • ResourcesExpand
    • Help
    • Blog
  • EnglishExpand
    • 中文 (中国)
    • Русский
    • English
Contact us

OnlyTG Echo

  • Introduction
  • How to start
  • Chatbots
    • Message Receive and Reply
    • Set Start Message
    • Set Auto-reply and keywords-based reply
    • Set Quick Reply
    • Create Broadcast Task
    • Tracking Links
  • Channels
    • Channel Management
    • Channel Post
    • Channel Post Edit
    • Pro Communities – Channel
    • Loop Post on Telegram Channels
  • Groups
    • Group Management
    • Group CAPTCHA
    • Group Greeting
  • Others
    • Change to Topic Mode
    • Multimedia Messages
    • Set and use content module
    • Edit bot infomation
    • View my bot’s statistics

OnlyTG Recorder

  • Introduction
  • Record Message and Foward
  • Save Record
  • Lock Record
  • Edit Record Title
  • Timezone
View Categories
  • Home
  • Docs
  • Channel Post

Channel Post

2 min read

OnlyTG Echo provides the function to Publish Channel Post via your bot. You can configure text/media/button for your post.

Video Tutorial

 step 1

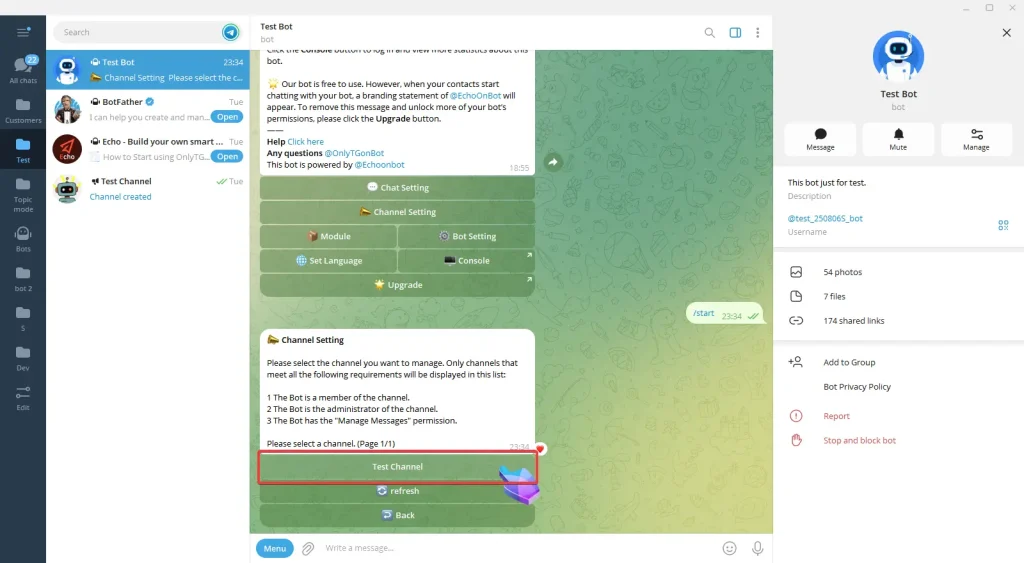
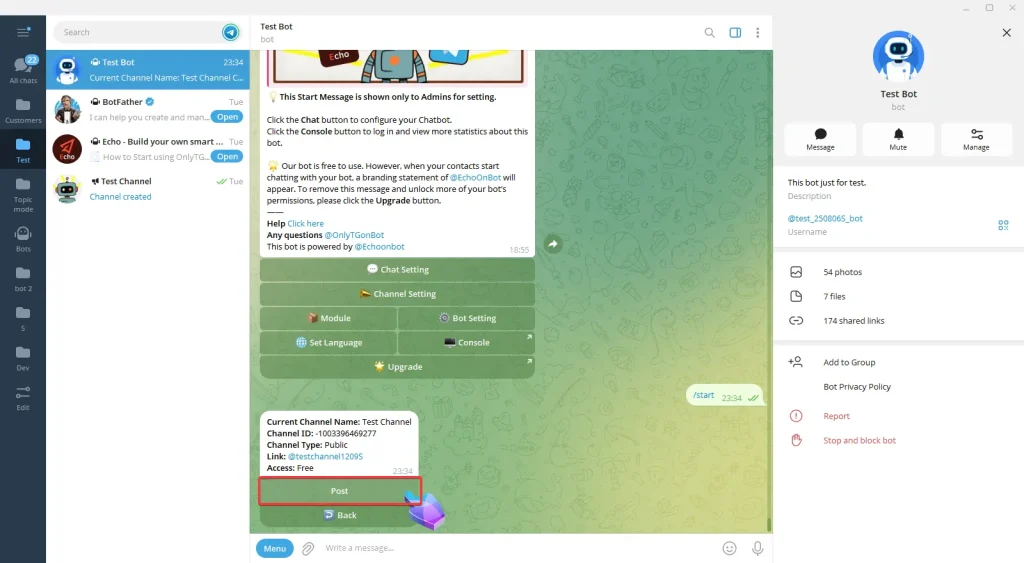
Send /start command to your bot and click Channel Setting button.

Channel Post

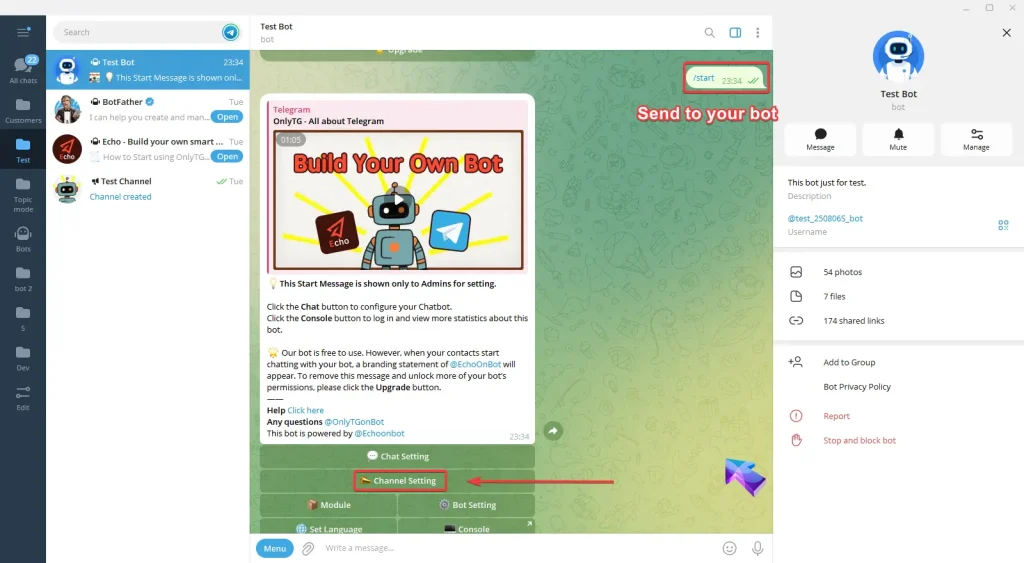
Now select your channel and you can view the channel’s basic information. (Click here to learn how to add channels?)

Channel Post
Channel Post

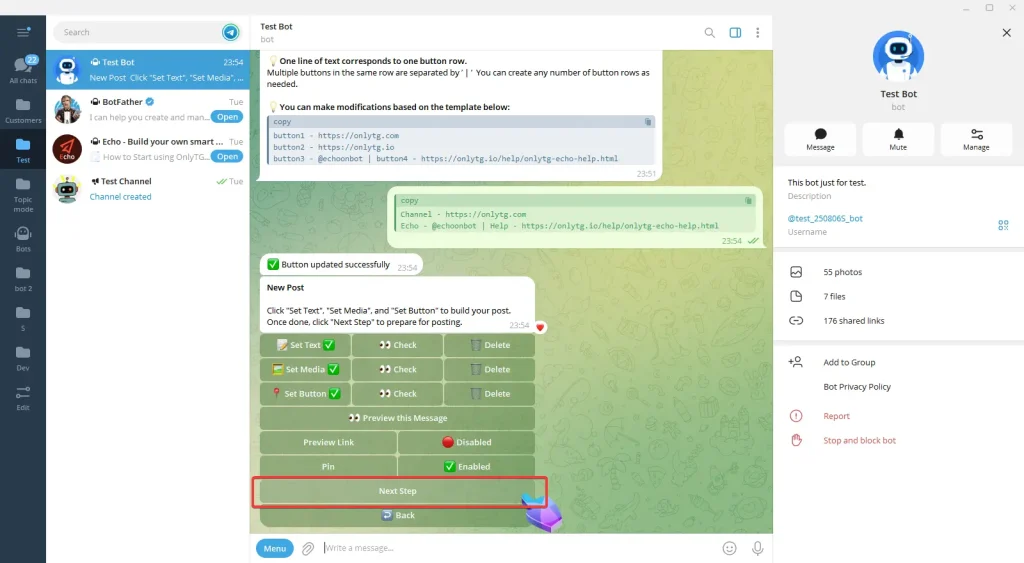
Click Post button and then New Post button.

Channel Post
Channel Post

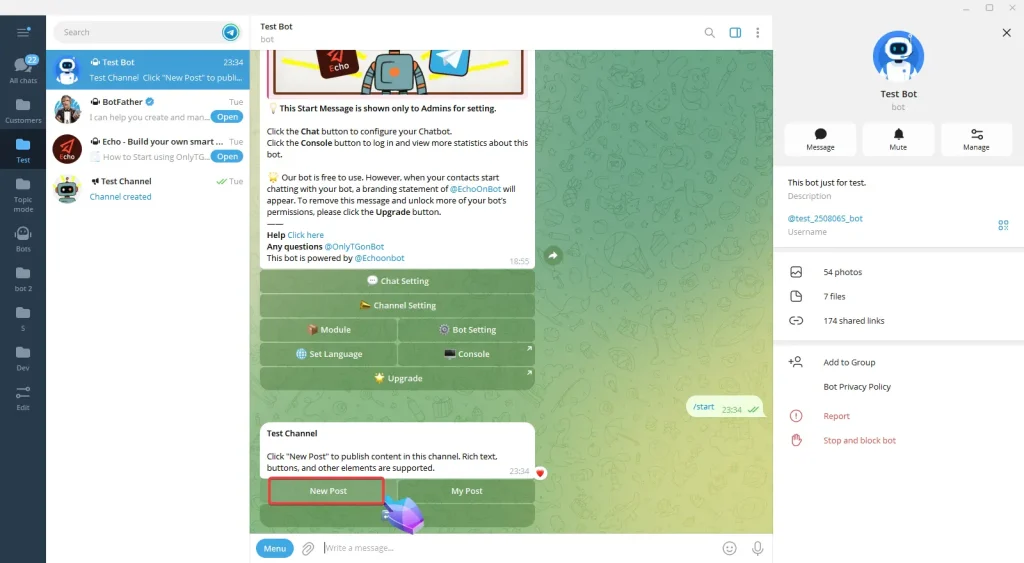
Here, you can configure Text/Media/Button for your post.

Channel Post

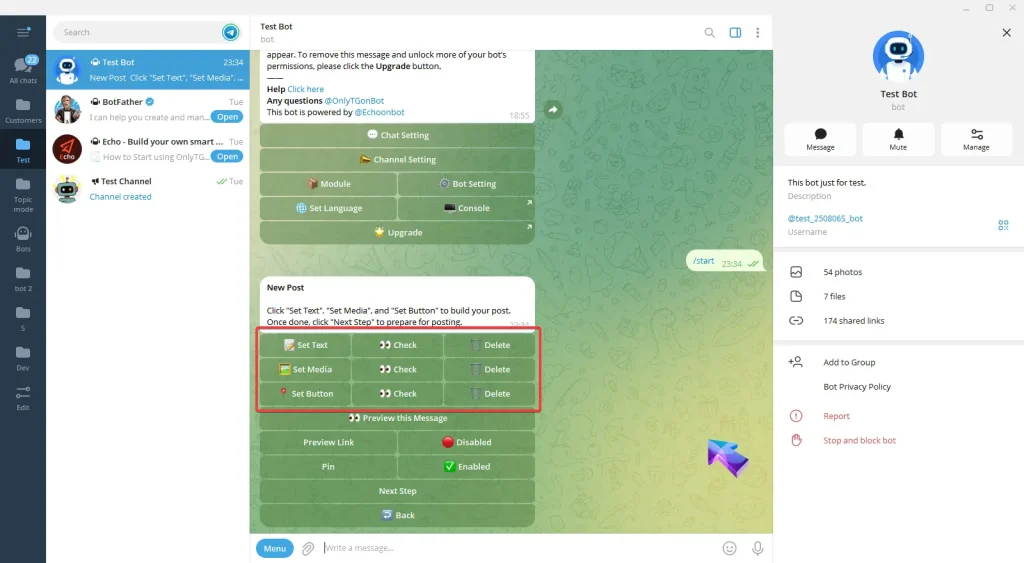
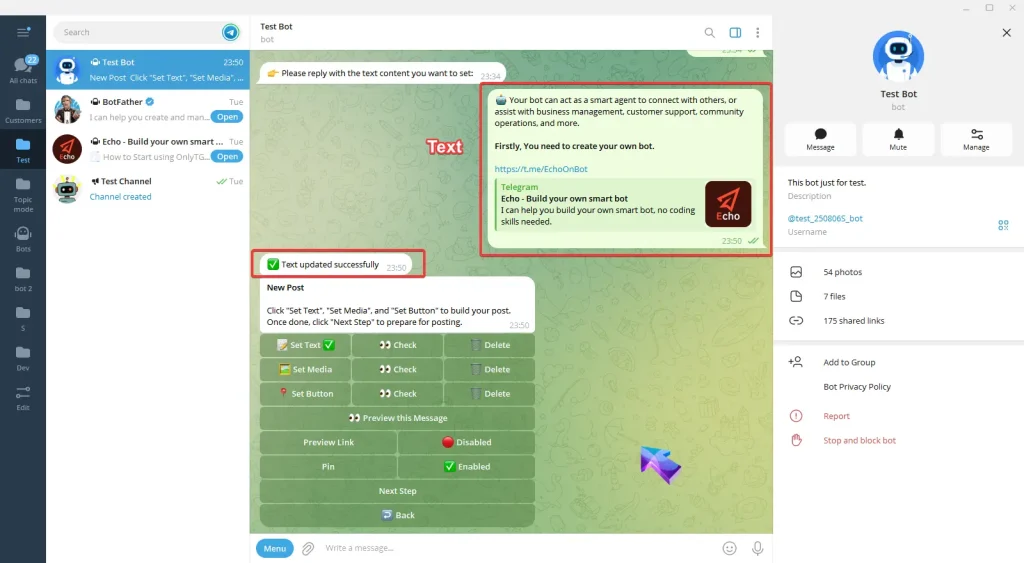
A. Set Text: Reply with your text. Once the update success message pops up, it means the process is complete.

Channel Post

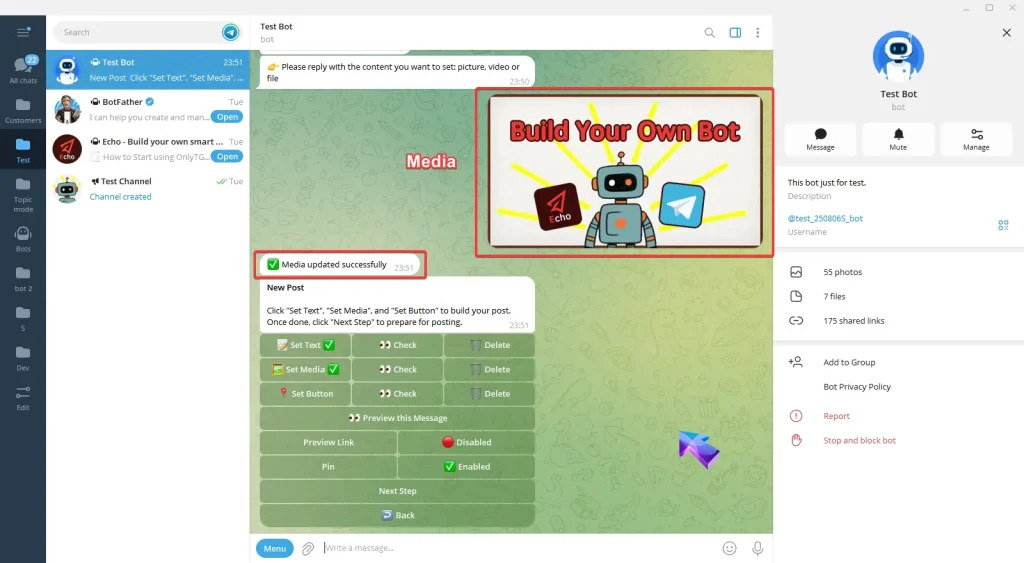
B. Set Media: Reply with the content you want to set: picture, video or file. Once the update success message pops up, it means the process is complete.

Channel Post

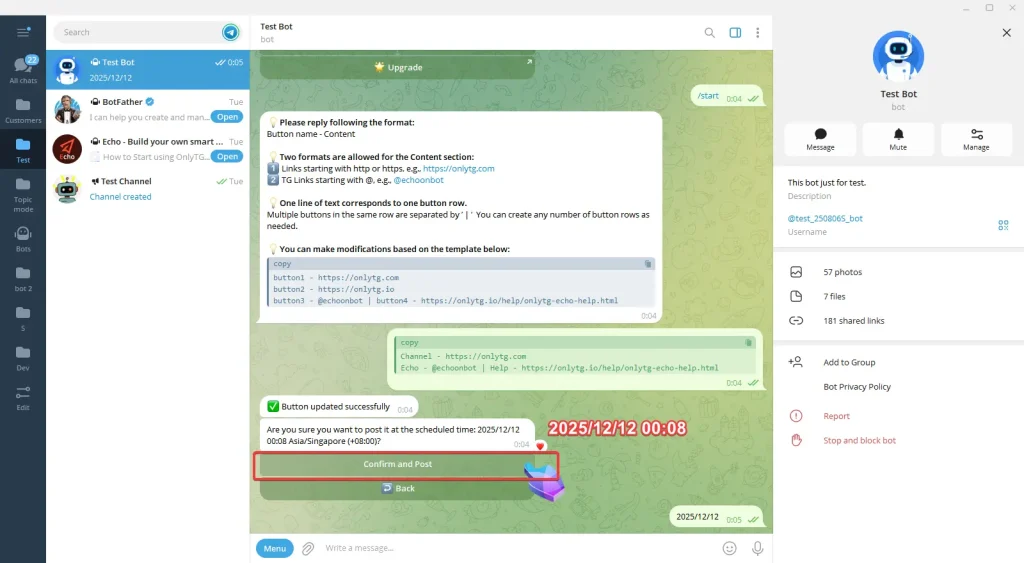
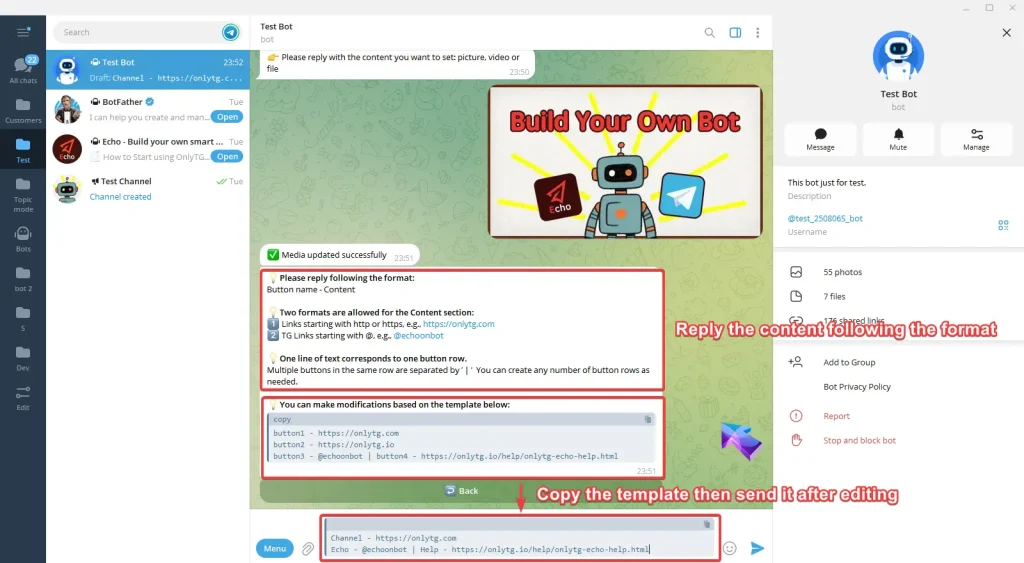
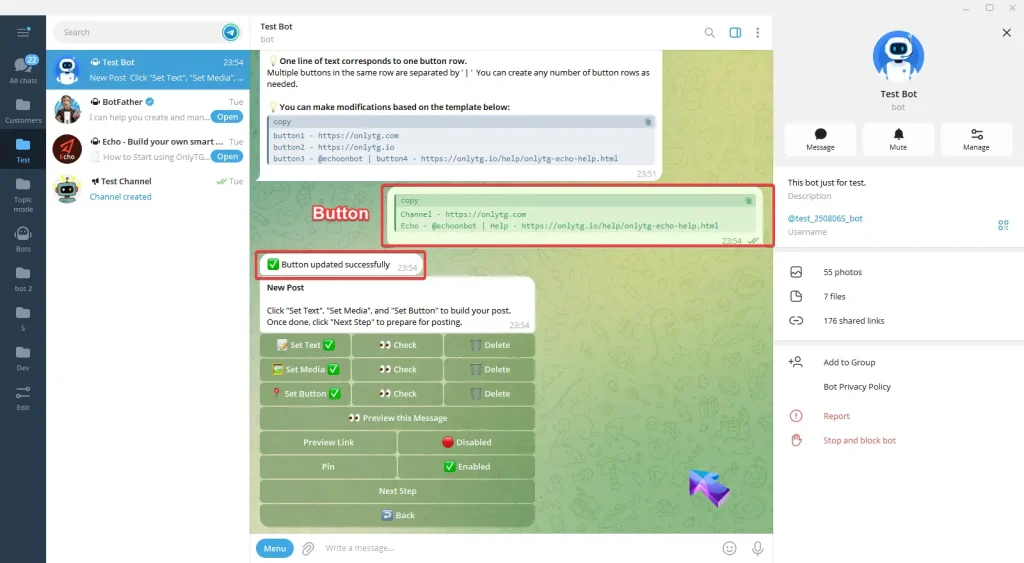
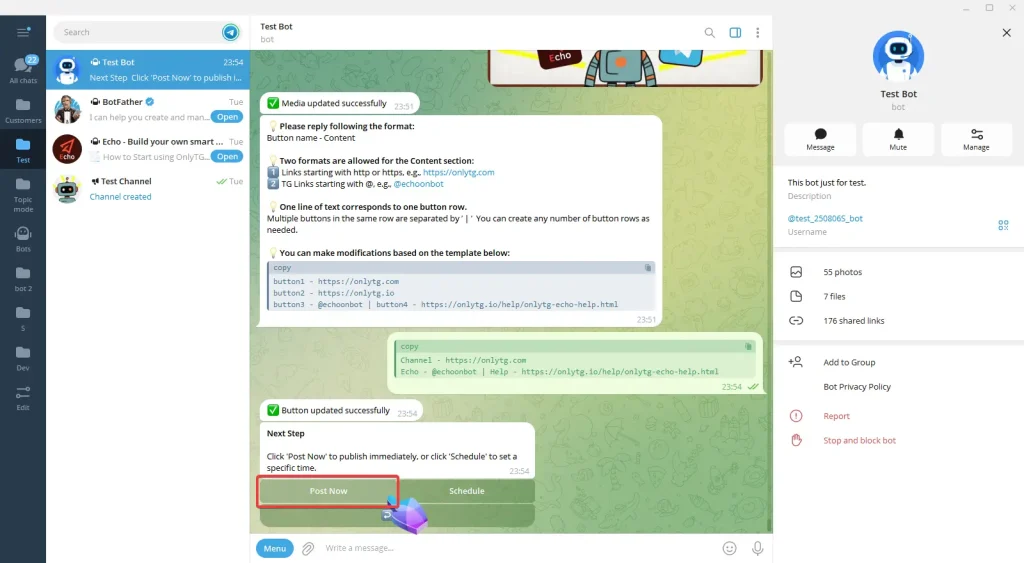
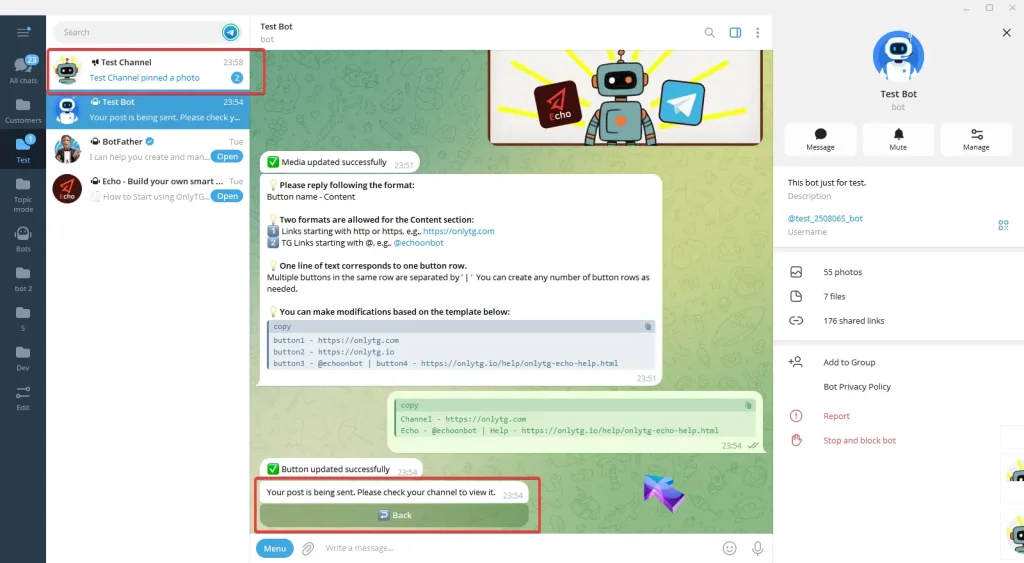
C. Set Button: Reply the content following the format in the prompt. You can also directly copy the template then send it after editing. Once the update success message pops up, it means the process is complete..

Channel Post
Channel Post

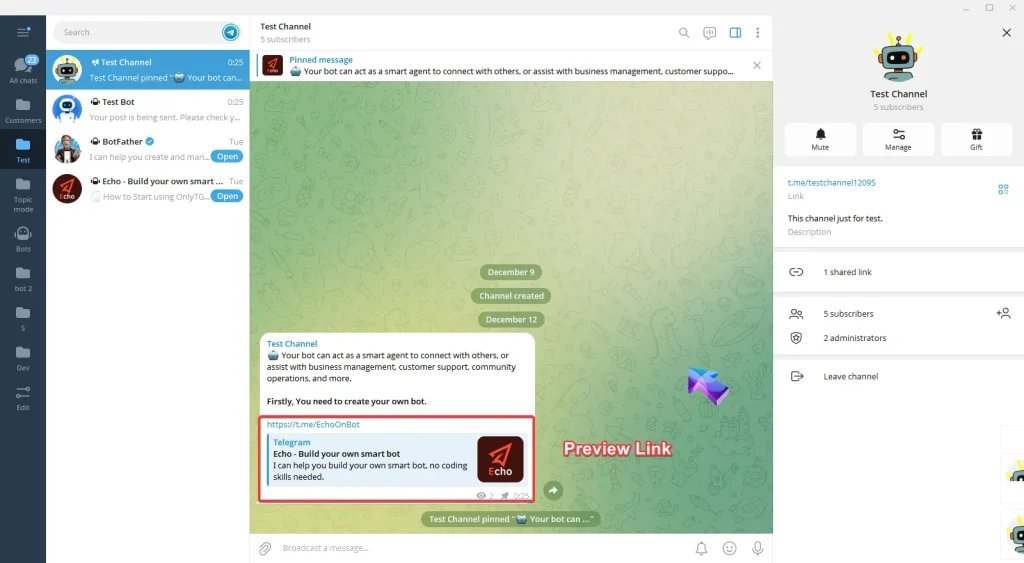
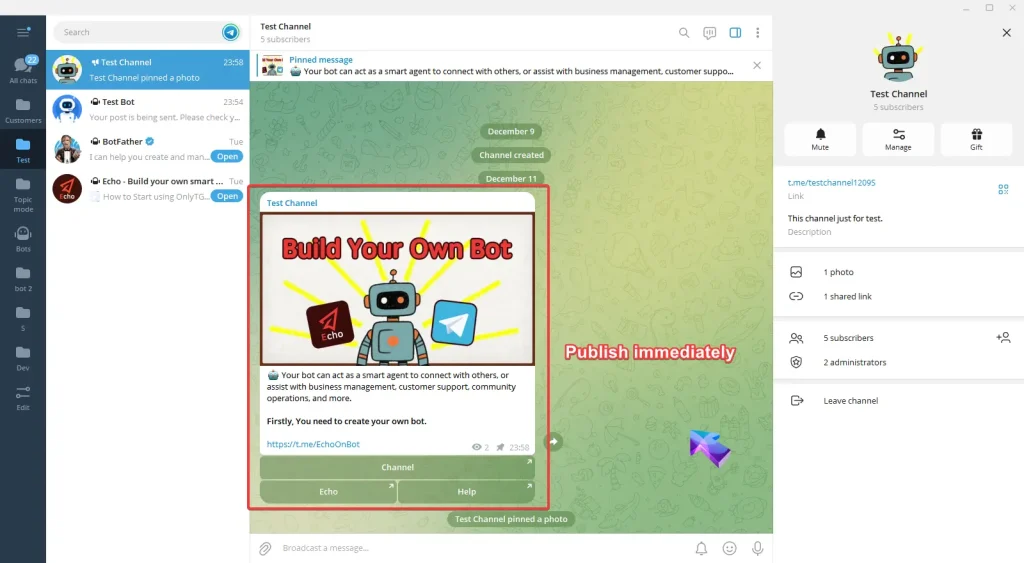
After completing the above configurations, click here to preview this message.

Channel Post

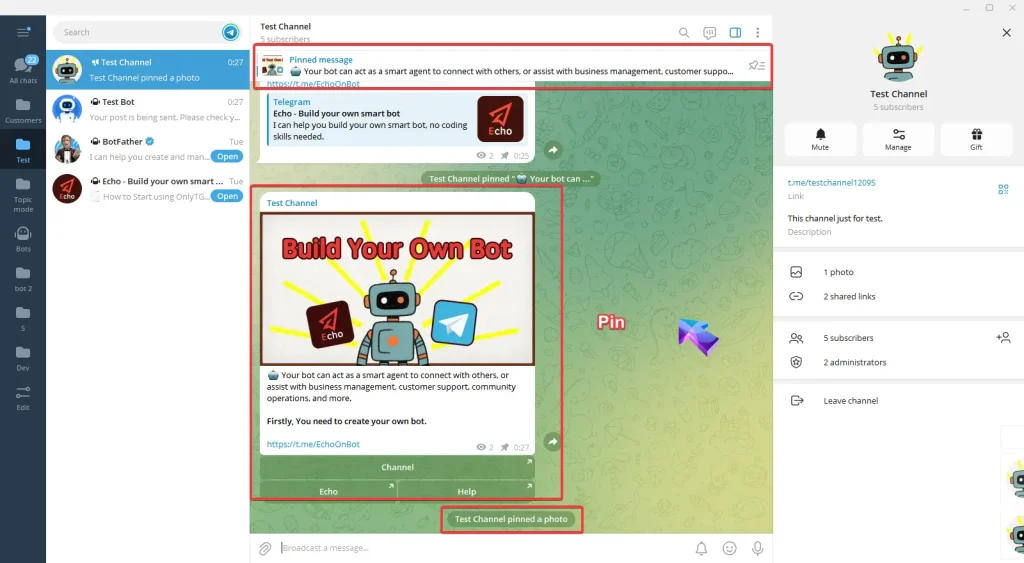
You’ll see two features here and you can choose to enable them based on your needs:

Channel Post

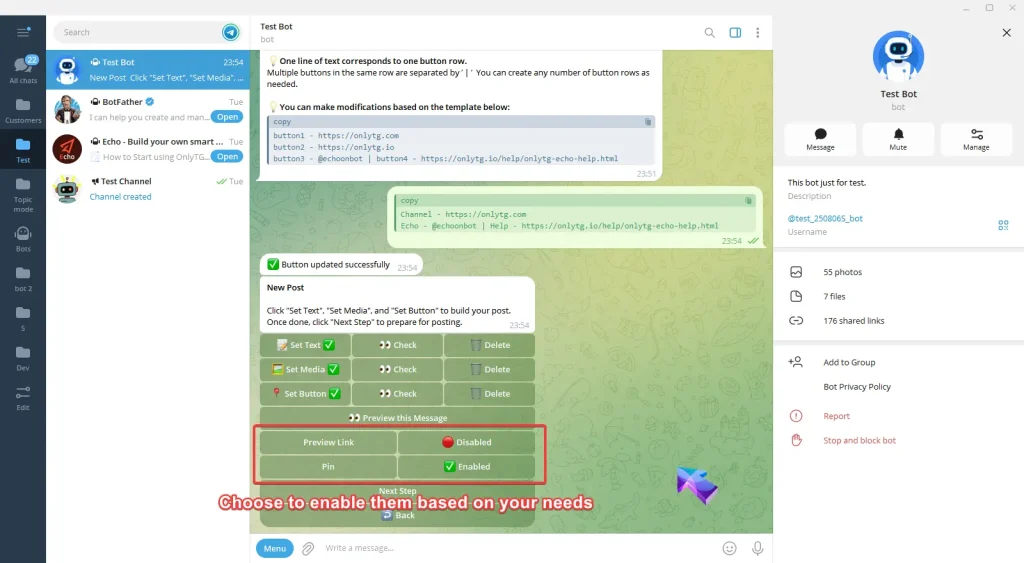
Preview Link: When enabled, there will be a preview of your link in your post.

Channel Post

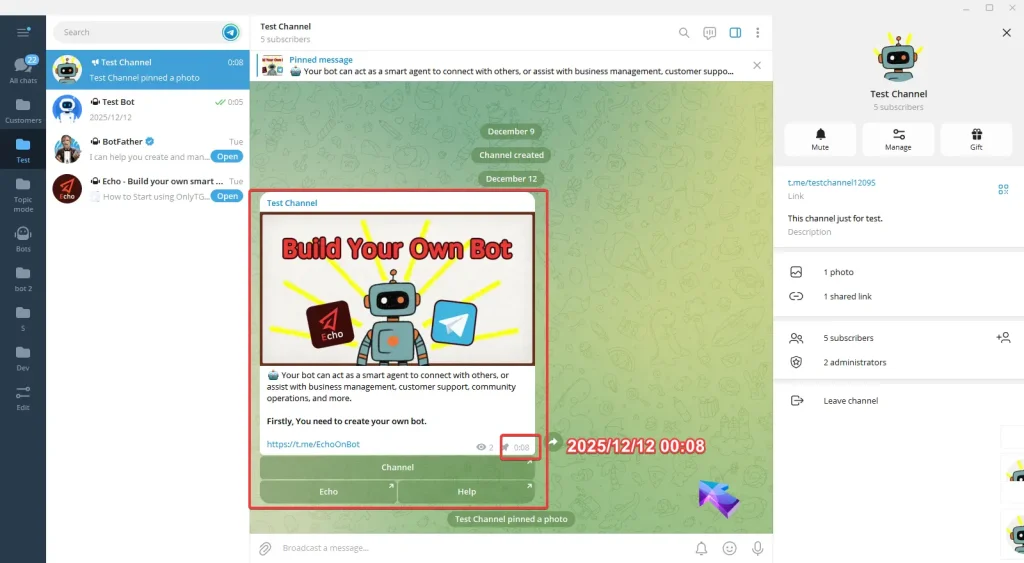
Pin: When enabled, this post will be pinned in your channel.

Channel Post

step 2

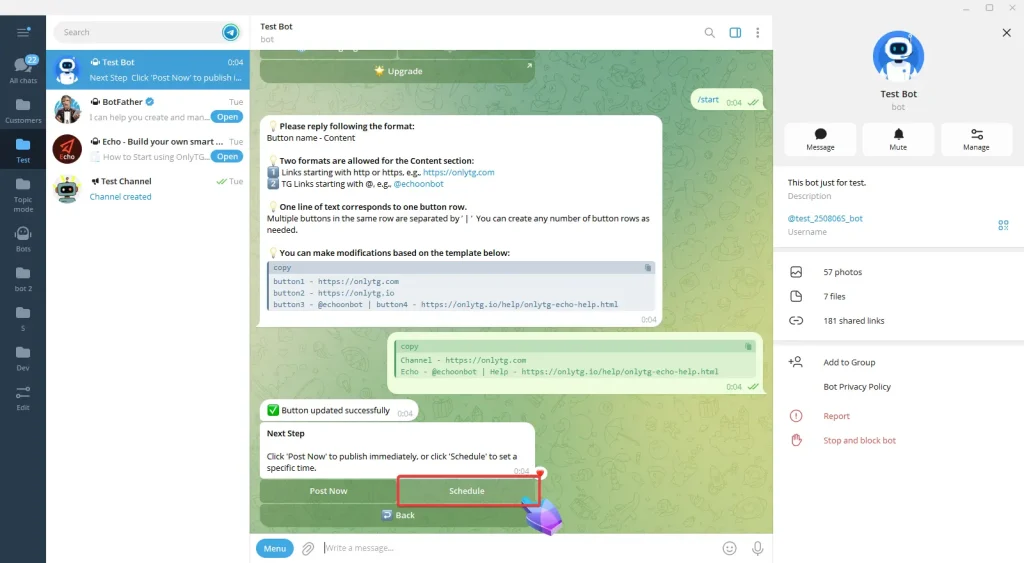
Now click Next Step.

Channel Post

Then You can click Post Now to publish immediately, or click Schedule to set a future publishing time.

Post Now

Channel Post
Channel Post
Channel Post

Schedule

Channel Post

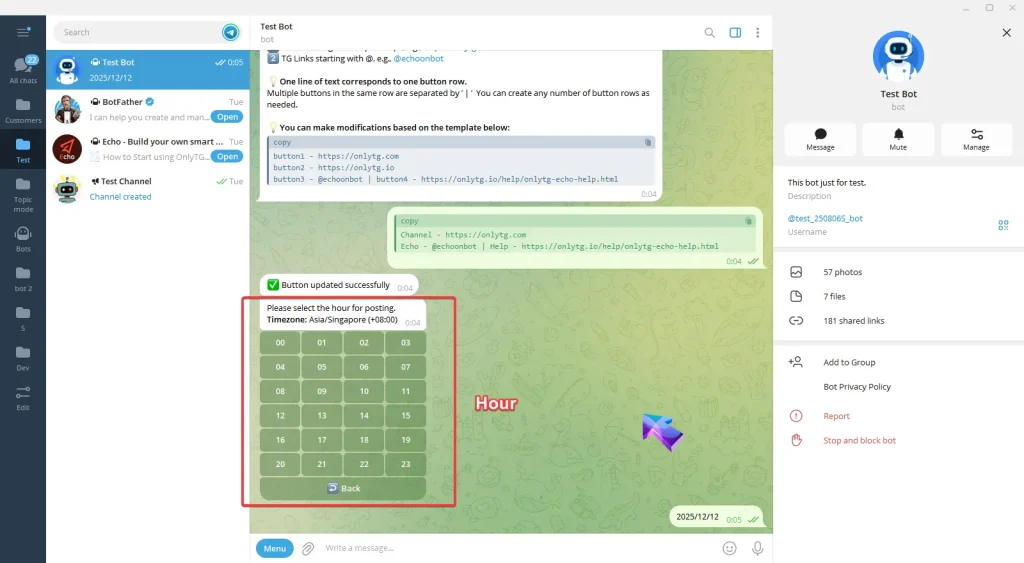
You can either click Today directly or reply the date according to the format of  YYYY/MM/DD.

Channel Post

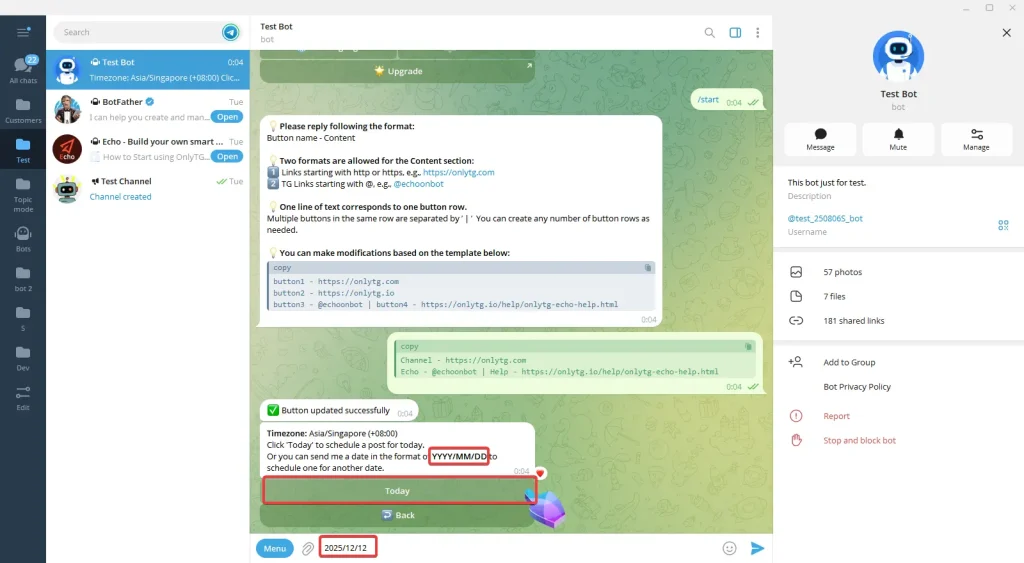
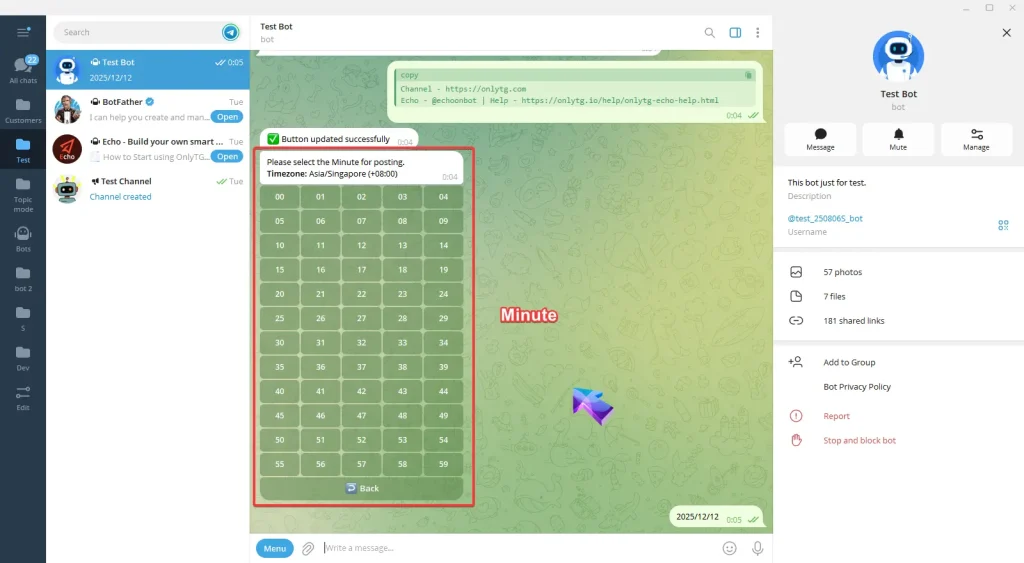
After setting the date, select the specific Hour and Minute (the time follows your configured time zone).

Channel Post
Channel Post

Finally, click Confirm and Post. The post will be published in the channel at the scheduled time.

Channel Post
Channel Post

Share This Article :

  • Facebook
  • X
  • LinkedIn
Channel ManagementChannel Post Edit
Table of Contents
  • Video Tutorial
  •  step 1
  • step 2
  • OnlyTG
  • Echo
  • Recorder
  • Help
  • Blog
OnlyTG EchoTelegram VK YouTube Facebook X Email

© 2026 OnlyTG

Scroll to top
  • Products
    • Echo
    • Recorder
  • Resources
    • Help
    • Blog
Contact us