
OnlyTG Echo provides the function to set Quick Reply. It only requires you to pre-enter a series of messages to be sent (supporting Text, Media, Button, etc.), and then configure triggers for these pre-entered messages. When you’re chatting with contacts via your Telegram Bot, you can input your preset trigger, which is typically in the format of a hyphen plus your trigger name (e.g., ‘-test’).
Video Tutorial
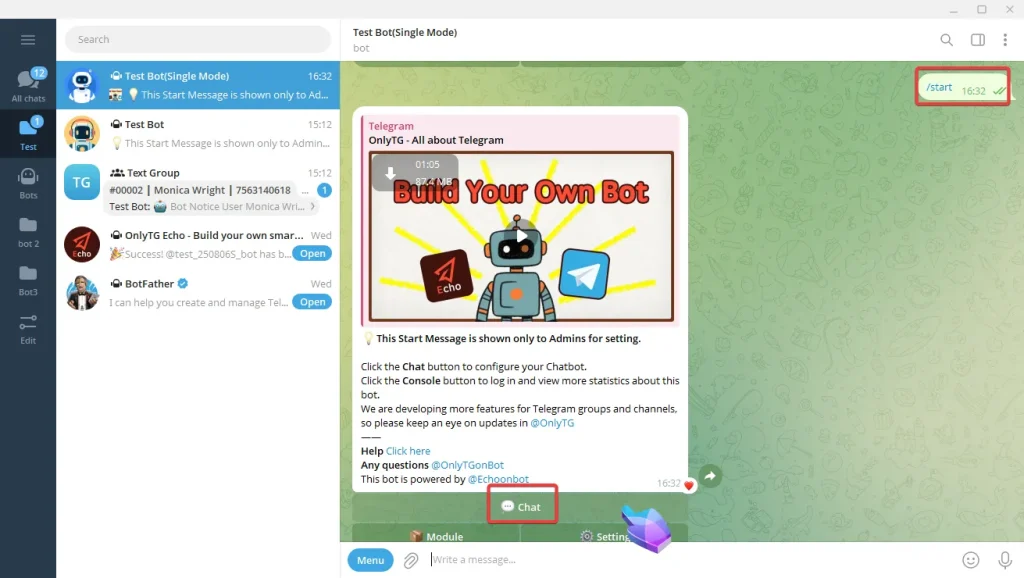
step 1
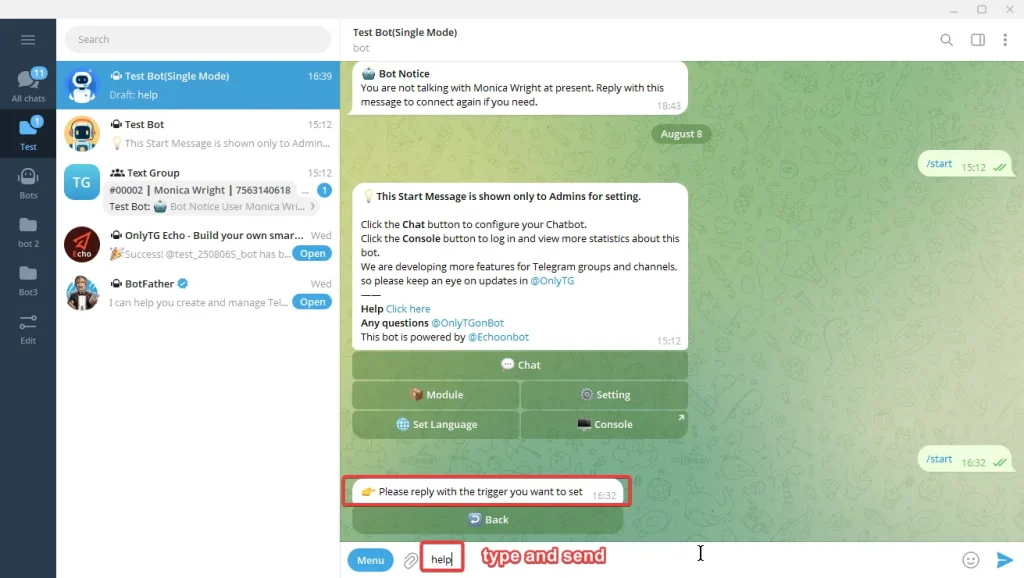
Send the command /start to your bot, and click the Chat button.
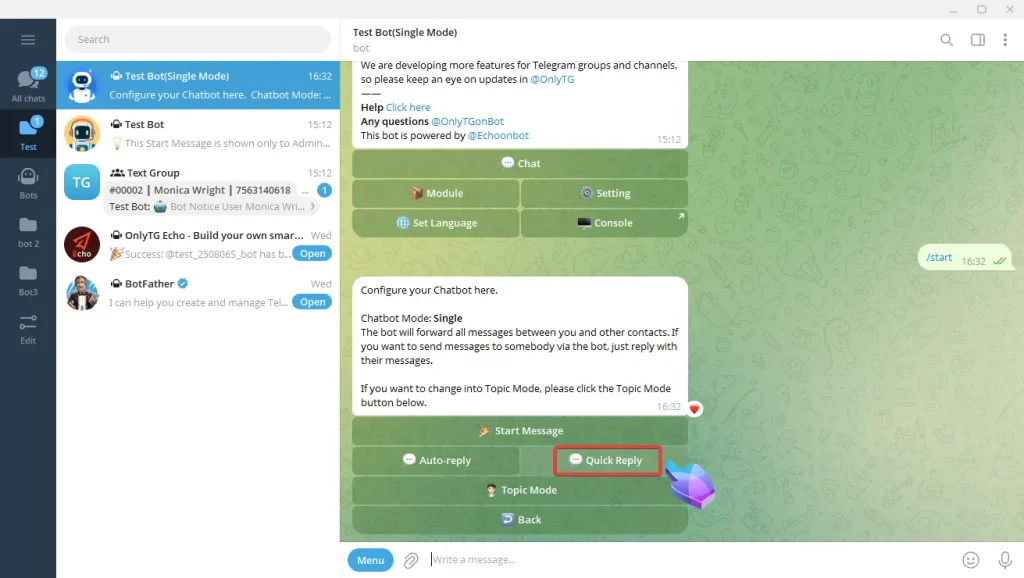
Then click the Quick Reply button.
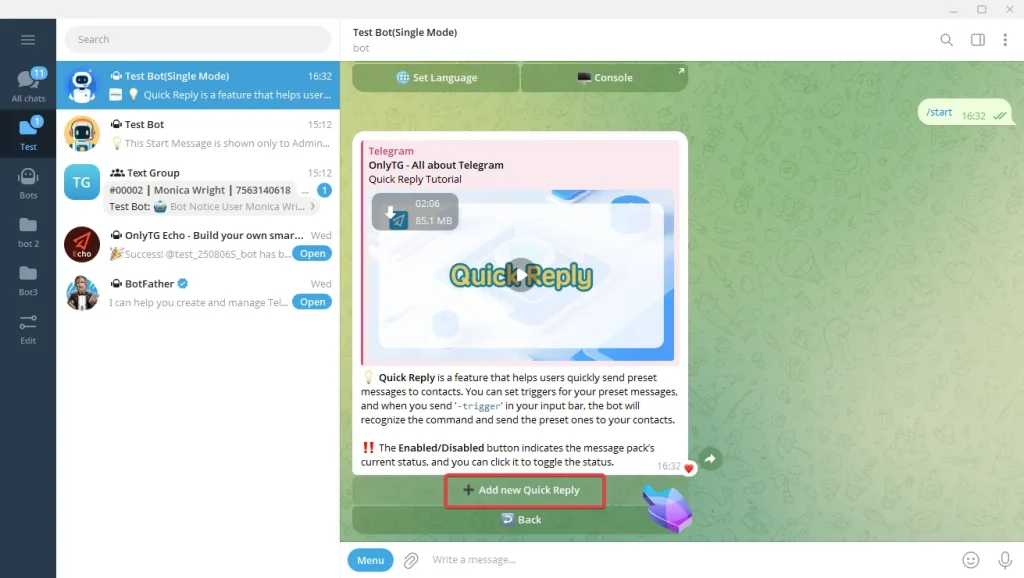
step 2
A. Click the Add new Quick Reply button. And you can edit Quick Reply name here.

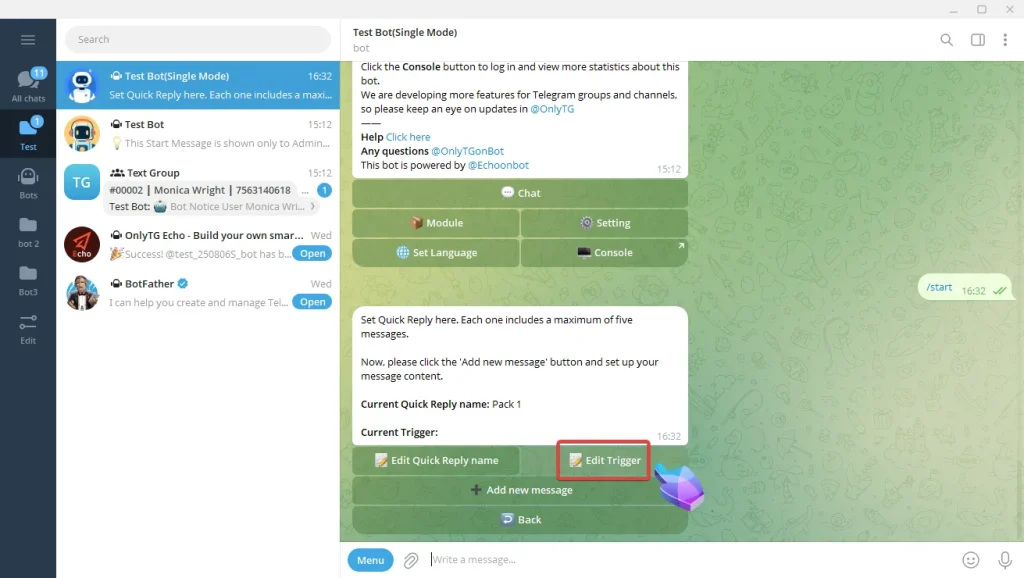
B. Click Edit Trigger, reply with the trigger you want to set. When you need to use this quick reply, you need to add a hyphen in front of the trigger and send it to contacts. It’s important to note that only when the trigger is sent completely accurately will the preset content be sent.
For example
Edit Trigger: help
Reply to contacts: -help
C. Click the Add new message button, a new one will be created. Every Quick Reply includes a maximum of five messages.
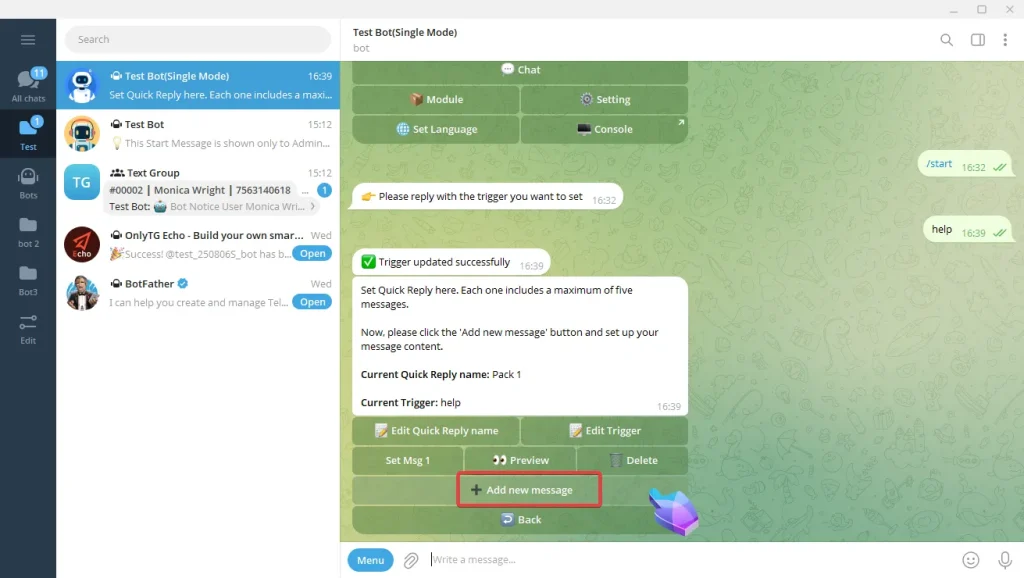
D. Click the Set Msg 1 button. You can add Text, Media, Button or use the Module.
(Modules are preset messages, you can use them when setting Start Message, Auto-reply, Quick reply, etc. Click here to more about Module.)
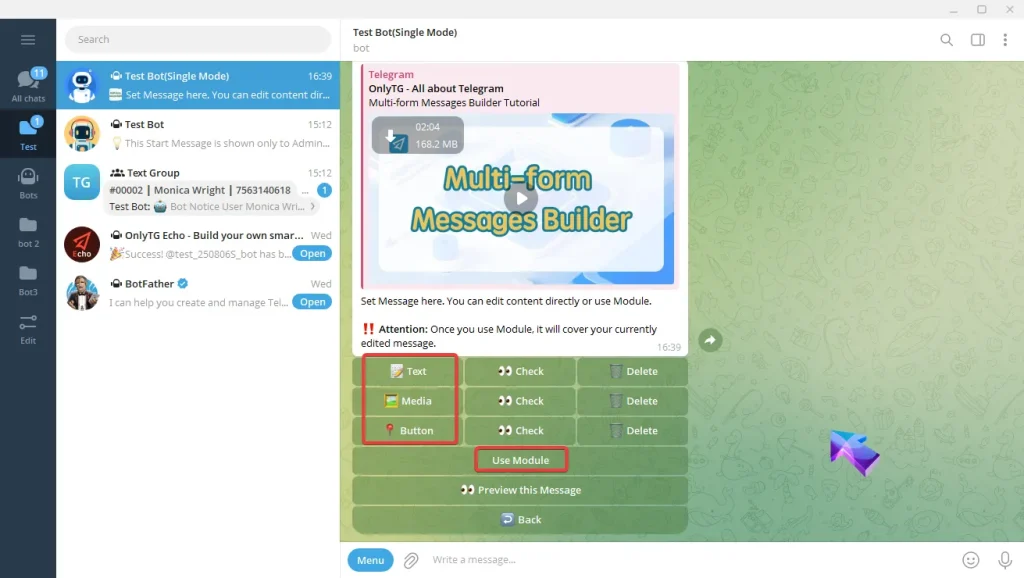
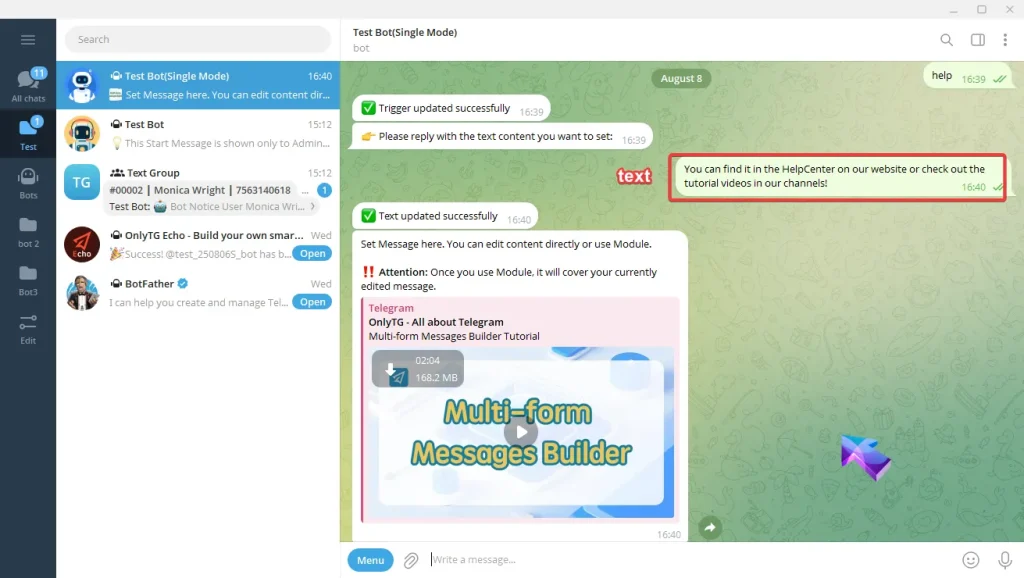
Add Text, type your text and send, Once the update success message pops up, it means the process is complete.
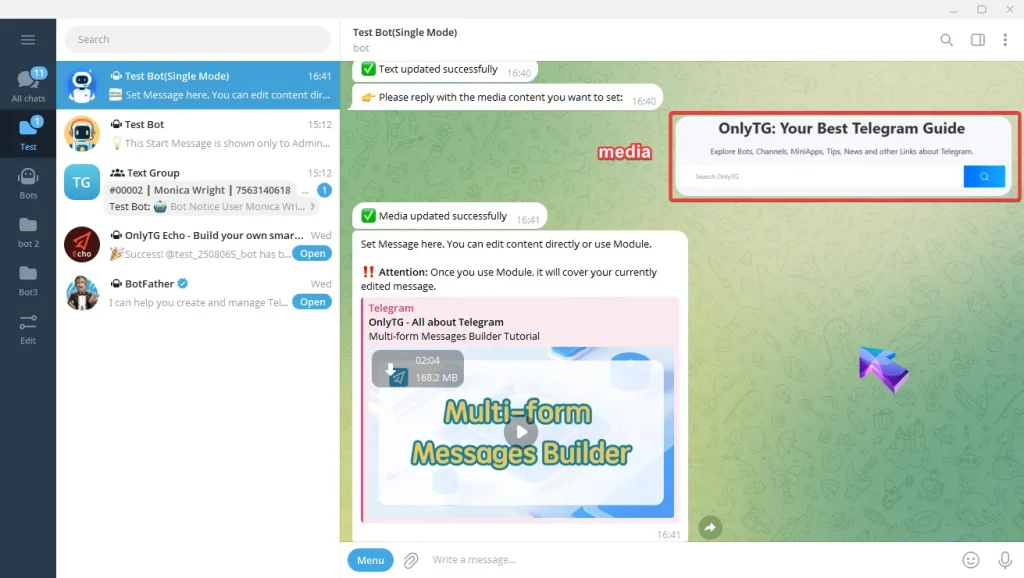
Add Media, select a media file to upload, can be pictures, videos or other media files. Once the update success message pops up, it means the process is complete.
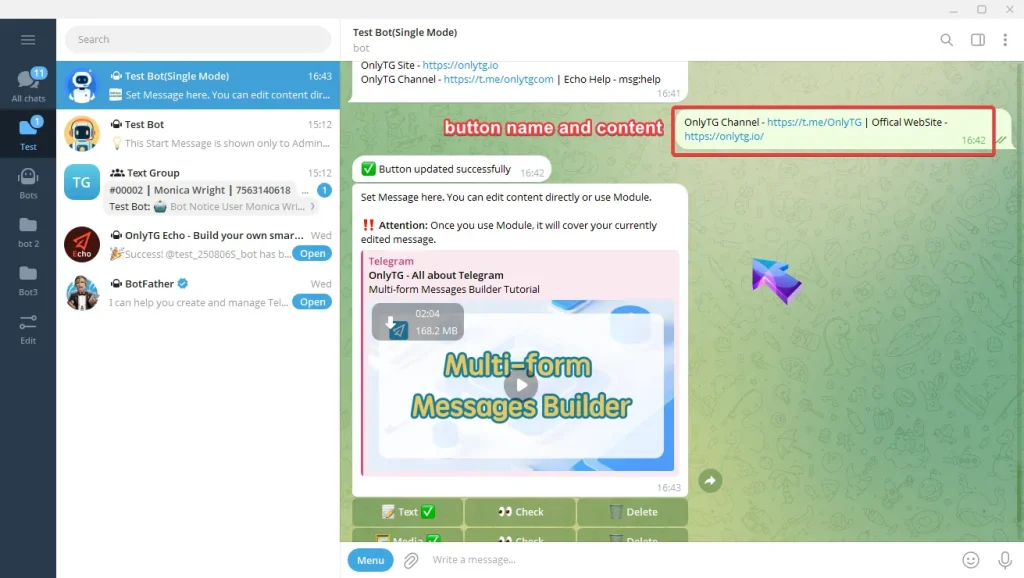
Add Button, type button’s name and the content but only link or Module is accepted in Content.
Note:
One line of text is one row of buttons, multiple buttons in the same row are separated by ‘ | ’ .
Links must start with http, https.
Module must be in format like: msg:modulename.
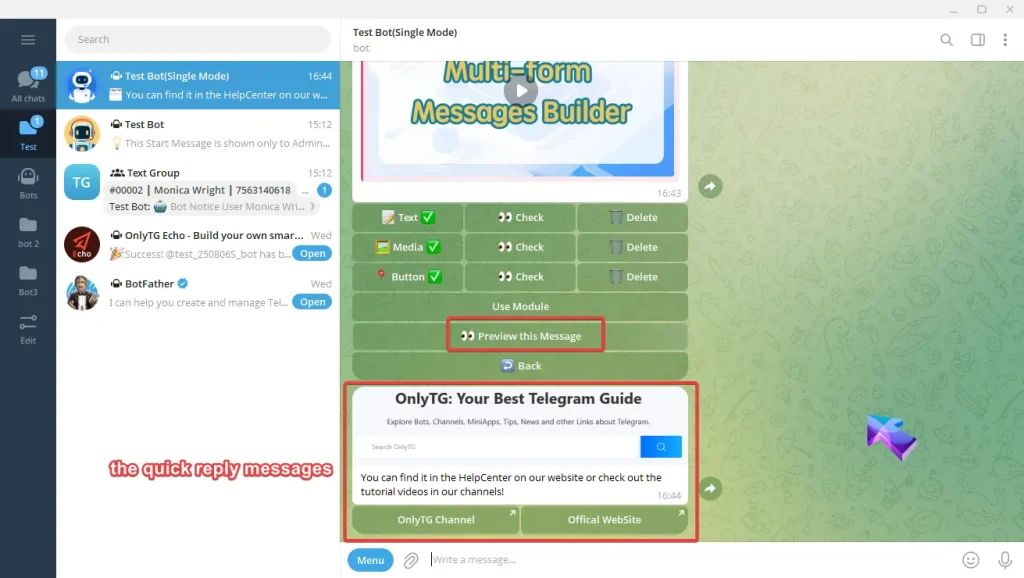
E. Click the Preview this message button can check this quick reply.
How it work
Topic mode (Change to Topic Mode)
When your bot is in Topic mode, you can directly send something to reply to contacts.
Send “-tirgger” to contacts, multiple pre-configured Quick Reply messages can be triggered in sequence.
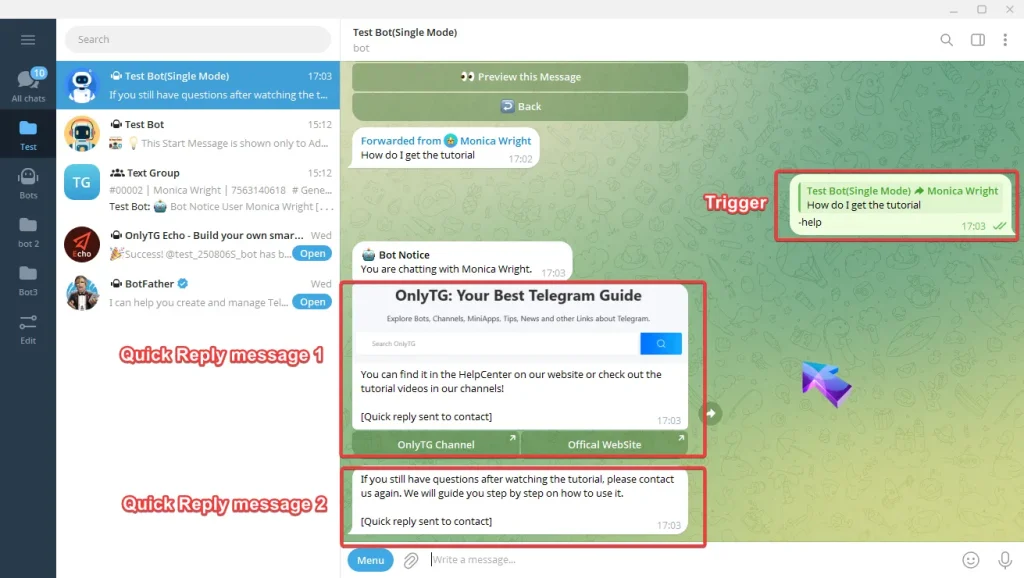
Single mode
If your bot is in single mode, you need to right-click on the message and click reply.
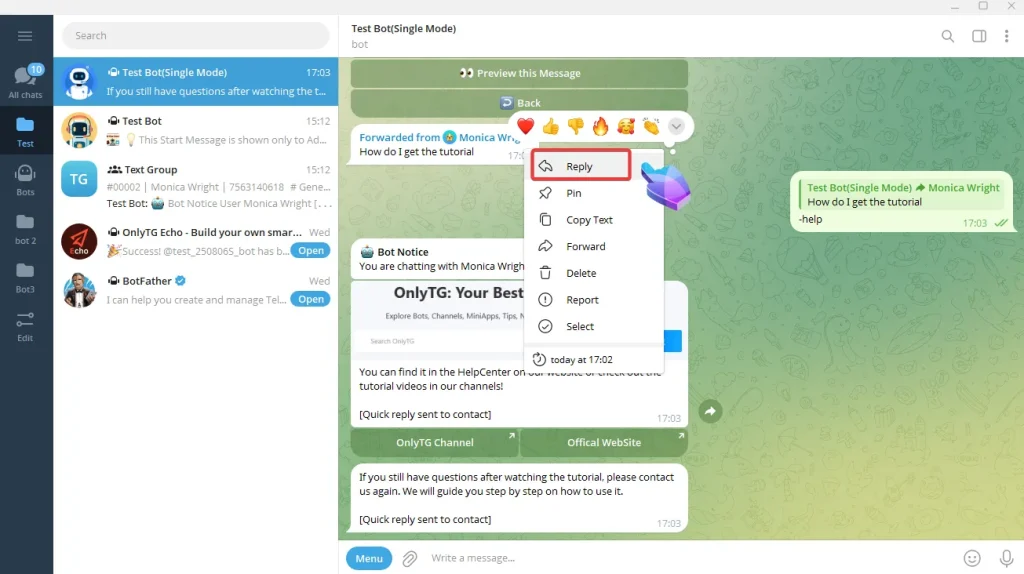
Send “-tirgger” to contacts, multiple pre-configured Quick Reply messages can be triggered in sequence.


