OnlyTG Echo provides the function to automatically loop posts in your channel. This not only keeps your channel active but also ensures subscribers never miss out on your channel’s key updates!
Video Tutorial
step 1
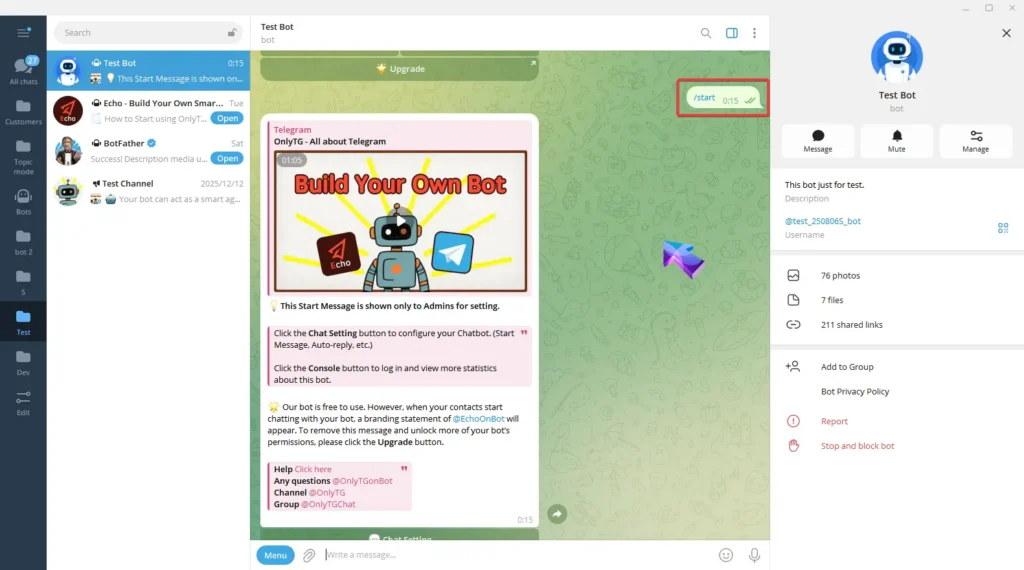
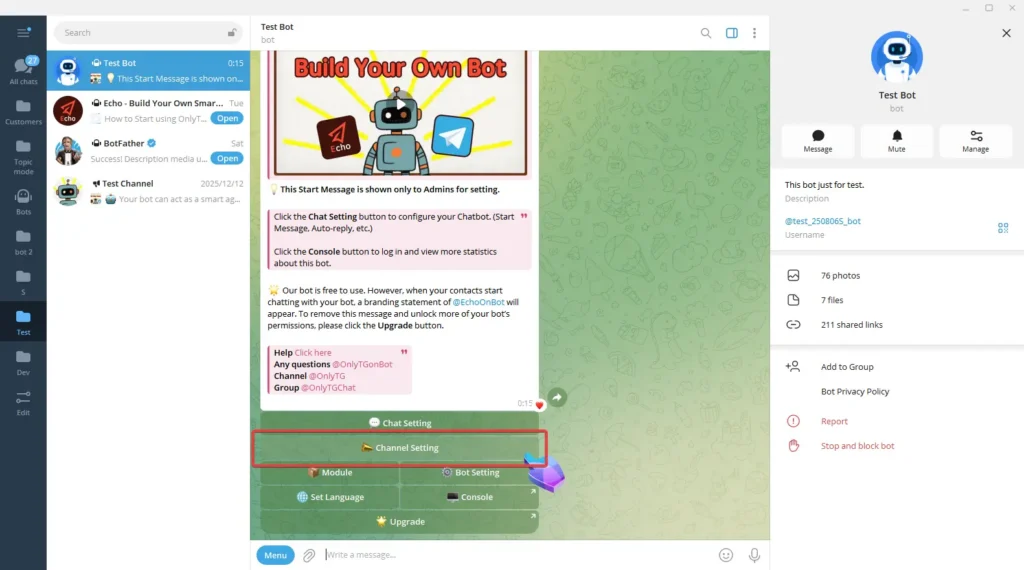
Send the /start command to your Bot, then click Channel Setting.
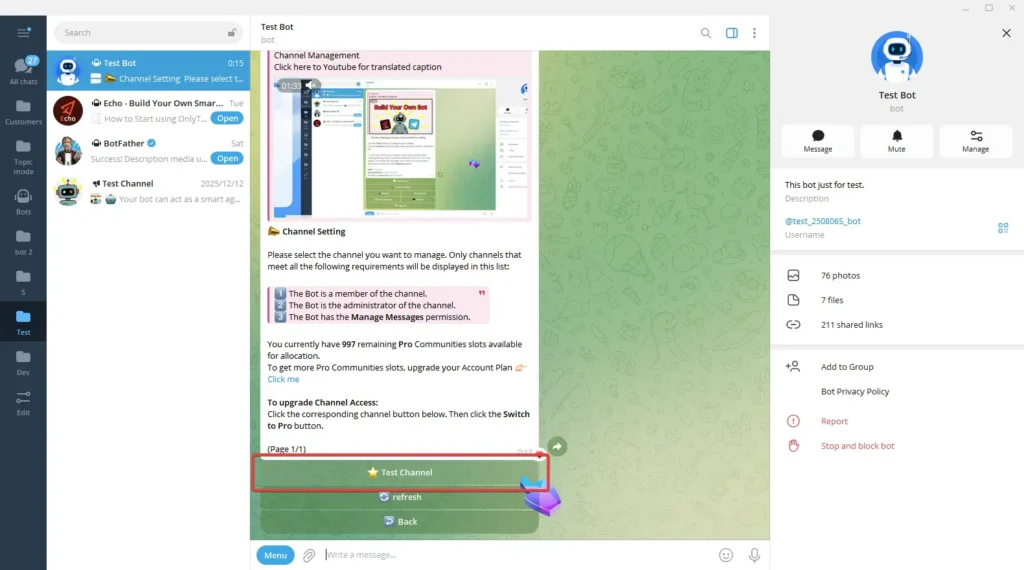
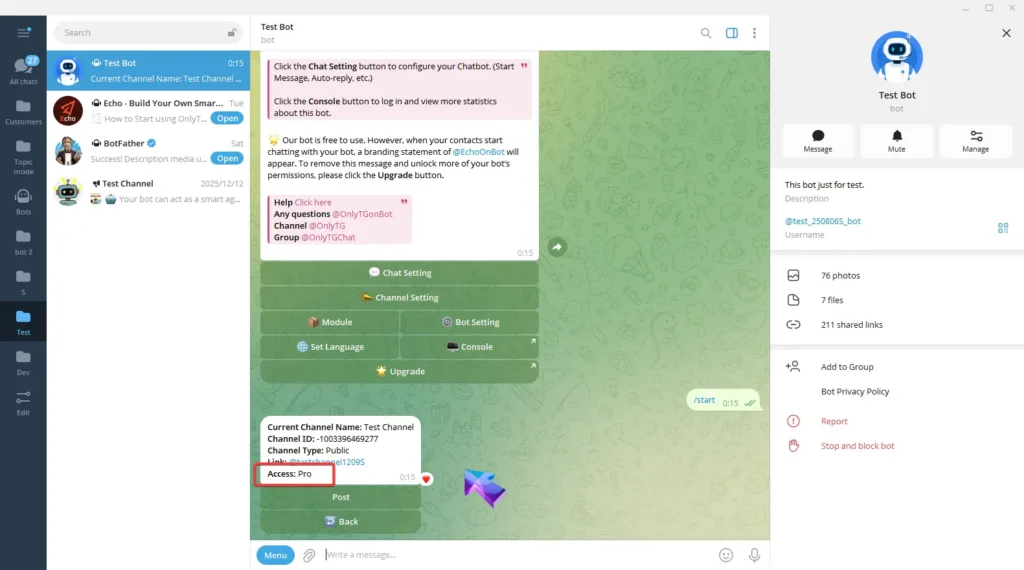
Choose the channel that has been upgraded to Pro access. Loop Post feature is currently exclusive to Pro Channels. (Click here to learn how to upgrade your channel’s access)
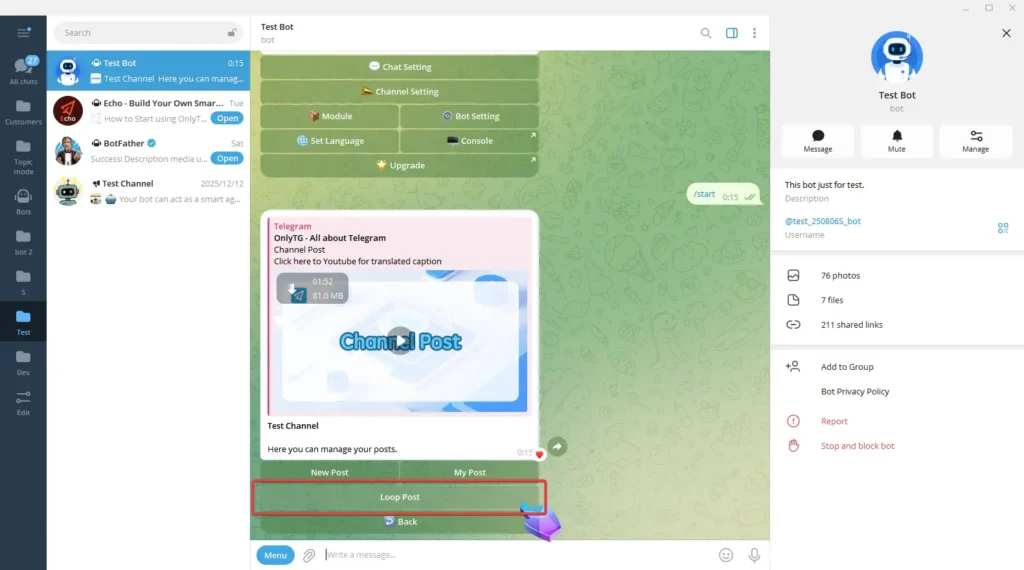
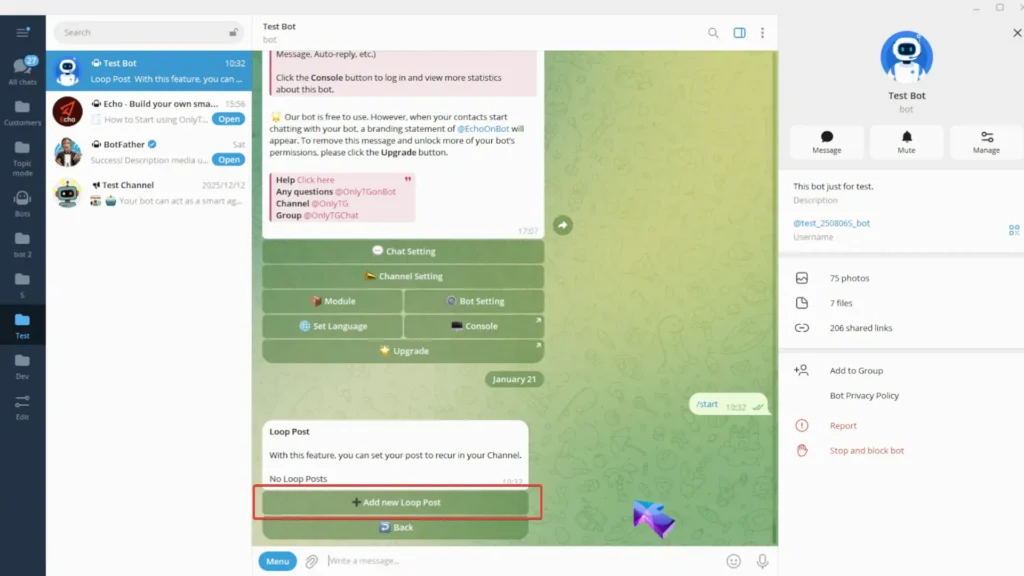
Click Post, then click Loop Post.

Click Add New Loop Post.
step 2
You can configure text, media, and buttons for your post:
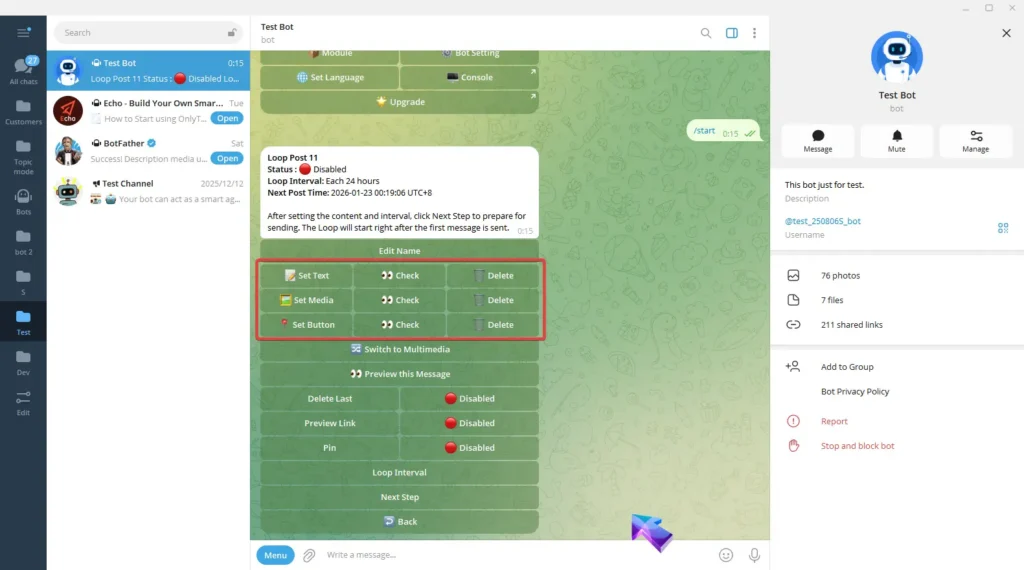
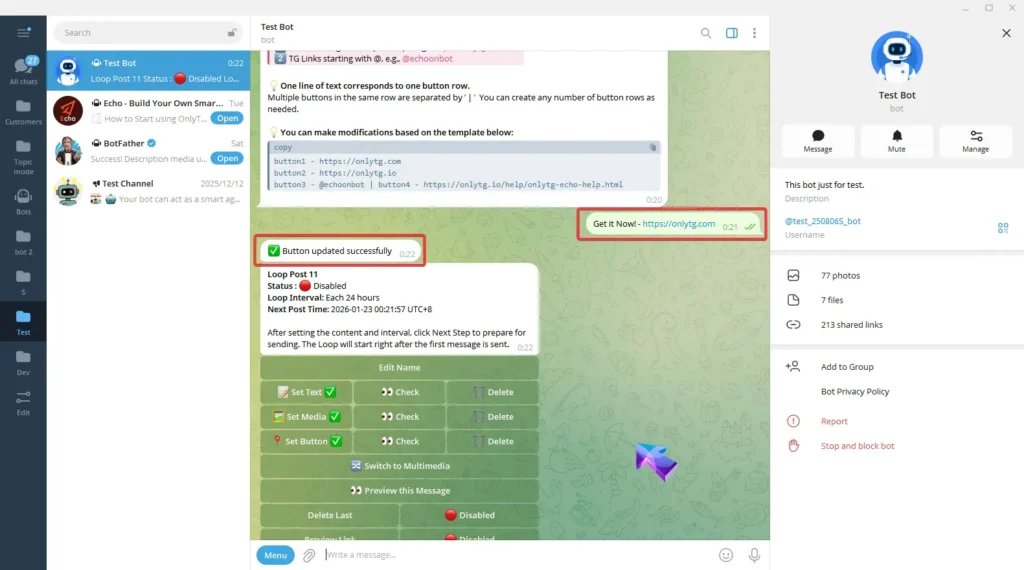
A. Set Text: Reply with your text. Once the update success message pops up, it means the process is complete.
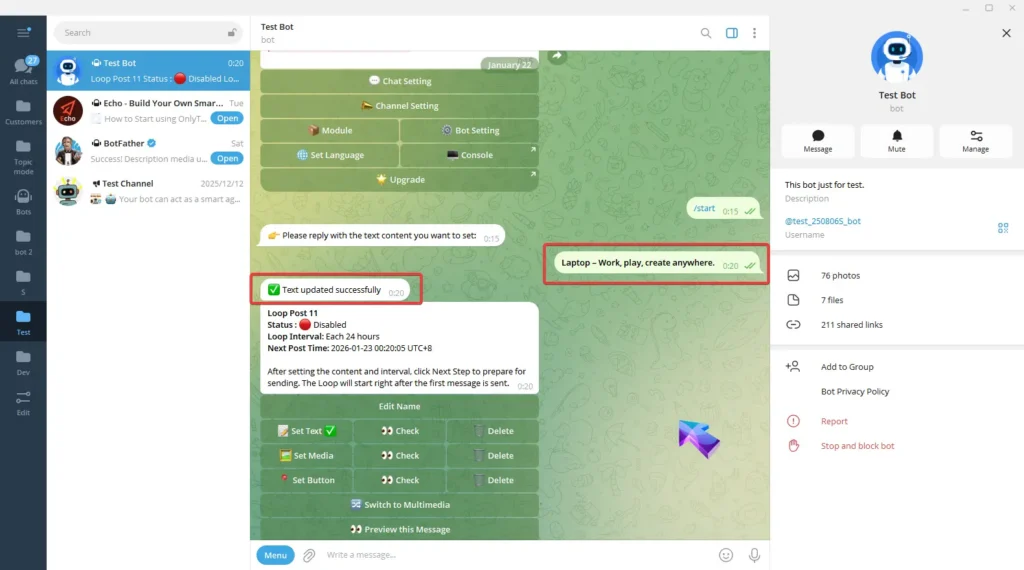
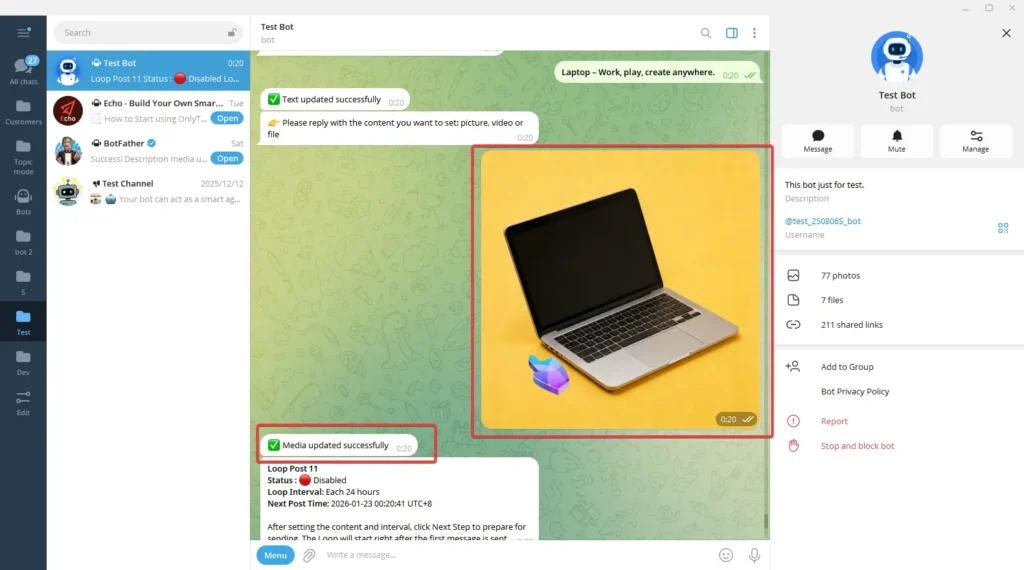
B. Set Media: Reply with the content you want to set: picture, video or file. Once the update success message pops up, it means the process is complete.
C. Set Button: Reply the content following the format in the prompt. You can also directly copy the template then send it after editing. Once the update success message pops up, it means the process is complete..
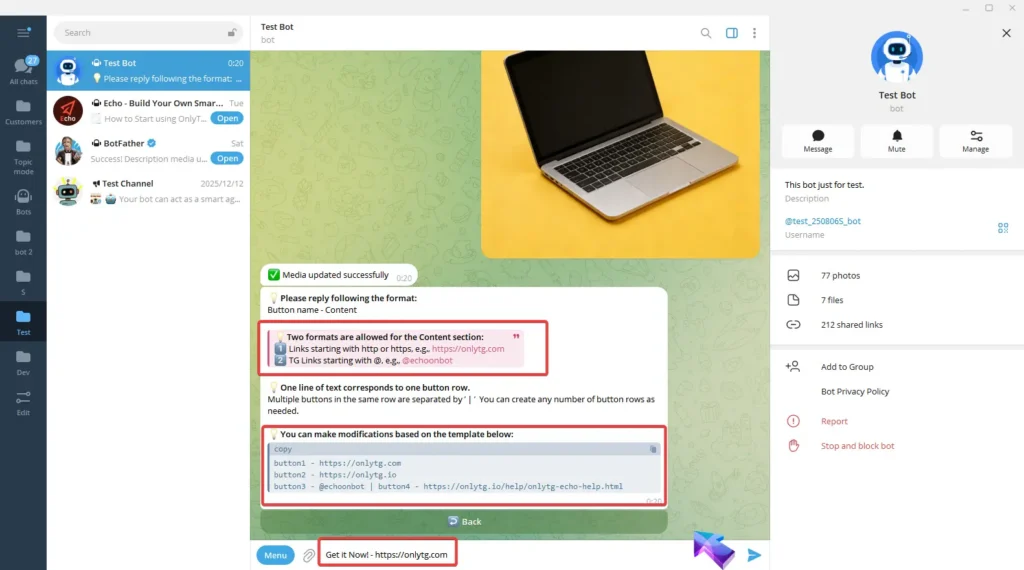
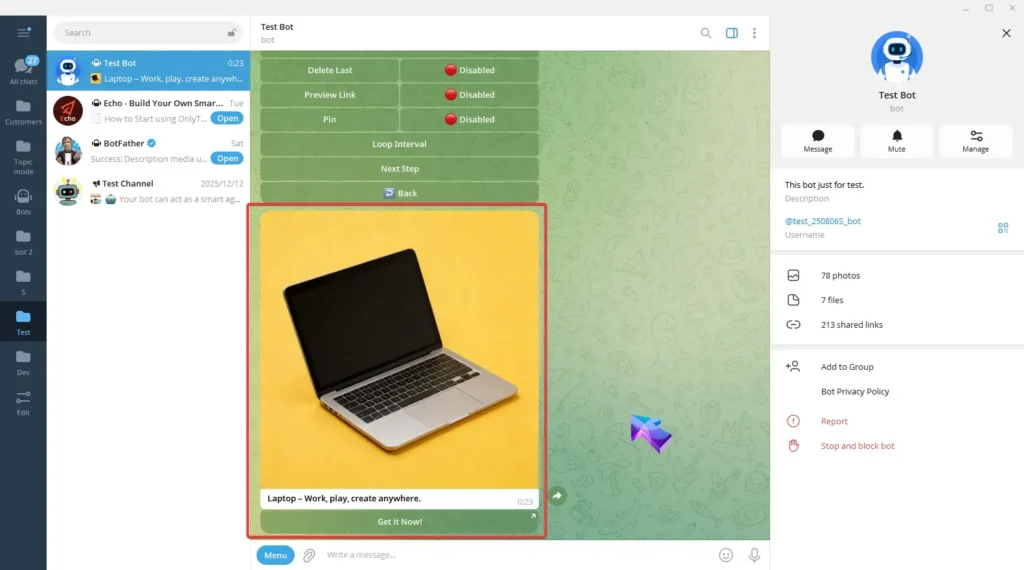
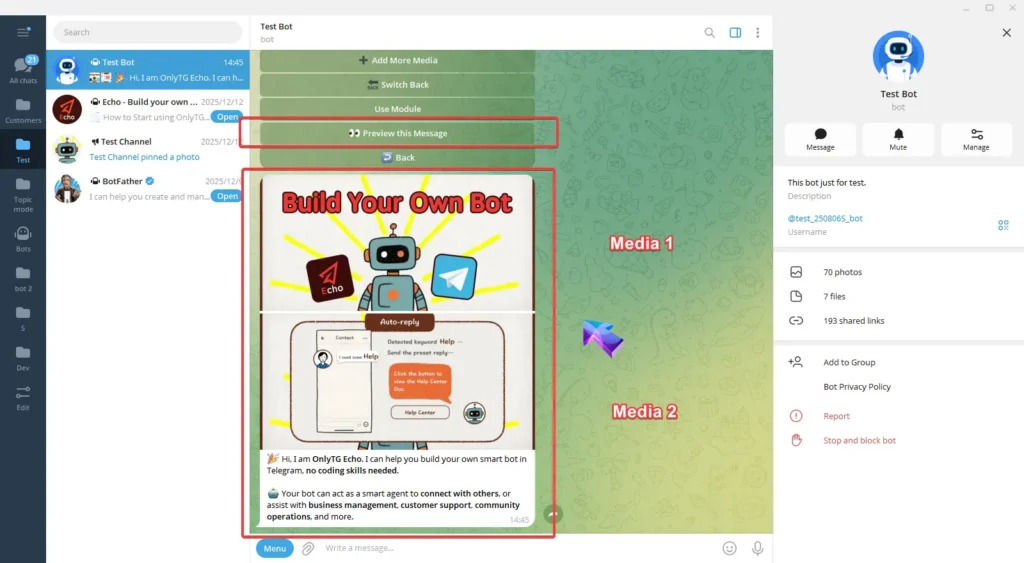
After completing the above configurations, click here to preview this message.

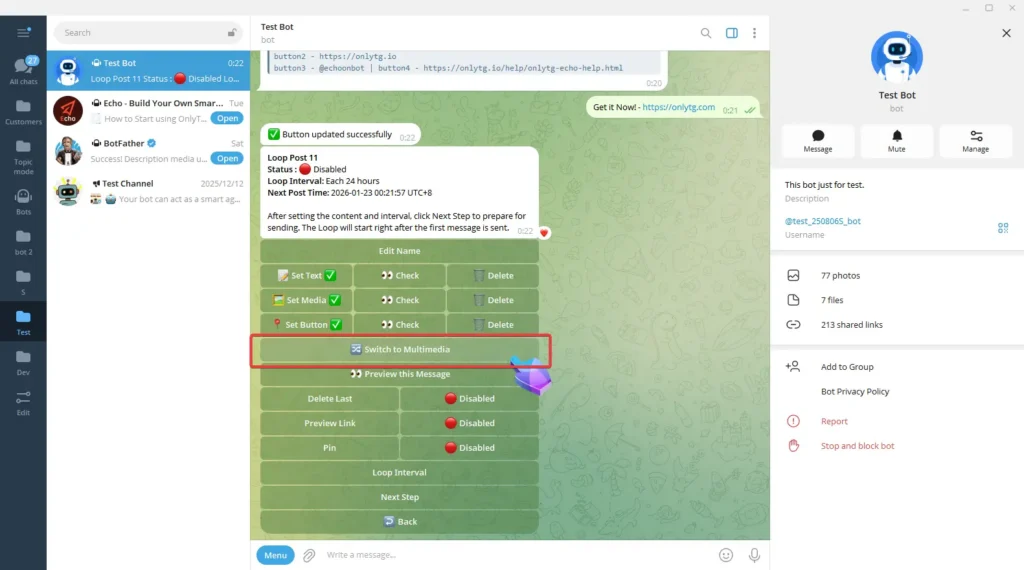
Switch to Multimedia: Convert the post to a mode which you can configure text and multiple images/videos, but files and buttons are not supported. We won’t use this mode for now. (Click here to learn how to set multimedia messages)
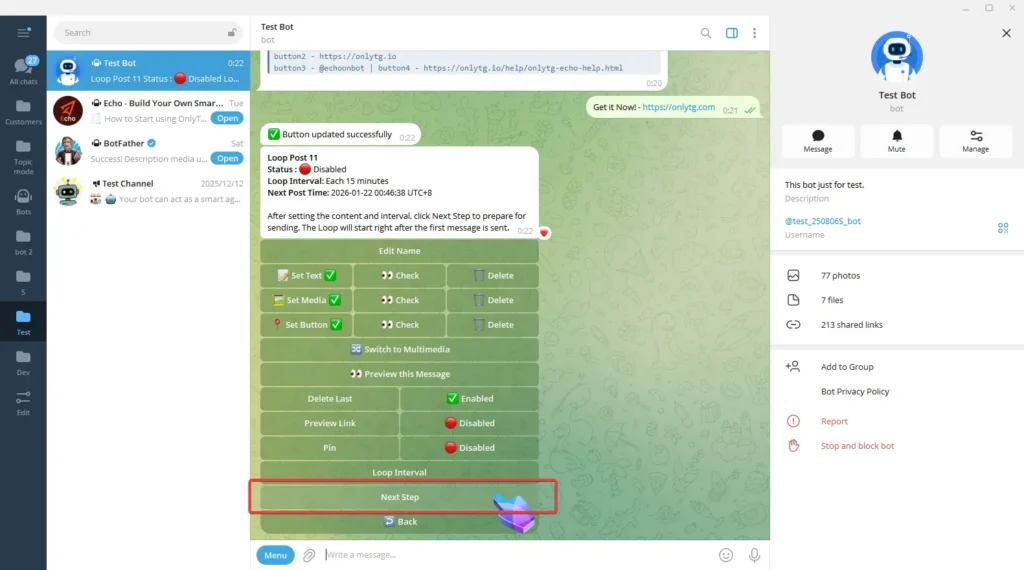
The three functions below can be enabled or disabled according to your needs.

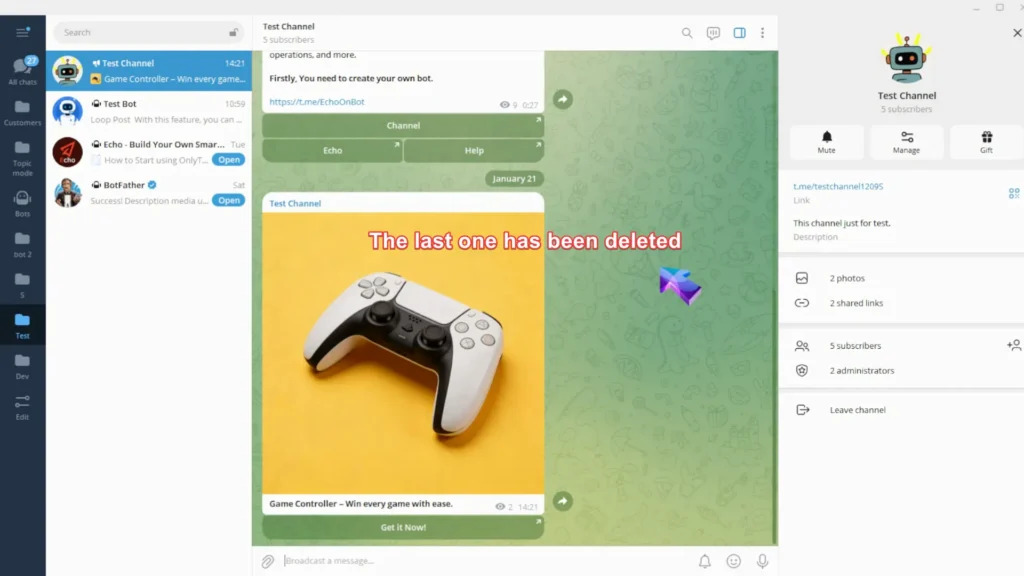
Delete Last: When enabled, the previous post sent by this loop will be deleted before sending the new one.

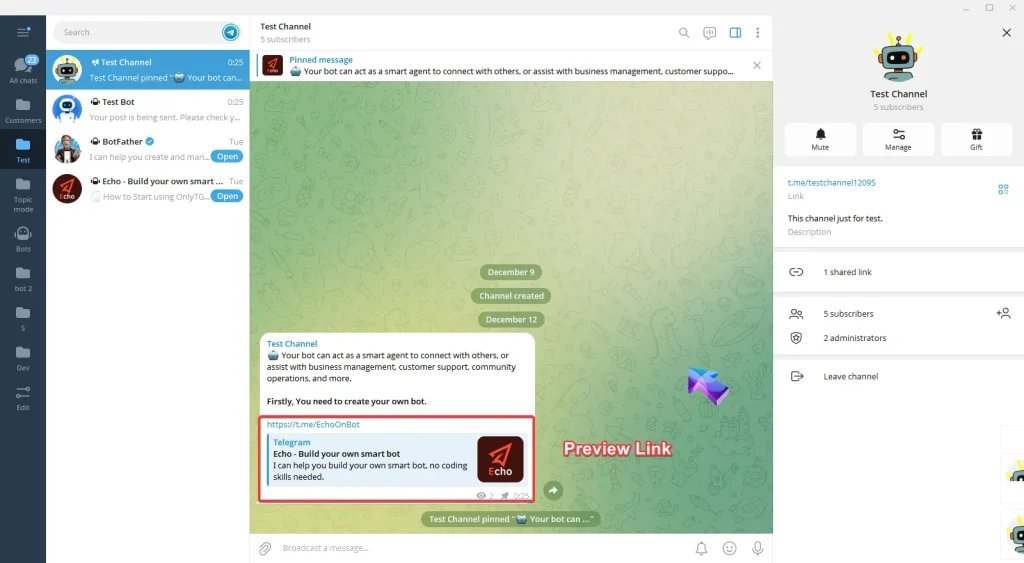
Preview Link: When enabled, there will be a preview of your link in your post.
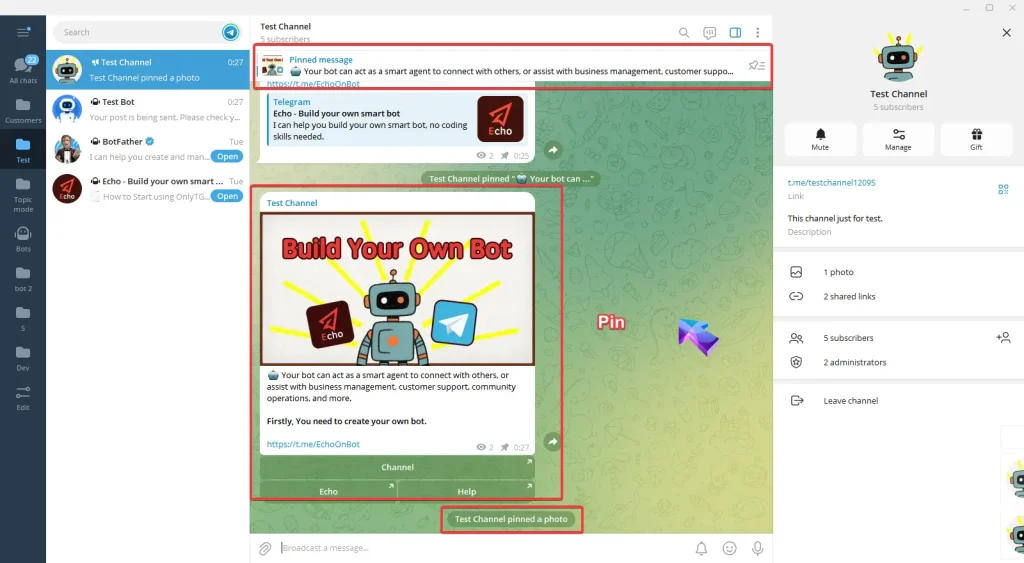
Pin: When enabled, this post will be pinned in your channel.
step 3
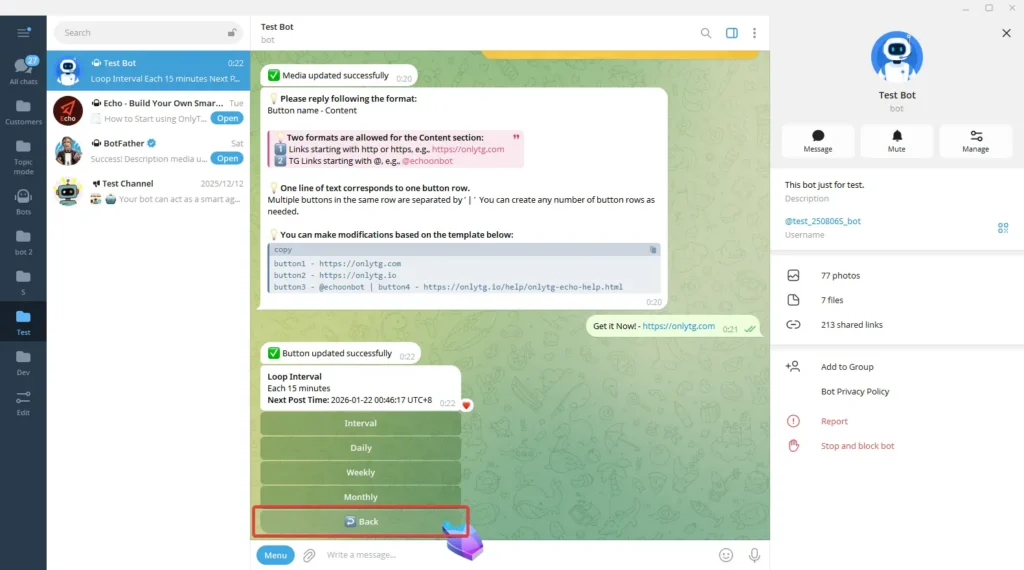
Click Loop Interval.

Directly use the buttons here to set daily, weekly, or monthly loops.

Or click Interval to set an interval within 24 hours.
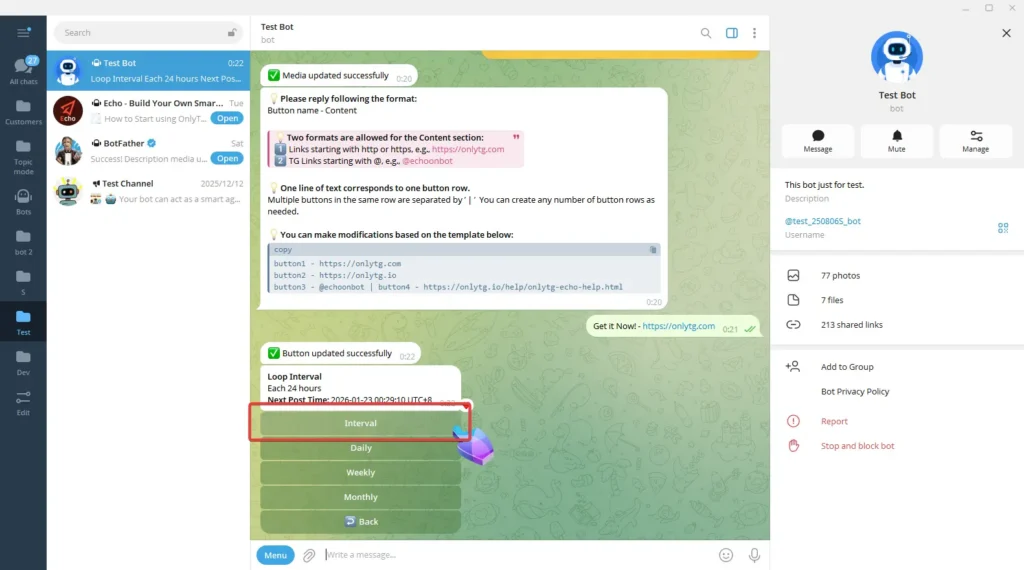
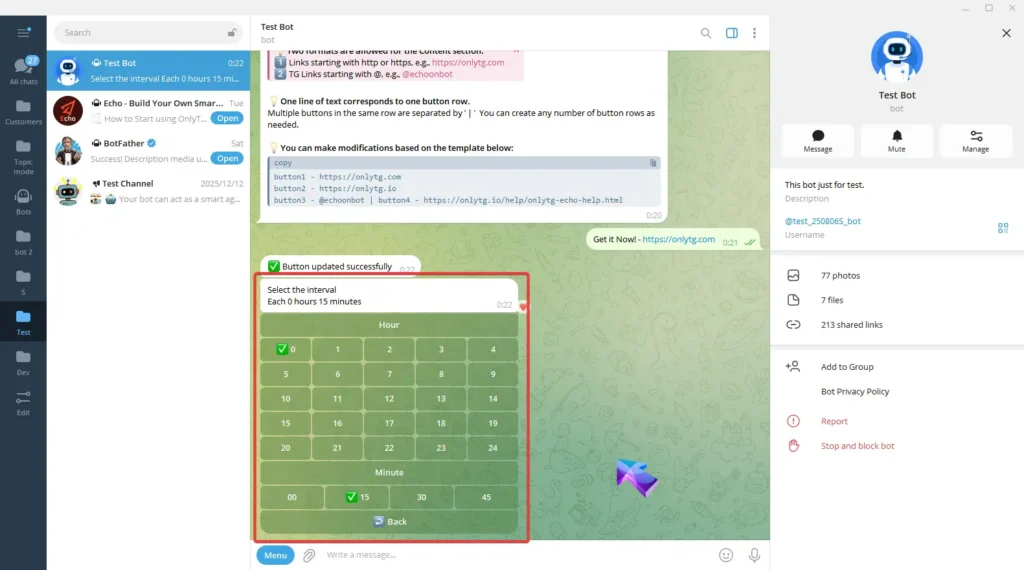
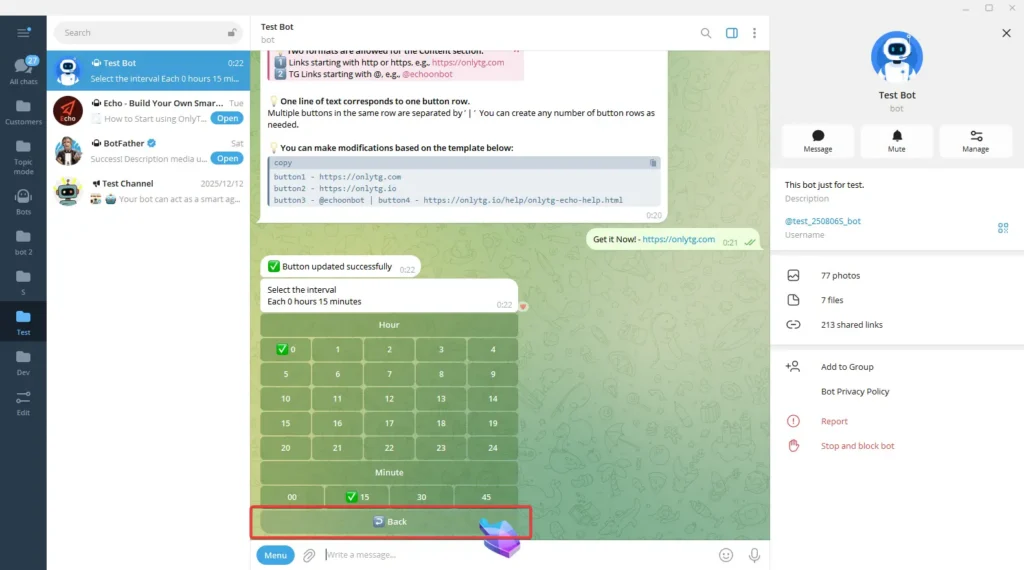
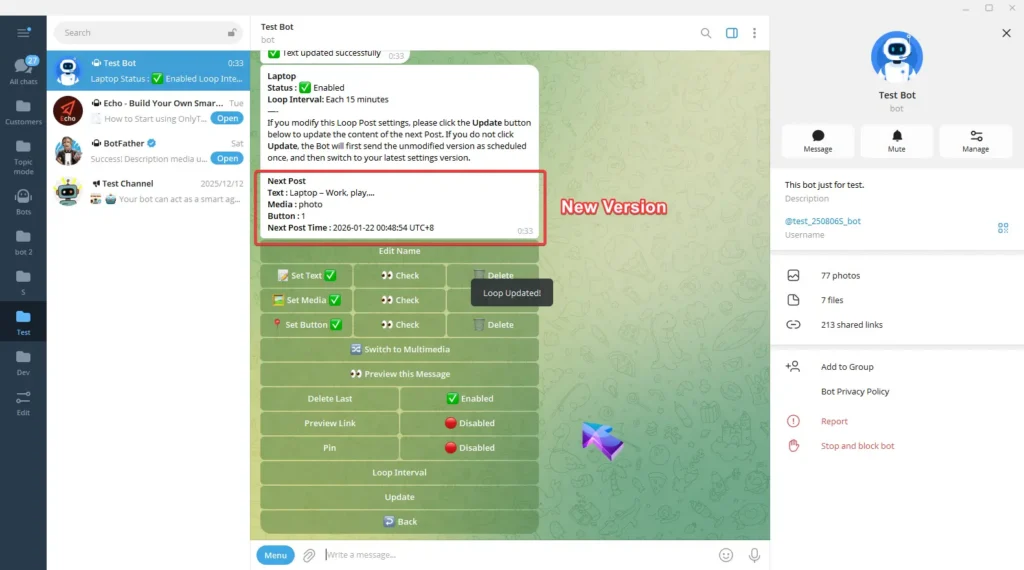
Click Back, Here you can view the loop interval and the exact time of the next post.

Click Back, then click Next Step.
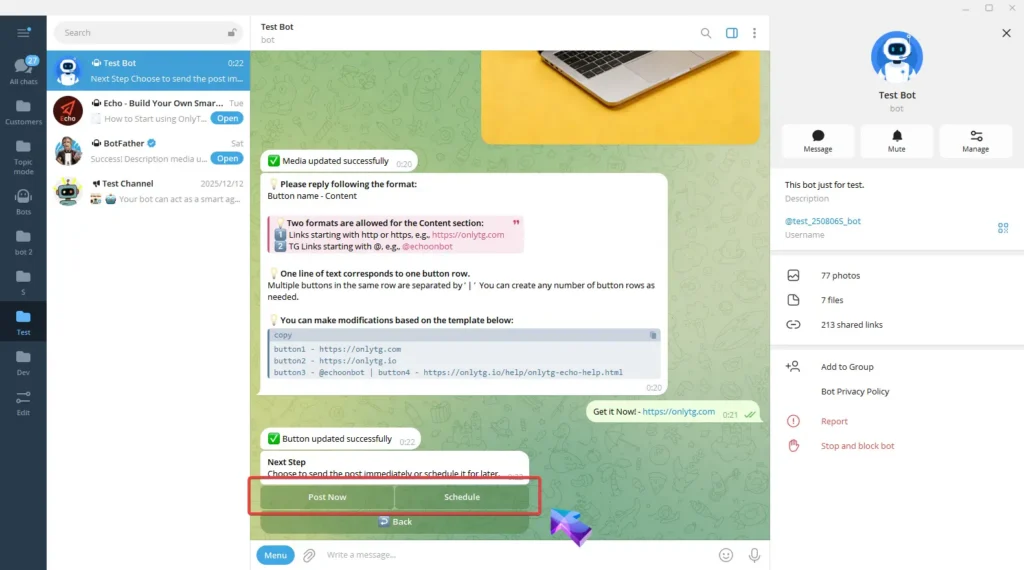
Click Post Now publish the post immediately or click Schedule it for a later time. (Click here to learn how to schedule post)
Repeat the above steps to add multiple Loop Posts, and you’ll achieve the effect of having multiple posts auto-looping simultaneously.

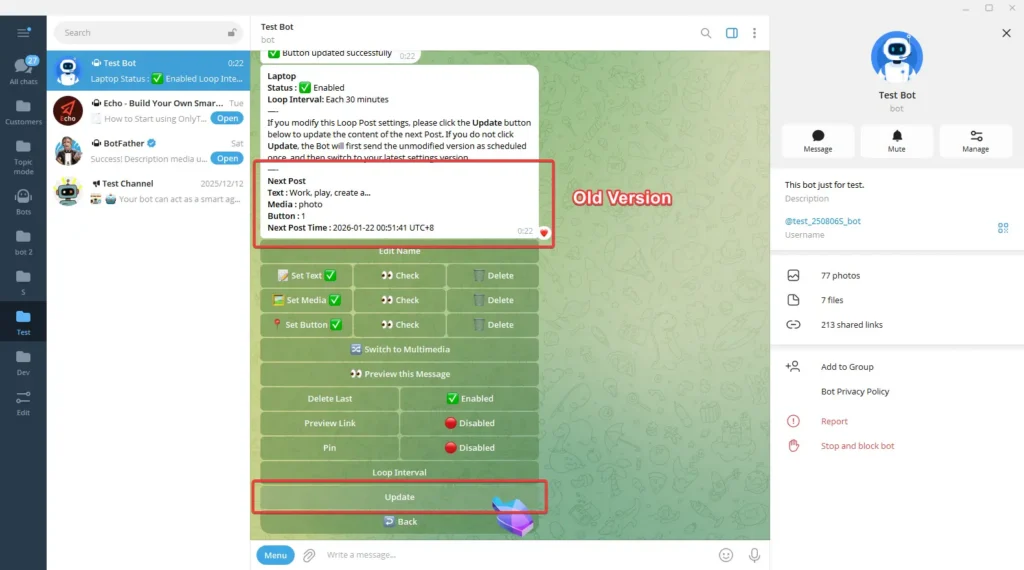
When you need to modify posts that are already in the loop—including post content, loop intervals, and other settings, you must click Update after making the changes for them to take effect immediately. Otherwise, the old version of the post will be published one more time before switching to the new version.
Now these Posts will automatically loop in this channel at the set interval.